Overclocking the Intel Core i7 4770K was a serious challenge back in 2013. This cpu of the Haswell generation had a tendency to run hot very rapidly especially once pushed beyond 4.0Ghz with increased voltages. And even at stocks (3.5 Ghz) a decent cpu load pushed temperatures up in notime. Using a beefy CPU cooler or AIO was well worth the effort keeping temperatures under control. Hardware enthousiast first blamed the integration of the voltage regulator and PCH on-chip causing the Haswell cpu to heat up. Partly they were right.
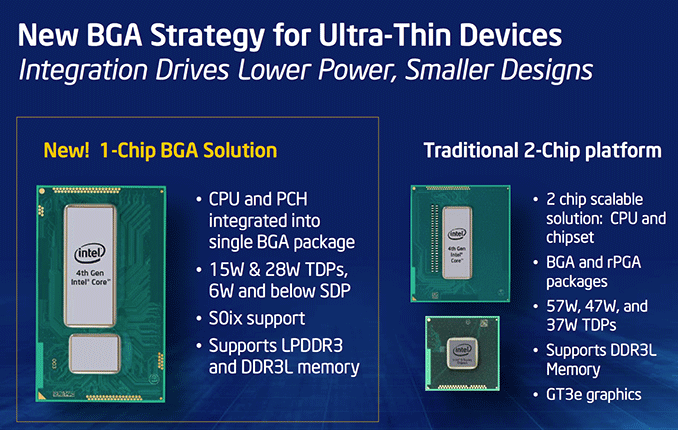
Few people at that time bothered about TIM or Thermal interface material. In the preceding generations Sandy Bridge and Ivy Bridge, Intel soldered the IHS to the cpu. This allowed better transfer of heat to the IHS, but to save a few bucks Intel didn’t bother soldering but instead applied TIM to the Haswell cpu and has done eversince. If done right the heat transfer capabilities of TIM wouldn’t be as bad as they are now. First, Intel used low quality TIM which dried out rapidly. Secondly, they glued the IHS to the chip using a thick layer of silicon leaving a little gap between the chip and the IHS. To make matters worse AMD has recently started to put TIM on their Raven Ridge chips. Really AMD what are you thinking. In the meantime AMD also confirmed to solder cpu’s again in the upcoming cpu generations.
Now in 2018 you might have heard of the term Delidding. Delidding is the process of separating the IHS from the chip/die. Be warned before trying yourself, it voids your warranty!! We have warned you :)! Here at Techjunkies.nl we have purchased the Delid-Die-Mate 2 from Der Bauer enabling us to chop of the IHS and relidding (glueing) it back afterwards. In addition to the Delid-Die-Mate 2 we also purchased some Coollaboratory Liquid Ultra and UHU silicon paste to reglue the IHS once we applied the Liquid metal to the chip.
Before we start delidding we need a baseline displaying the temperatures of our i7 4770K with the factory TIM. We apply an overclock of 4.3 GHZ which is 800 Mhz up from its 3.5 Ghz base clock. We leave every voltage setting on Auto. Were we would normally opt to find the perfect voltage through manual inputs, this takes up to much time for now. In the end finding a lower workable voltage will only benefit the temperatures. In this before and after test we would like to see the obvious differences and hopefully we will see lower temperatures.
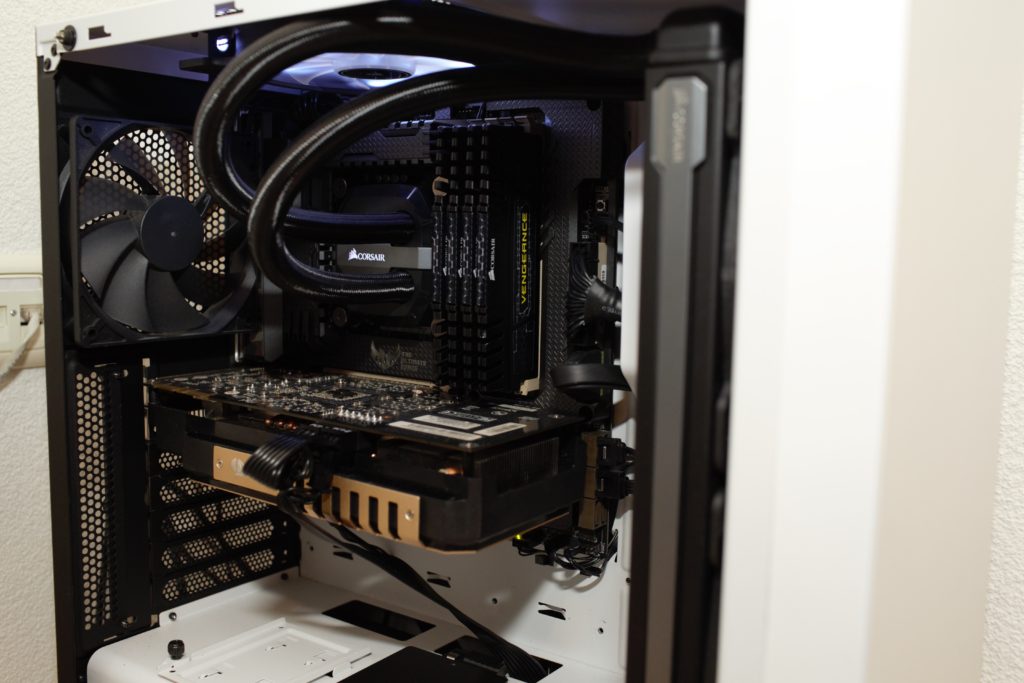
Our test setup: Intel Core i7-4770K with an Asus Z97 Gryphon m-ATX motherboard, 4×4 gigs of 1600 mhz DDR3 Ram in an NZXT S340 Elite white. As a cooling solution we fitted an H115i from Corsair with two 140mm fans in push config. Running Prime 95 on the Small FFT set immediately leads to temperatures in excess of 90 degrees celcius and a throtteling cpu fighting the heat, moments later our pc shut down because all cores reached 100 degrees. In the bios we set all our case fans to PWM mode according to Asus’s default settings.
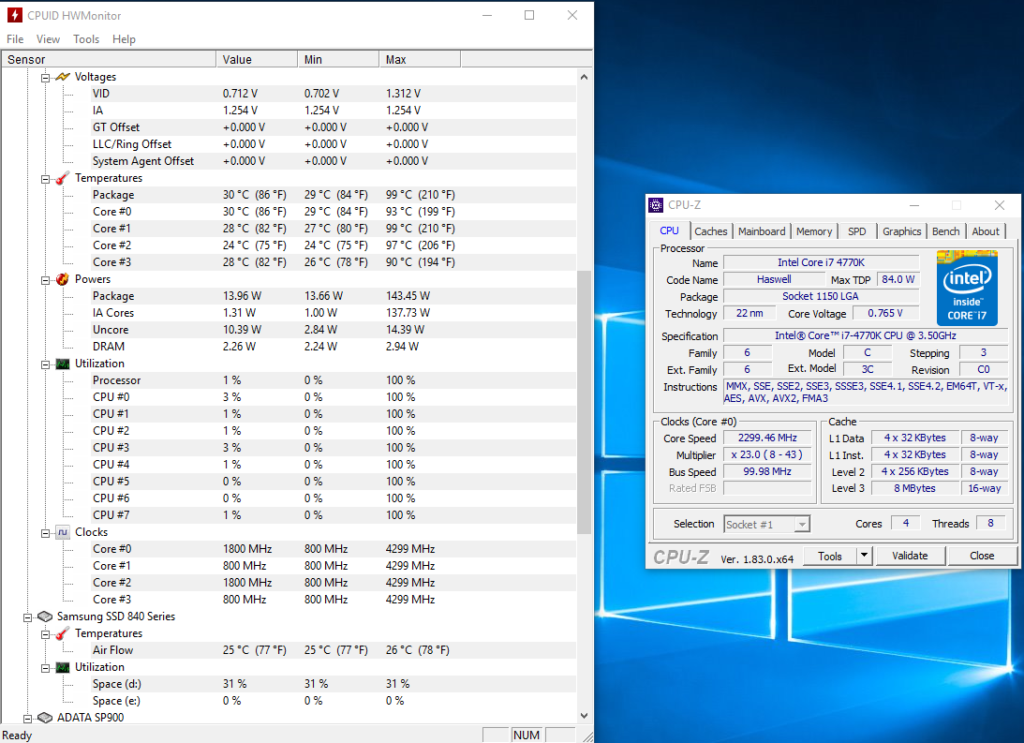
i7-4770K IDLE no delid
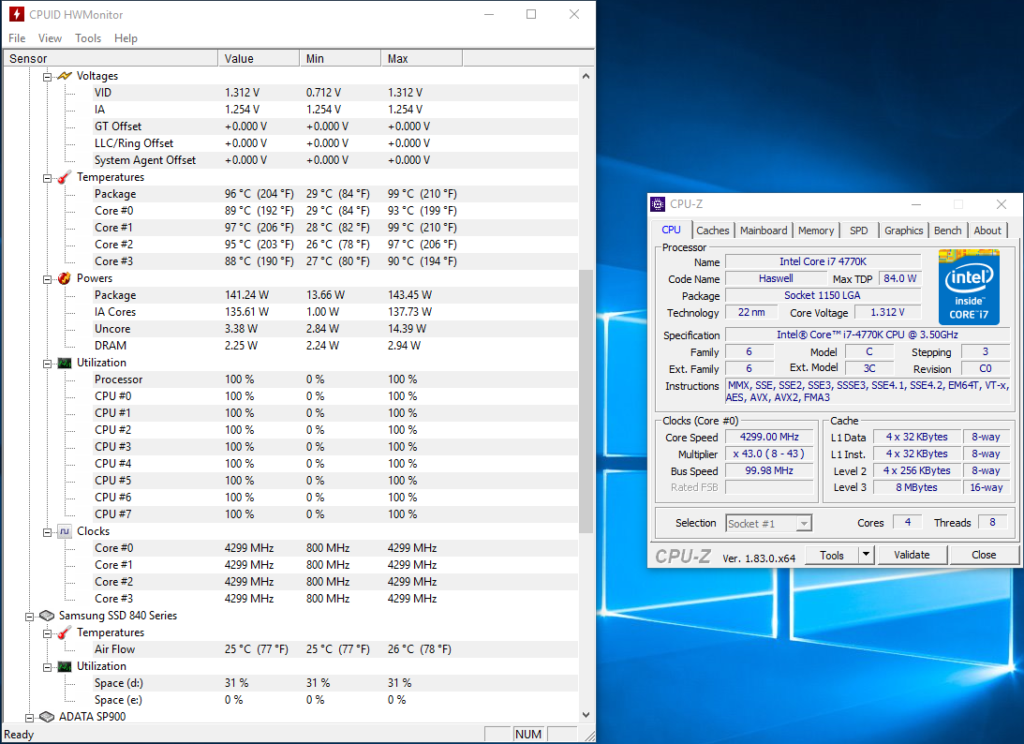
i7-4770K LOAD no delid
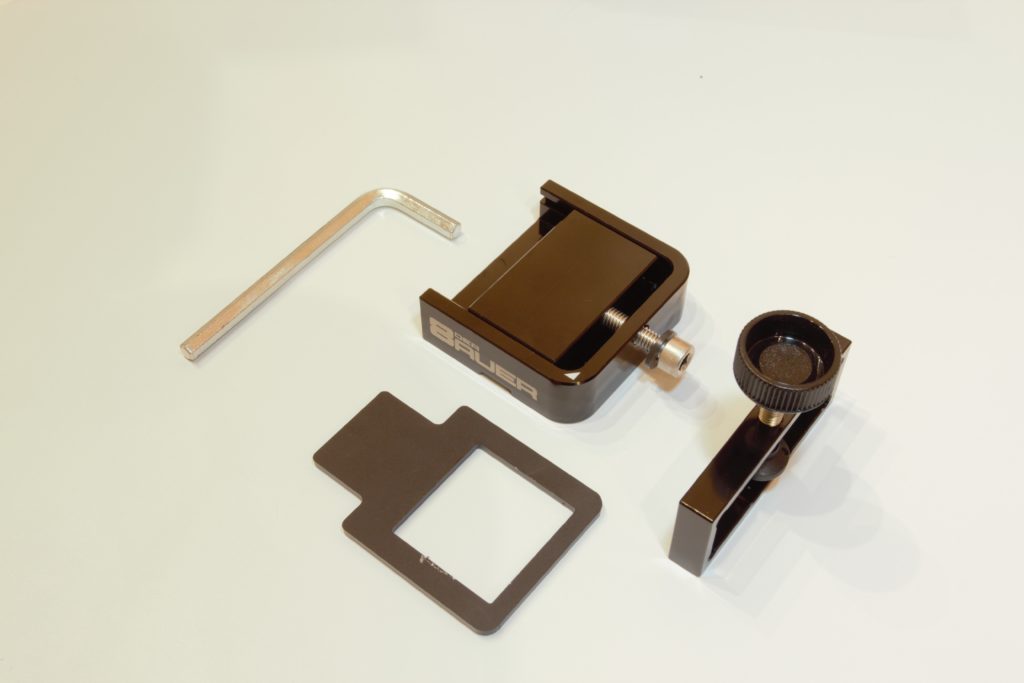
The Delid-Die-Mate-2
Time to get started then! First, we clean the CPU with cleaning alcohol 96% to remove the old TIM on top of the IHS. Use some cleaning alcohol with at least 90% alcohol. Don’t submerge your cpu, just grab a cloth and apply it to the cloth first and then clean your cpu. 🙂 (Sadly we forgot to replenish our rubbing alcohol so we have to do it without.)
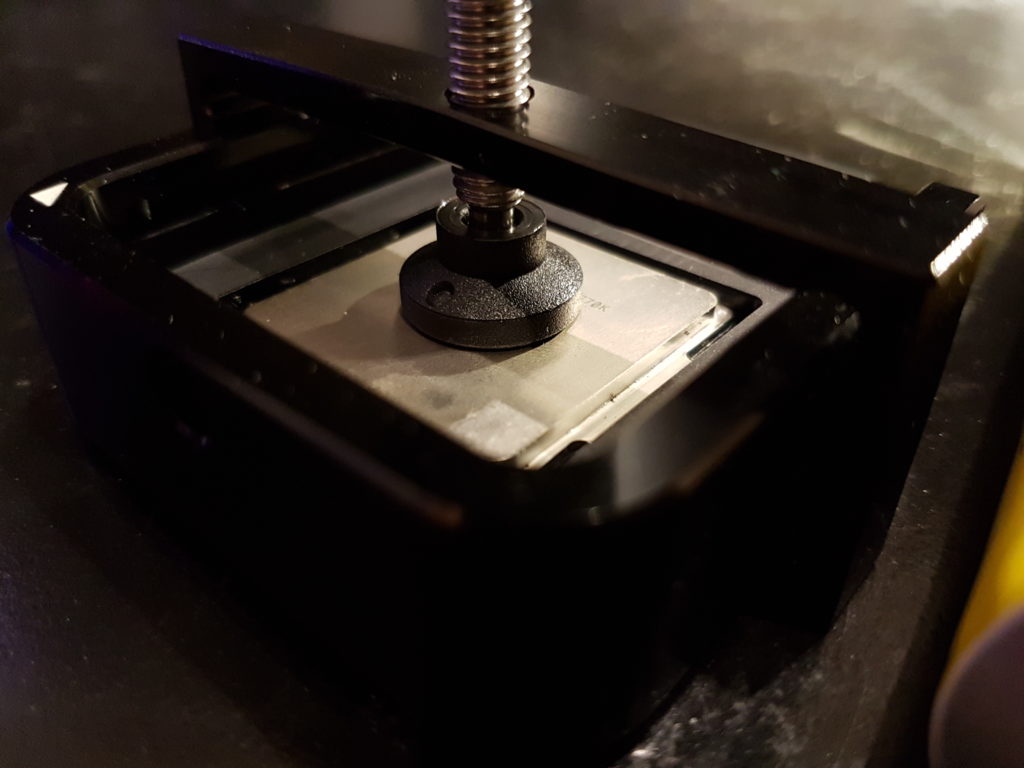
Once thorougly cleaned it is time to grab our Delid Die Mate 2. We place our cpu carefully in the bottom part of the DDM2 in such a way the cpu’s triangle corresponds to the triangle on the DDM2 bottom part.
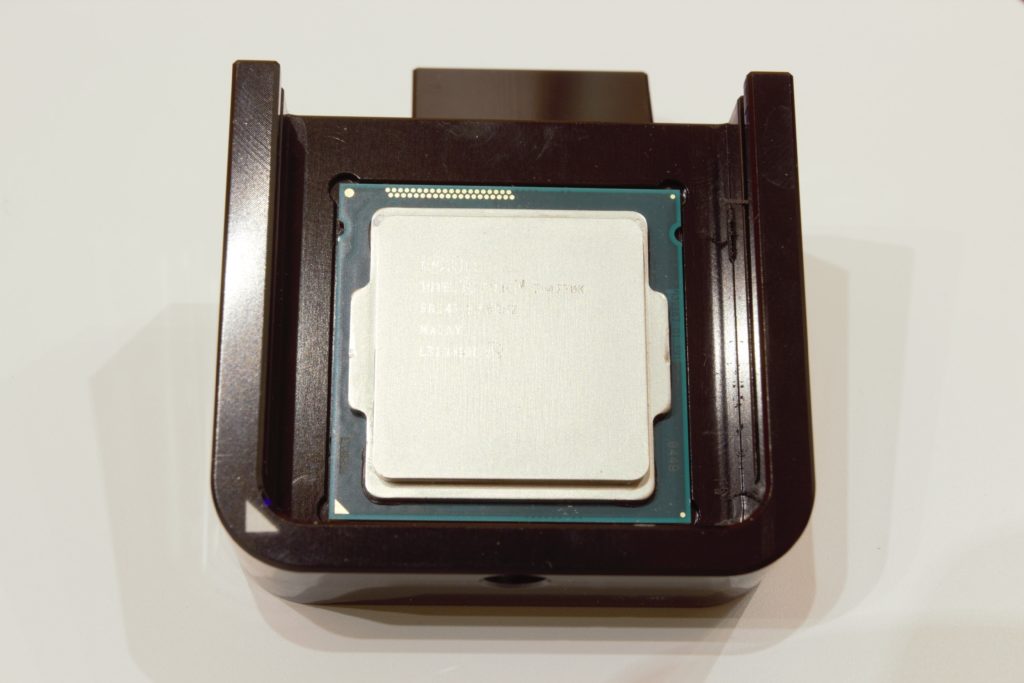
The corresponding triangle should be in the bottom left corner and match the cpu
We have arrived at the point of no return, separating the IHS from the chip. The DDM2 is in fact a small metal vise which presses the IHS to the side when turning the Allen Key bolt. The bottom part remains in its original position forcing the IHS off.

Guys please, i’ve seen many alternatives to the metal options including the 3D printed ones available on E-bay. I ordered one about half a year ago and completely detroyed an i7 4770K. What happened was the Delidder splitting in two, looking like a cracked tree. Probably the seller of the 3D printed delidder used the wrong material for its printing purposes. Let my experiences be a costly lesson to me, not to you… You can imagine that specific day is a dark page in my history and it will never be forgotten! :(. € 200,00 for a used i7 4770K later I’m here again with the right tools showing you how to do it right this time.
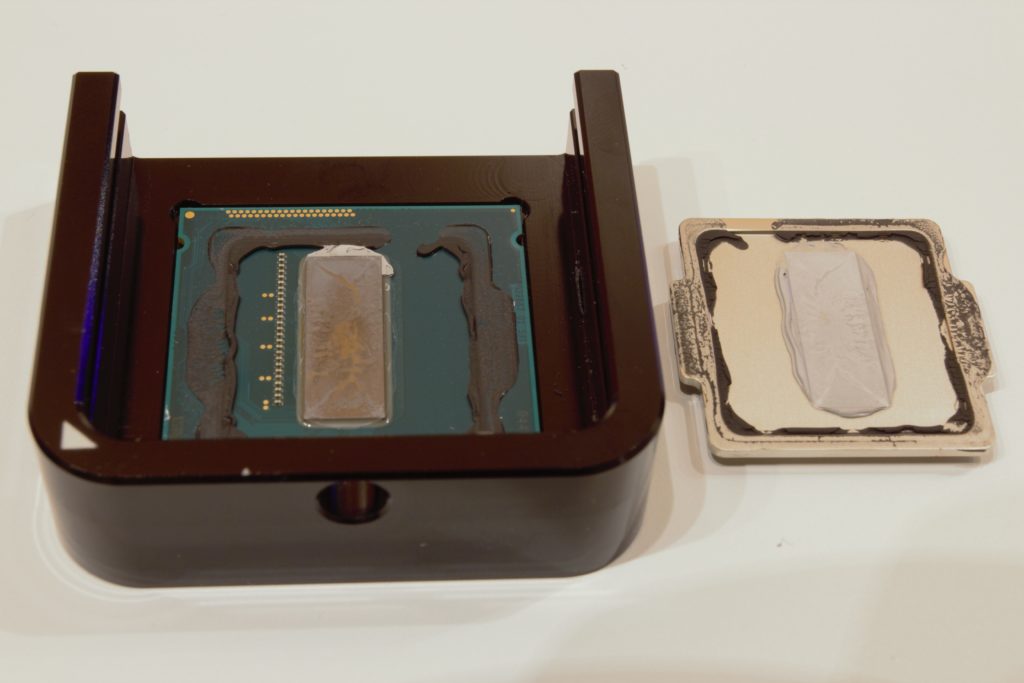
The remaining glue and dried out TIM
Okay, it worked! We now have two items, the IHS and the die with the chip. Rinse and repeat. Clean the inside of the IHS with some rubbing alcohol. Then when you’re finished move forward with the actual chip. Be gently and apply very light pressure on the chip. In the second step we also clean the leftover glue on the that held the IHS in its place. This part is a bit trickier as i found you need some sort of a (blunt) scalpel tool to remove the sturdy material. I use a plastic rounded wedge for this. During this cleaning process we leave the cpu in the DDM2 vise were its bottom is protected. You can also use a credit card of something else as long as it is not sharp and made of metal. Metal will scratch or permanently damage your cpu. Last but not least we apply a certain ammount of liquid metal to the die. Depending on the size of the die you will need more or less L.M.
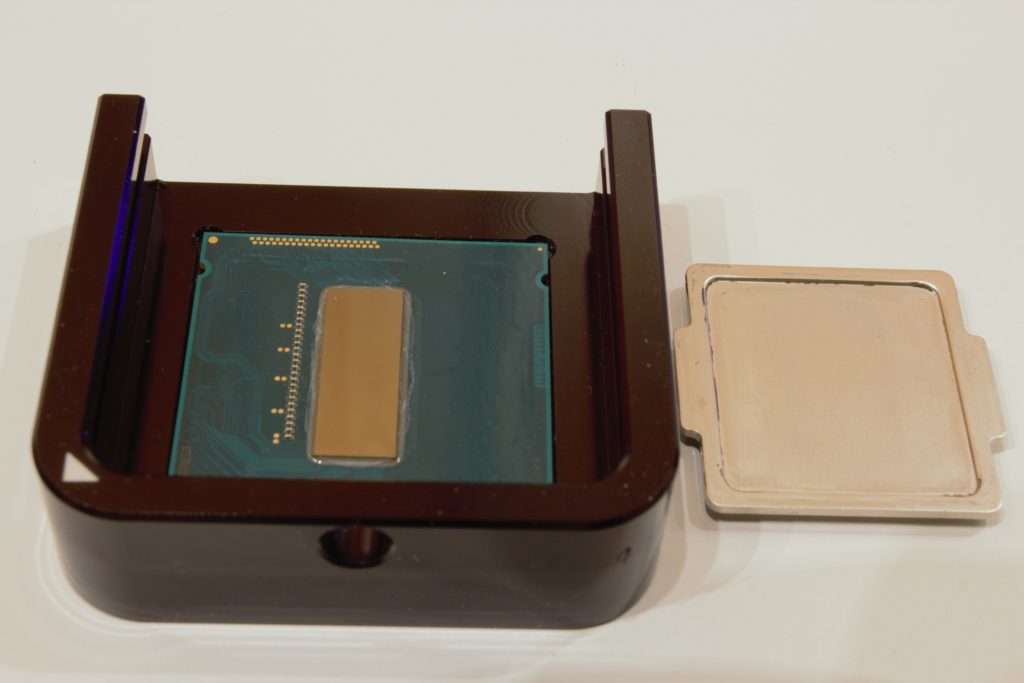
Thorougly cleaned as far as it goes without alcohol….. 🙁 I did my best.
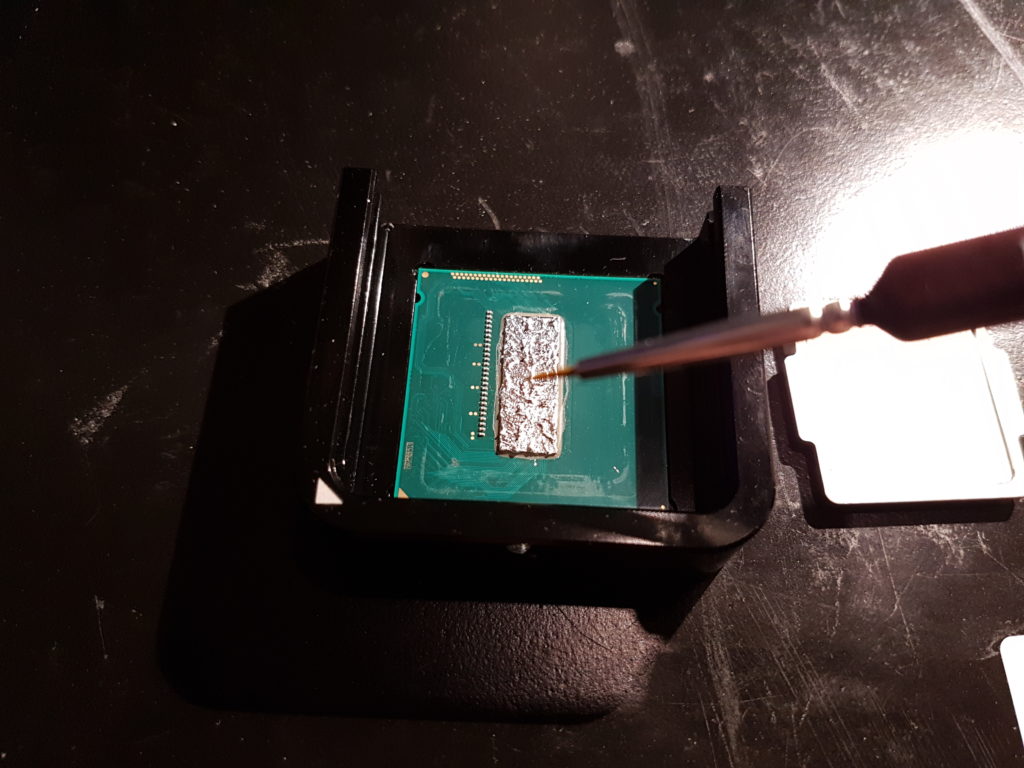
Applying Coollaboratory Liquid Ultra using a small paint brush.
Now it is time to glue the IHS in place. We use a UHU branded silicone available in (e)stores in the Western parts of Europe where we live. In the States we often see people opting for Permatex. As long as it is heat resistant and does not react to plastic you will be okay. You can also choose not to glue back the IHS, although we found this was more of a hassle. The retention clip of your socket will press down on the IHS holding it in place. You may have to put some counter active force on the IHS preventing the IHS from moving once you press down the clamp of the socket. If you chose to glue back the IHS let it dry for 4 hours before putting it back in the socket. Patience my friend!
The cpu is back in de DDM2 with glue applied.
Now the moment we have been waiting for the cpu is back in the socket and the H115i is reinstalled. Let’s do the same tests again and find out if our efforts paid off.
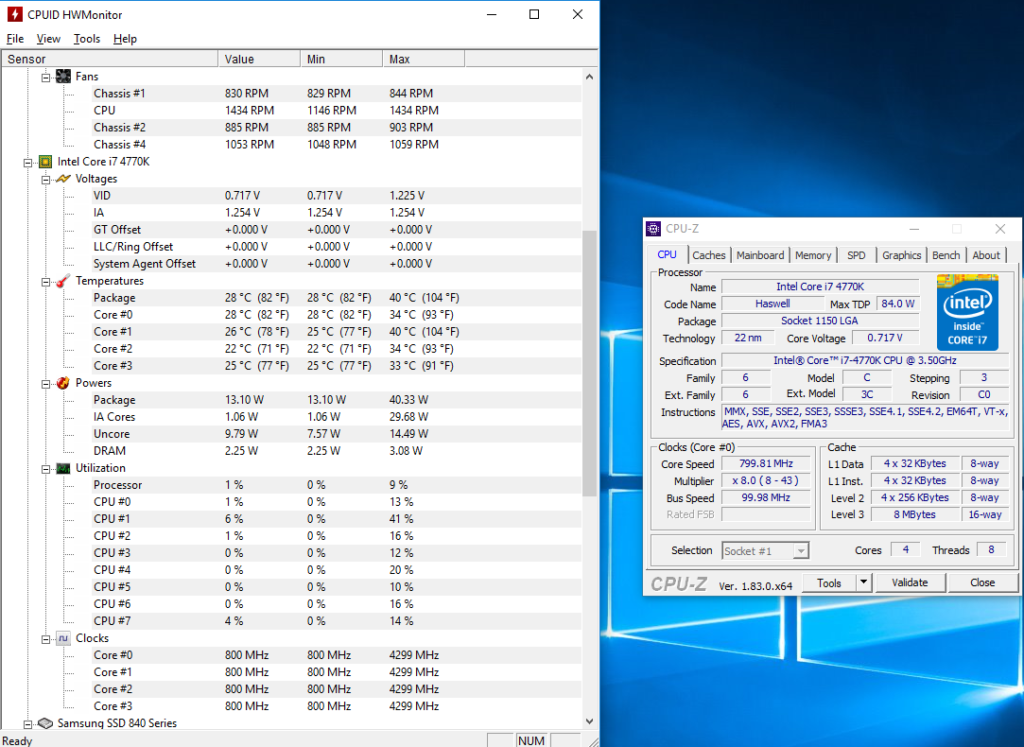
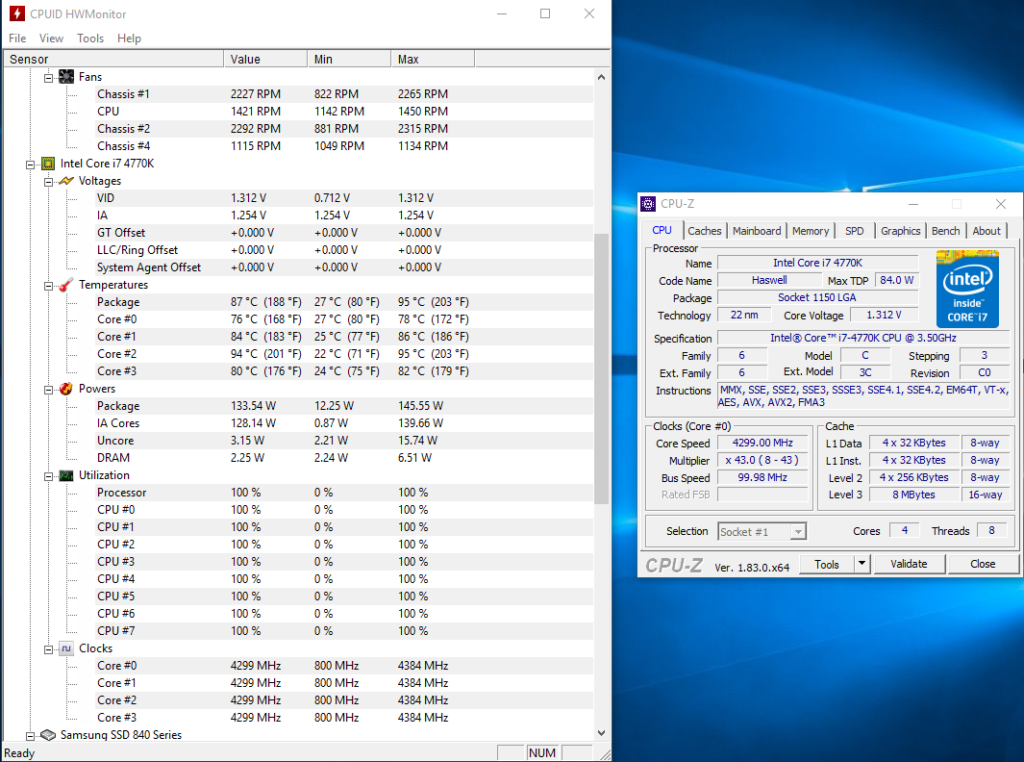
If we look at our results we can conclude that we realized an improvement in temperatures. We went from 30 degrees celcius to 28 degrees celcius idle. Under load the temperatures improved drastically. Previously, the pc could not finish a minute run of prime95 small FFT and would shutdown due too temps exceeding 100 degrees Celcius. We made our first load screenshot before delidding after 5 seconds of benchmarking. a few seconds later it crashed spiking over the 100 degrees Celcius mark.
The package temp after delidding went to 87 degrees Celcius and hovered around 90 and went back to 85 after a while. In the meantime there was no hint of a throtteling cpu.
Interestingly enough cores 0 1 2 and 3 moved within a bandwith of 94 degrees and then coming down to mid 70’s and up again. We can definitely conclude delidding saved us more than 10 degrees on the package and even more on the individual cores. Mission accomplished i would say.

1 reactie
Lian Li PC-011 Dynamic Case from Der Bauer | TECHJUNKIES · 16 april 2018 op 19:37
[…] Bauer well known from it’s delidding video’s and a partner of Caseking.de, proudly announces the new Lian Li PC-011 Dynamic. This […]