 Introduction

Hi guys, welcome to a new build episode. This time we take a look at our ‘new’ testbench. And If we say new, we mean the hardware that is on there at the moment. the physical testbench is with us for two years now, in the form of a Dimastech mini V1.0 benchtable. Recently we updated our dedicated gaming setup with the hardware that was initially on the testbench, a Gigabyte Z370 Aorus Gaming 7 motherboard and an Intel Core i5-8600K. But why did we swap the components?
Well first, benchmarking requires a lot of time, meaning we have the testbench occupied running benchmarks throughout the day which prevented me from playing a game now and then. Secondly, we like to have multiple generations of cpu/motherboards, enabling us to make cross platform performance comparisons. And finally having a separate tesbench does not mess up a nice gaming configuration when installing all kinds of hardware and software with different drivers. If i want to play a game it has to work without hassles!
Having a Core i7-7700K laying around looking pretty but doing nothing, it was obvious we wanted a previous generation Kaby Lake Intel Z270 board. Yes, you heard it right! Our testbench is having an older cpu than our gaming rig! :P. In every benchmark/game we have seen the Coffee Lake 8600K and Kaby Lake 7700K performing identical, where the Intel Core i7-7700K sometimes even has the edge over the Intel Core i5-8600K and Intel Core i7-8700K.
We looked for an overclocking board enabling us to push the Intel Core i7-7700K in the direction of 5.0 GHZ, never letting our cpu be the limiting factor in benchmarks. Our final selection consisted of the MSI Z270 X-Power Gaming Titanium, Asrock Z270 Supercarrier 27 and Gigabytes Z270 Aorus Gaming m9 which are all very lovely motherboards with excellent VRM’s and two of them even including PLX chips for extra PCI-E lanes, but proved to expensive for our purposes, still costing well over € 350,00.
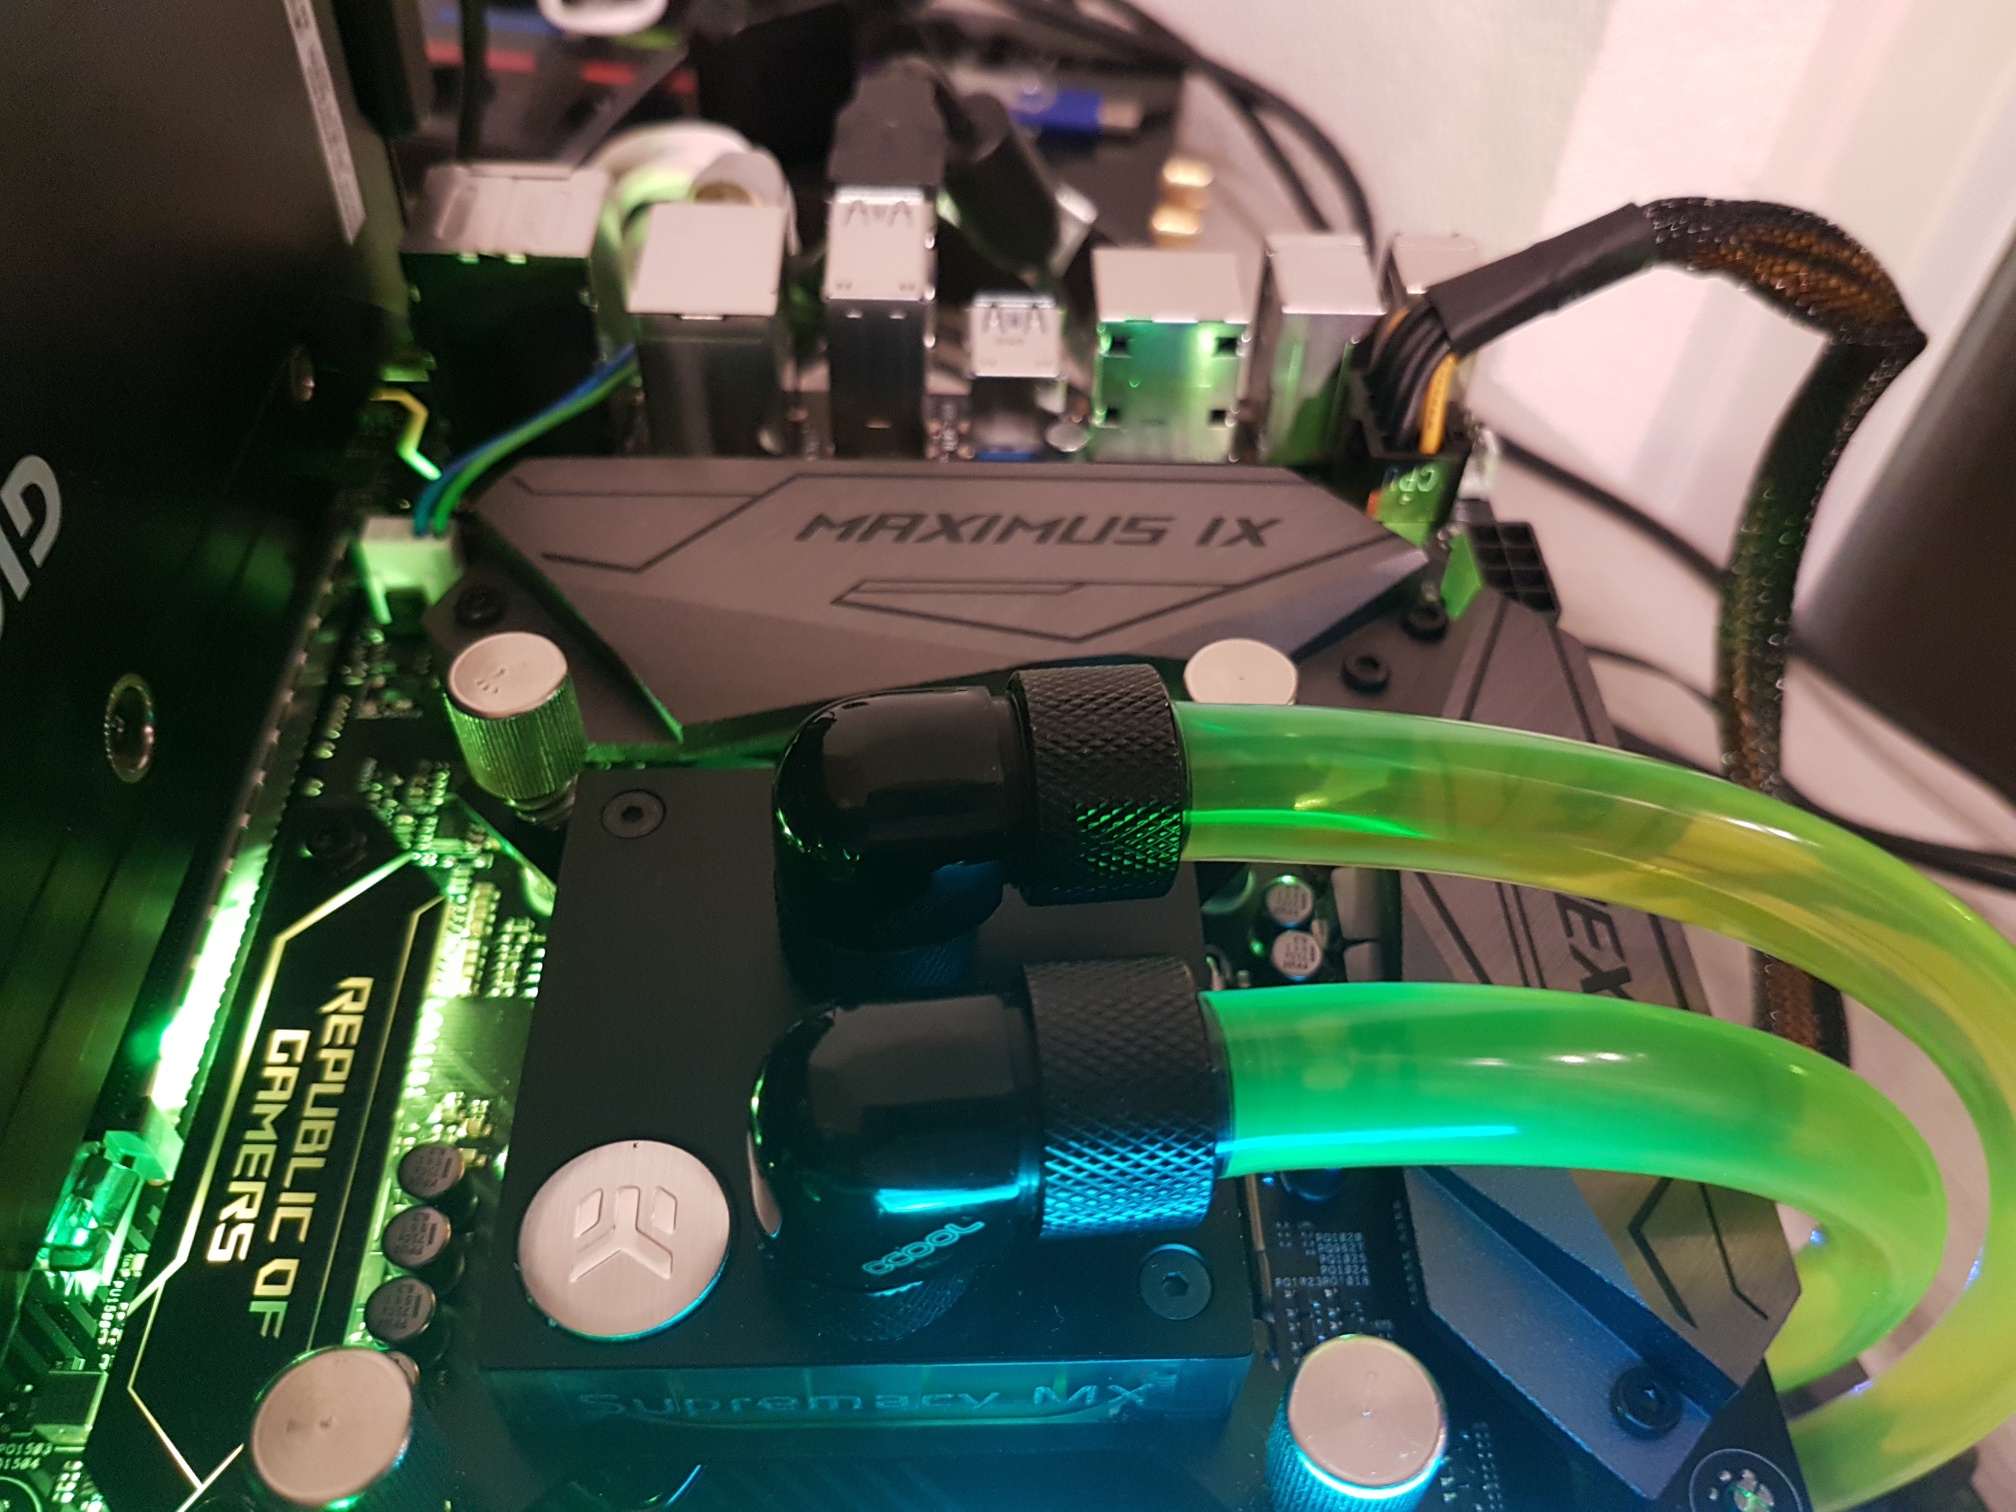
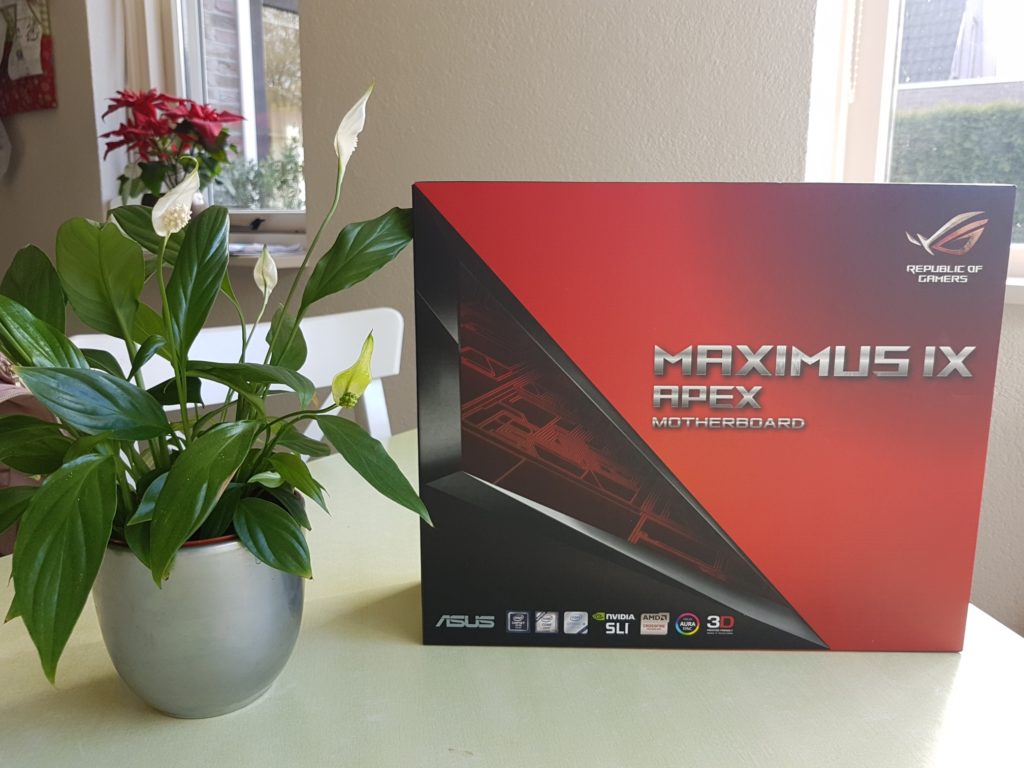
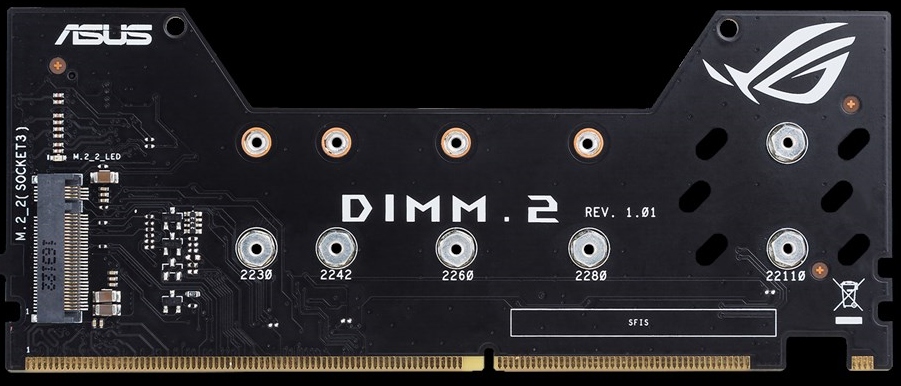
Finally we decided on the Asus Z270 MAXIMUS IX APEX, a motherboard just below the € 250,00 mark. The price tradeoff is one, but if you look at the uniqueness of the APEX board it is hard to resist for a tech geek like me! Having an X-form shape, only two DDR4 Dimm slots for better memory overclocking, special dual M.2. riser card that fits in the third Dimm slot and all kinds of switches that disable individual DIMM or PCI-E slots while benchmarking. Yes, the Asus Maximus IX Apex breaths overclocking and every little detail in this board reminds you of that. Let’s start with the contents of the packaging and dive deeper into its features.
Packaging
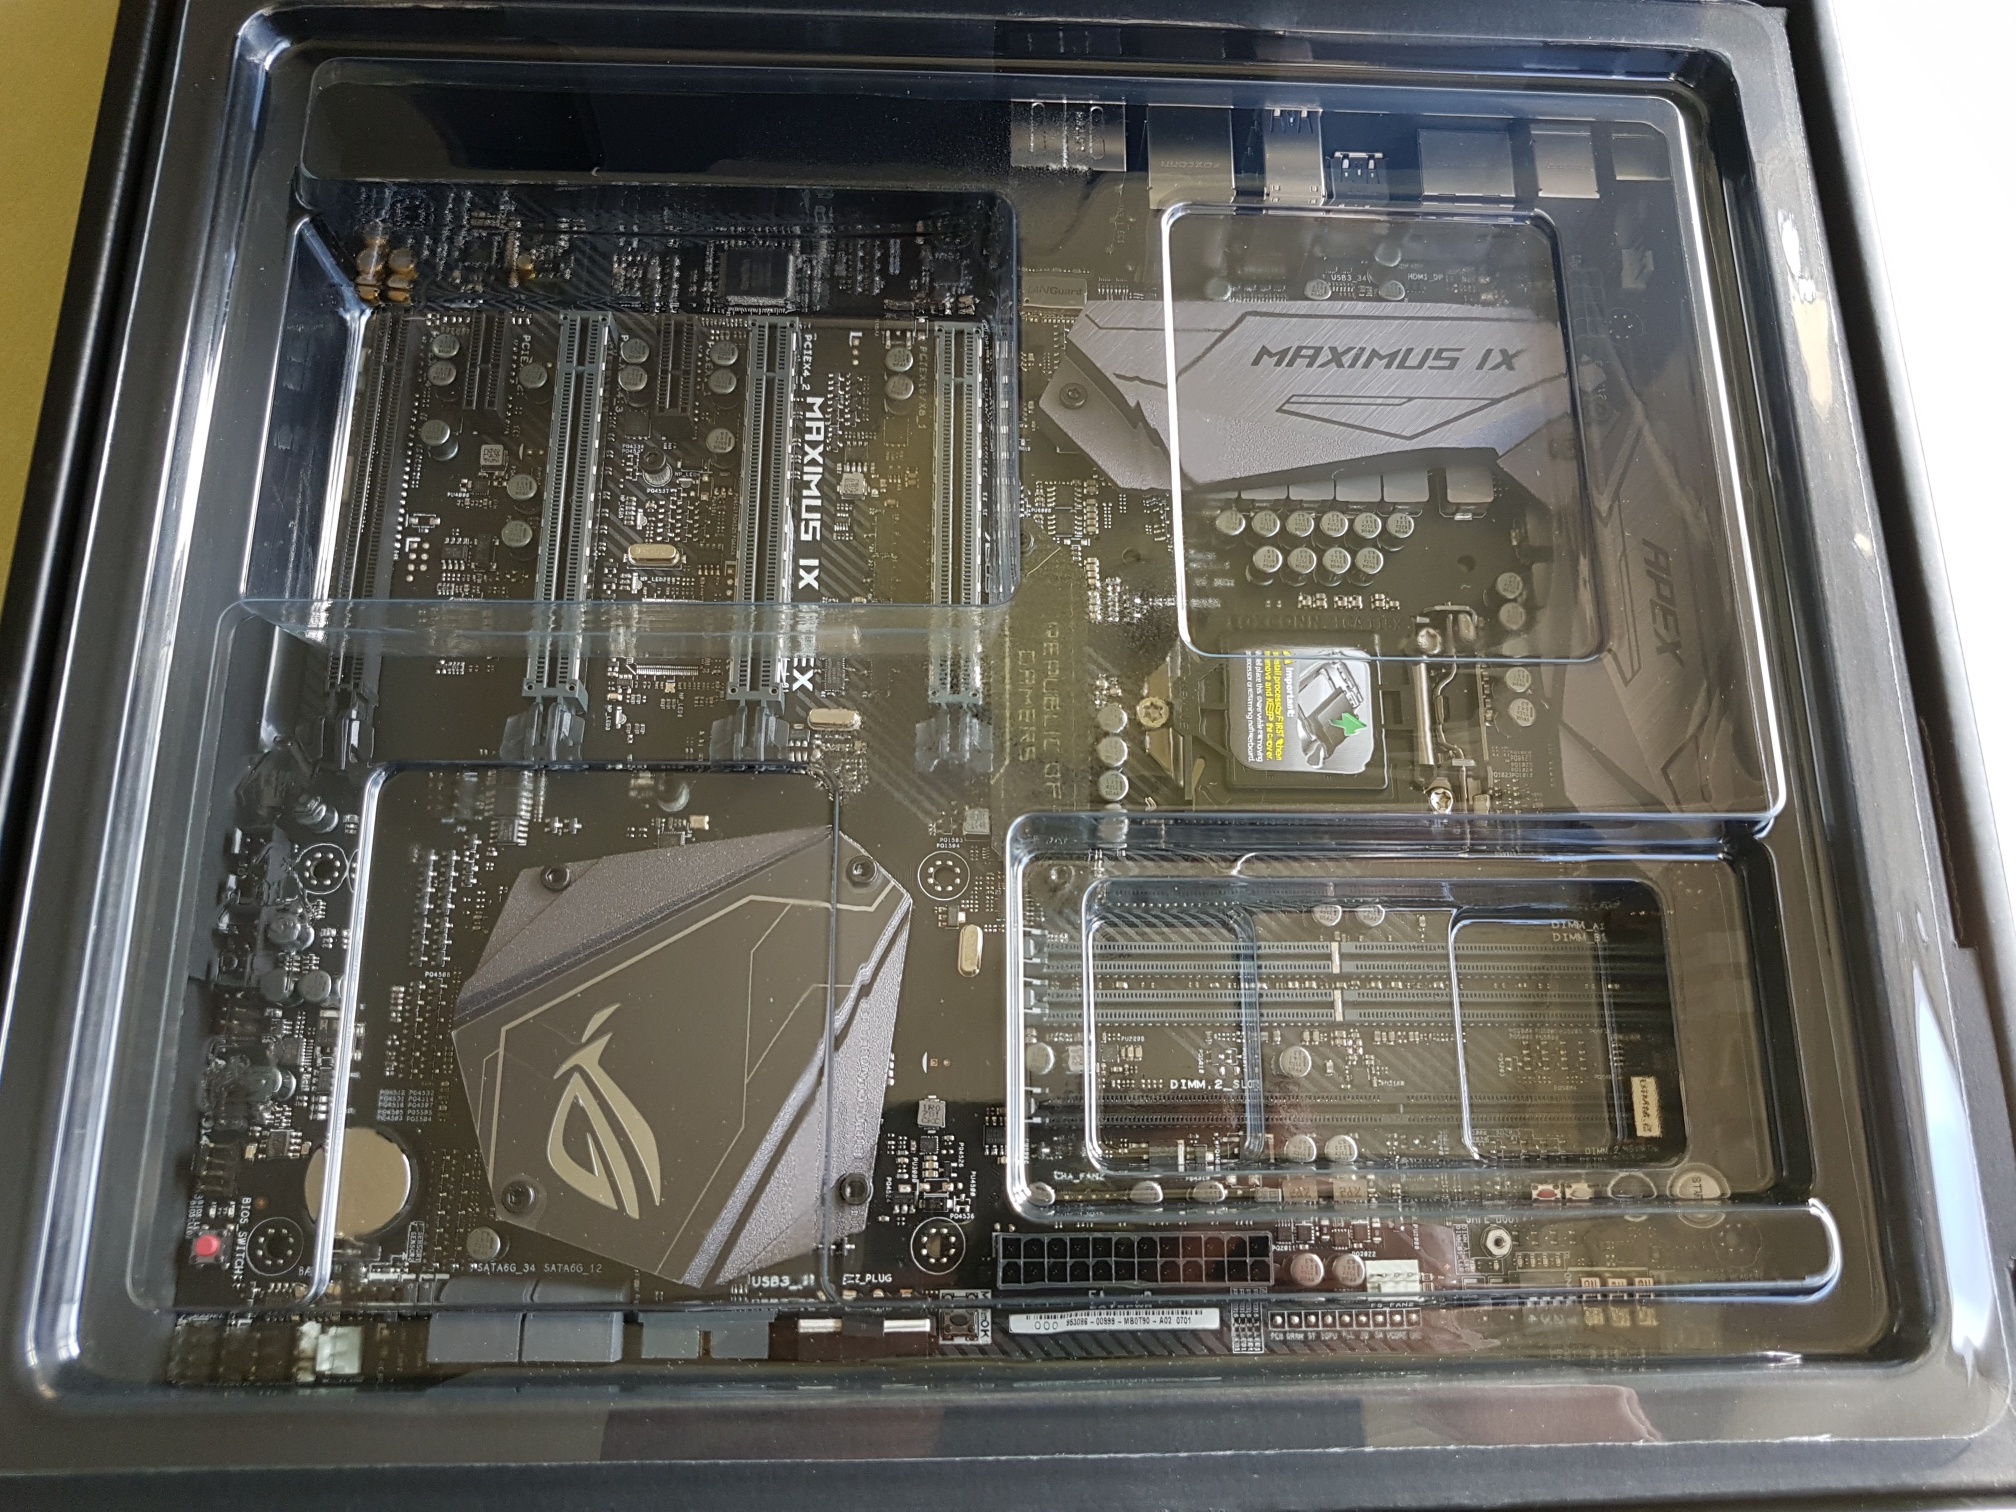
When opening the packaging, the Asus ROG Maximus XI Apex is covered by a plastic protector and surrounded by a dedicated box holding the board securely in place. It will not fall out if you accidently flip the box.
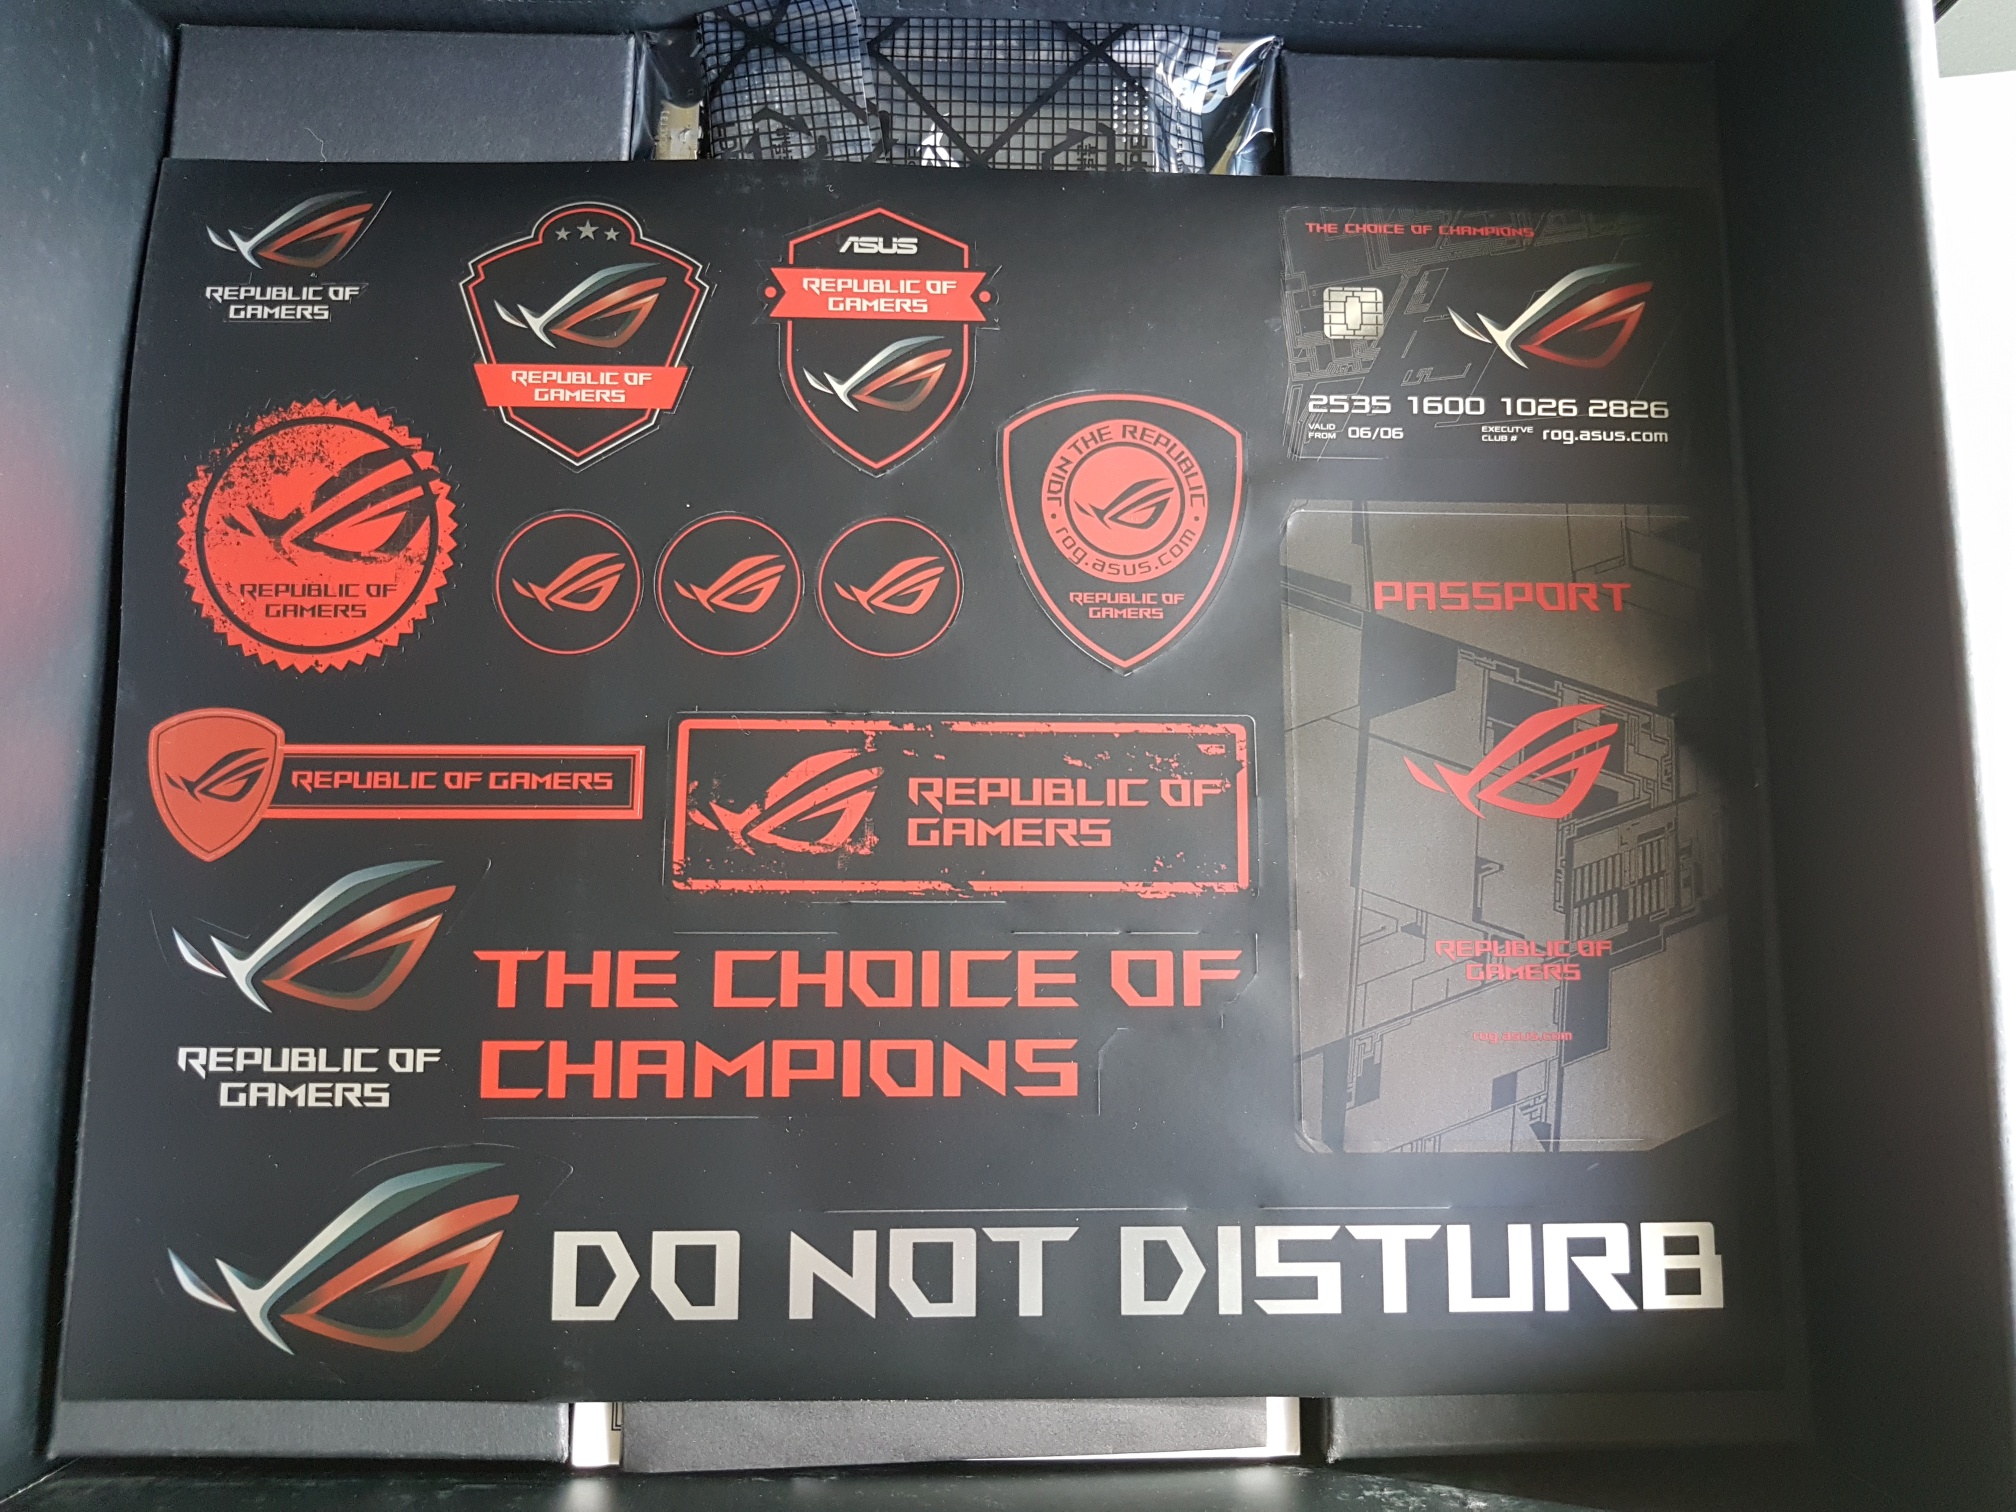
Below the tray holding the motherboard we find a sticker sheet. Not very usefull to us, although I’m thinking about using the Cablemod rebate Asus included in the box.
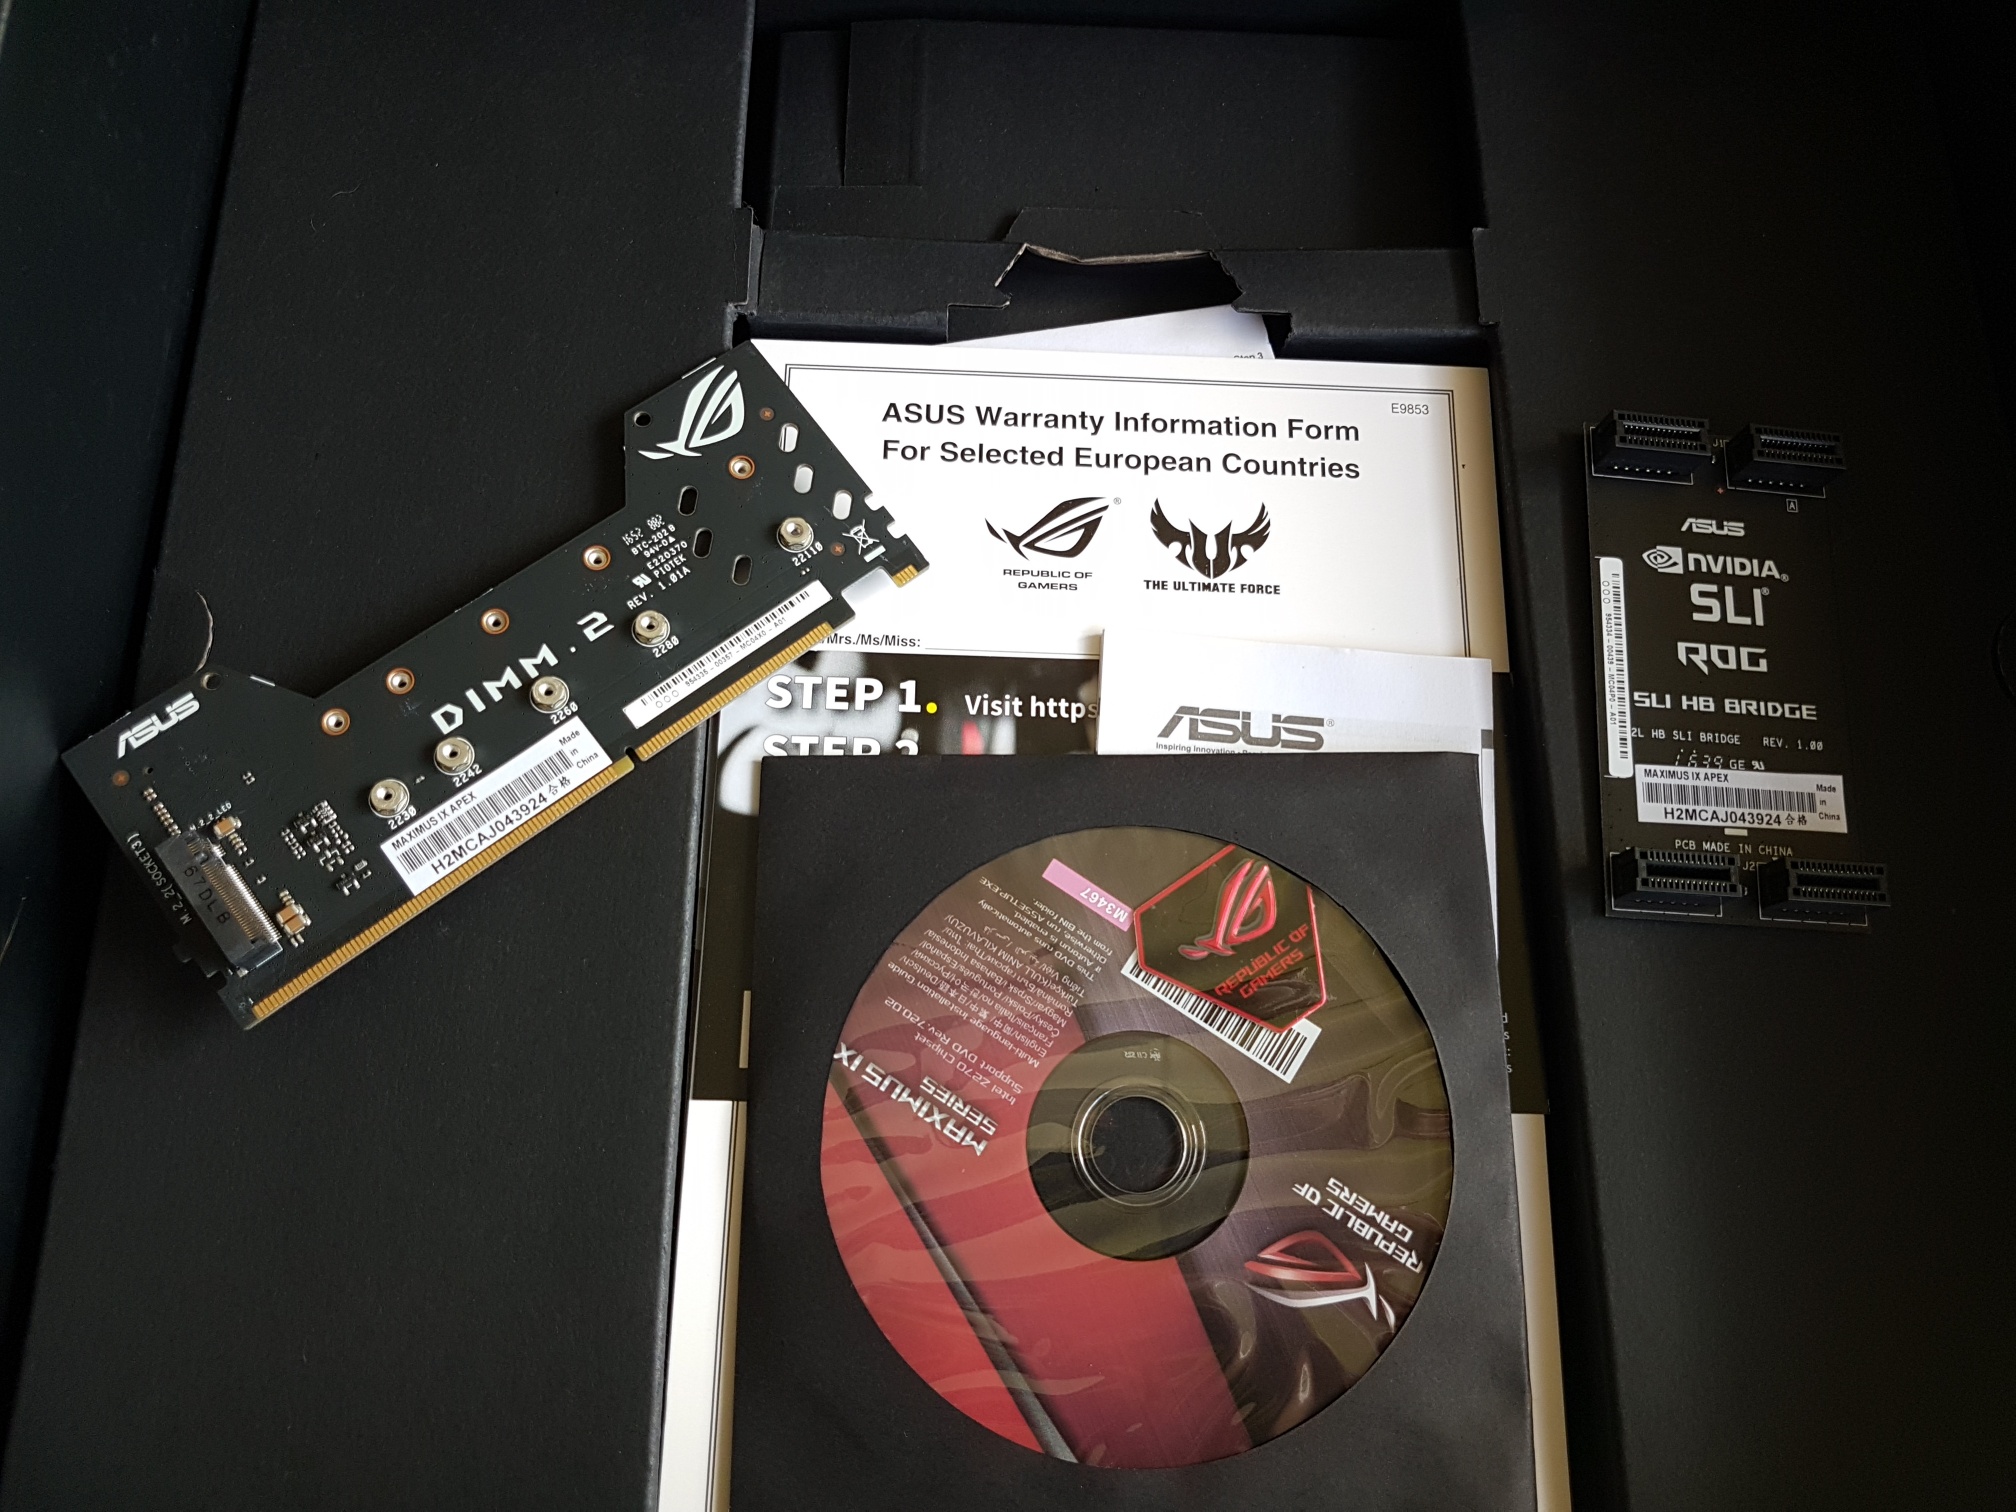
In the bottom part of the box we find a useless driver cd, An HB SLI Bridge, nametag shield and the double M.2. Riser card. The rest is paperwork 🙂 and a few black Sata cables.

The back of the box displays all the included features of the Asus ROG Maximus IX Apex, highlighting the OC Zone, customizable nametag, Dimm 2 M.2. riser card and Aura RGB lighting.
Welcome to Techjunkies.nl
Asus ROG Maximus IX motherboard Overview
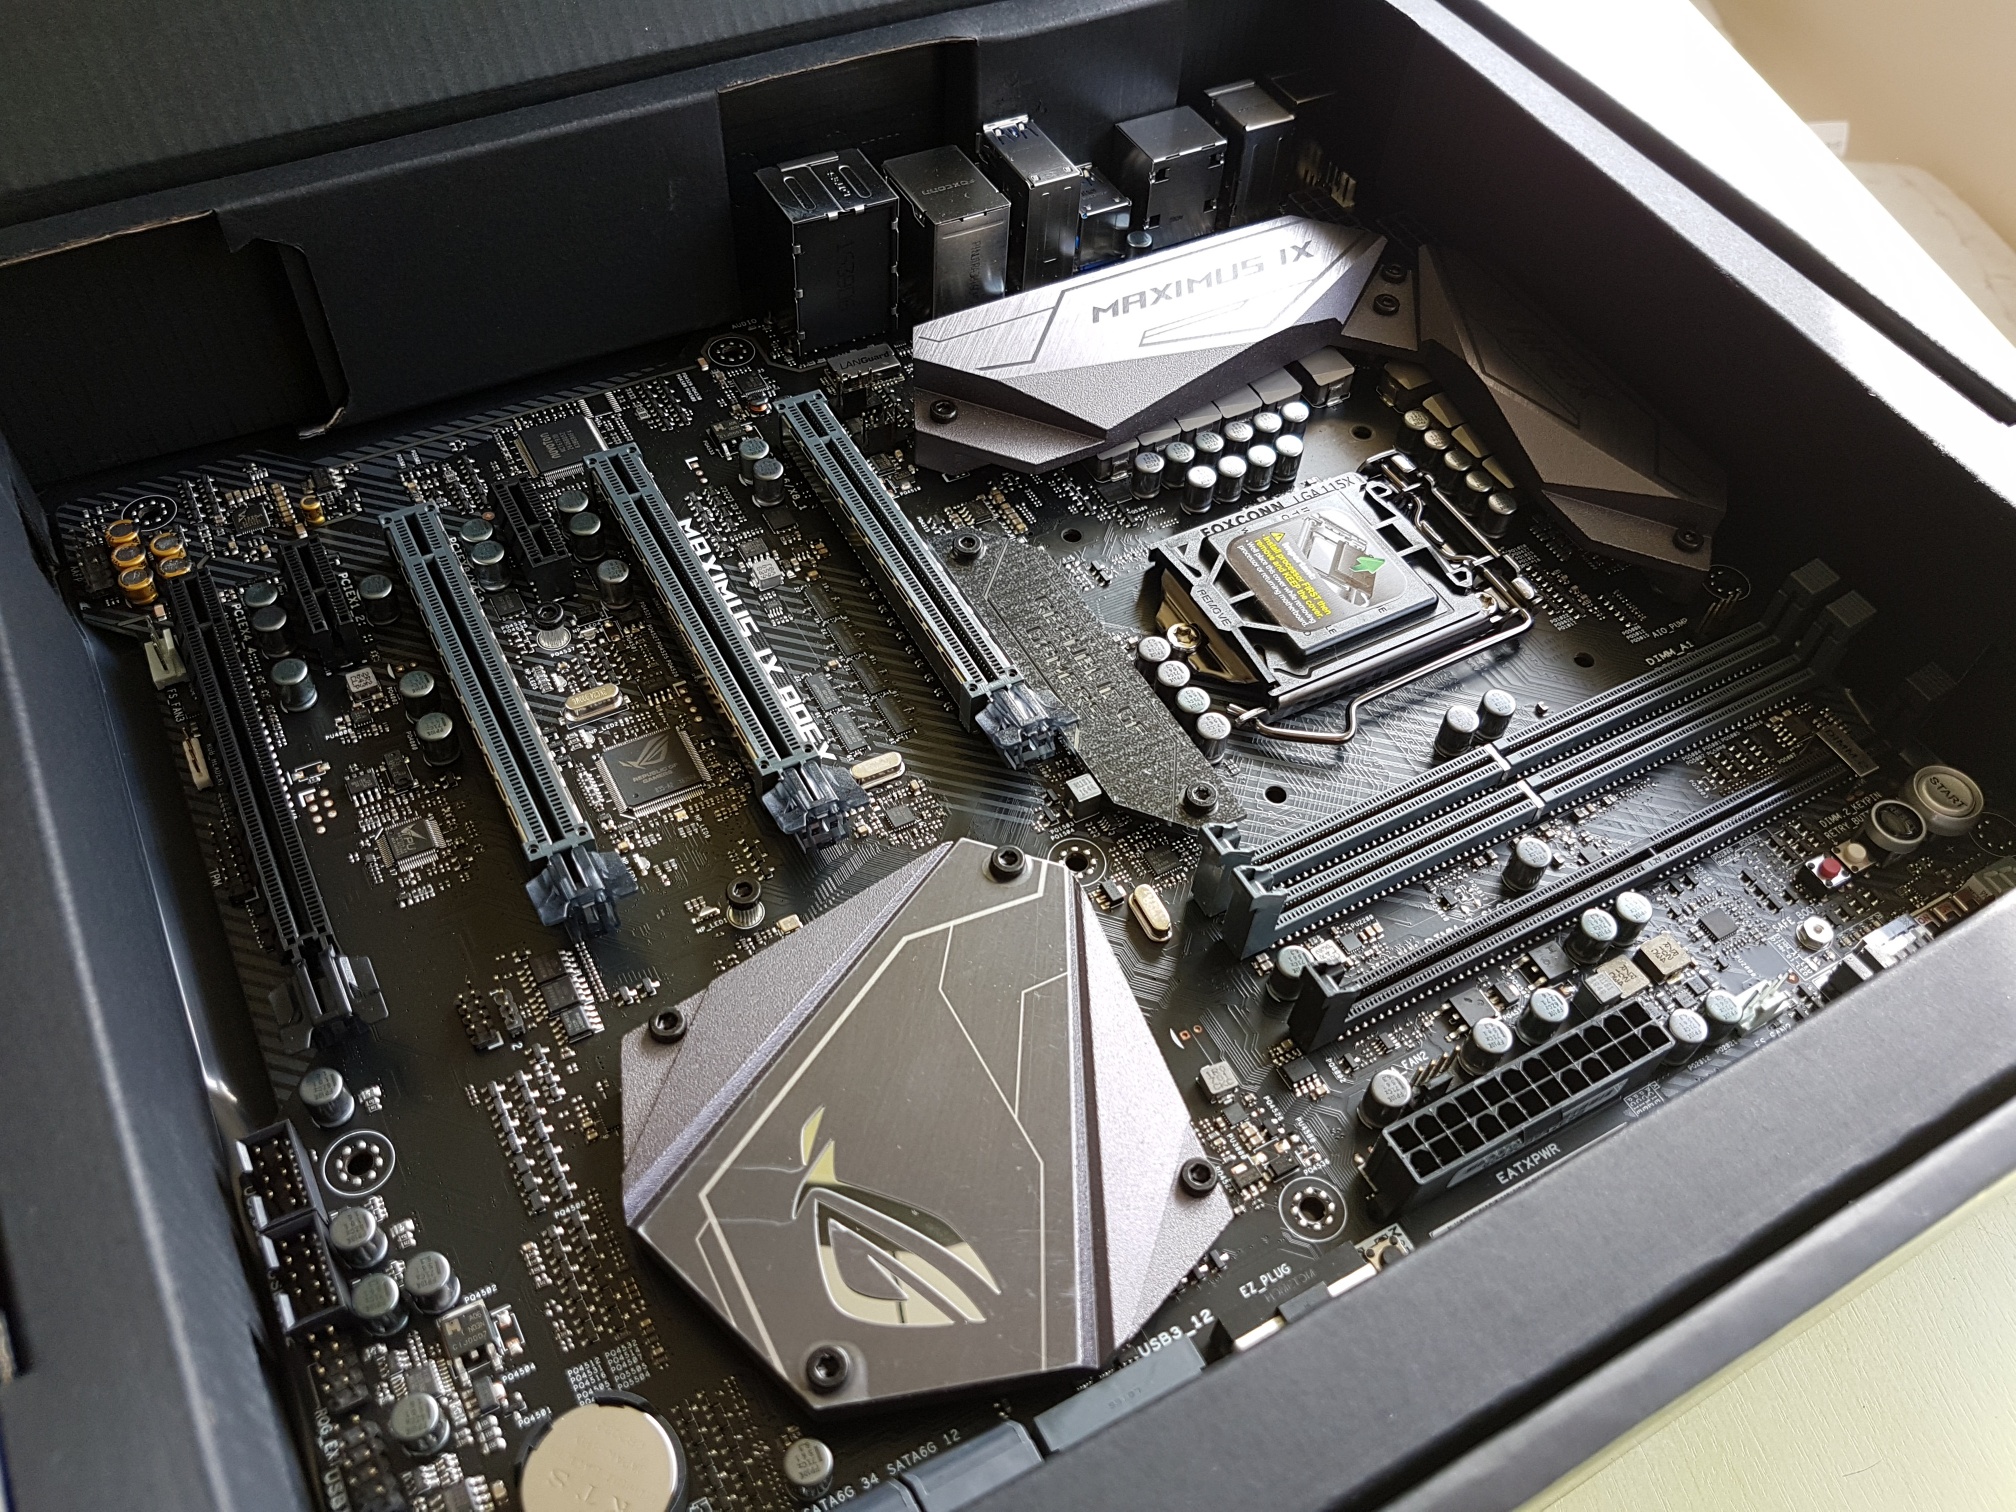
The Asus ROG Maximus IX APEX has four PCI-E 16x slots of which the top and third PCI-E slots are used for graphics cards, giving SLI or crossfire setups some breathing room.
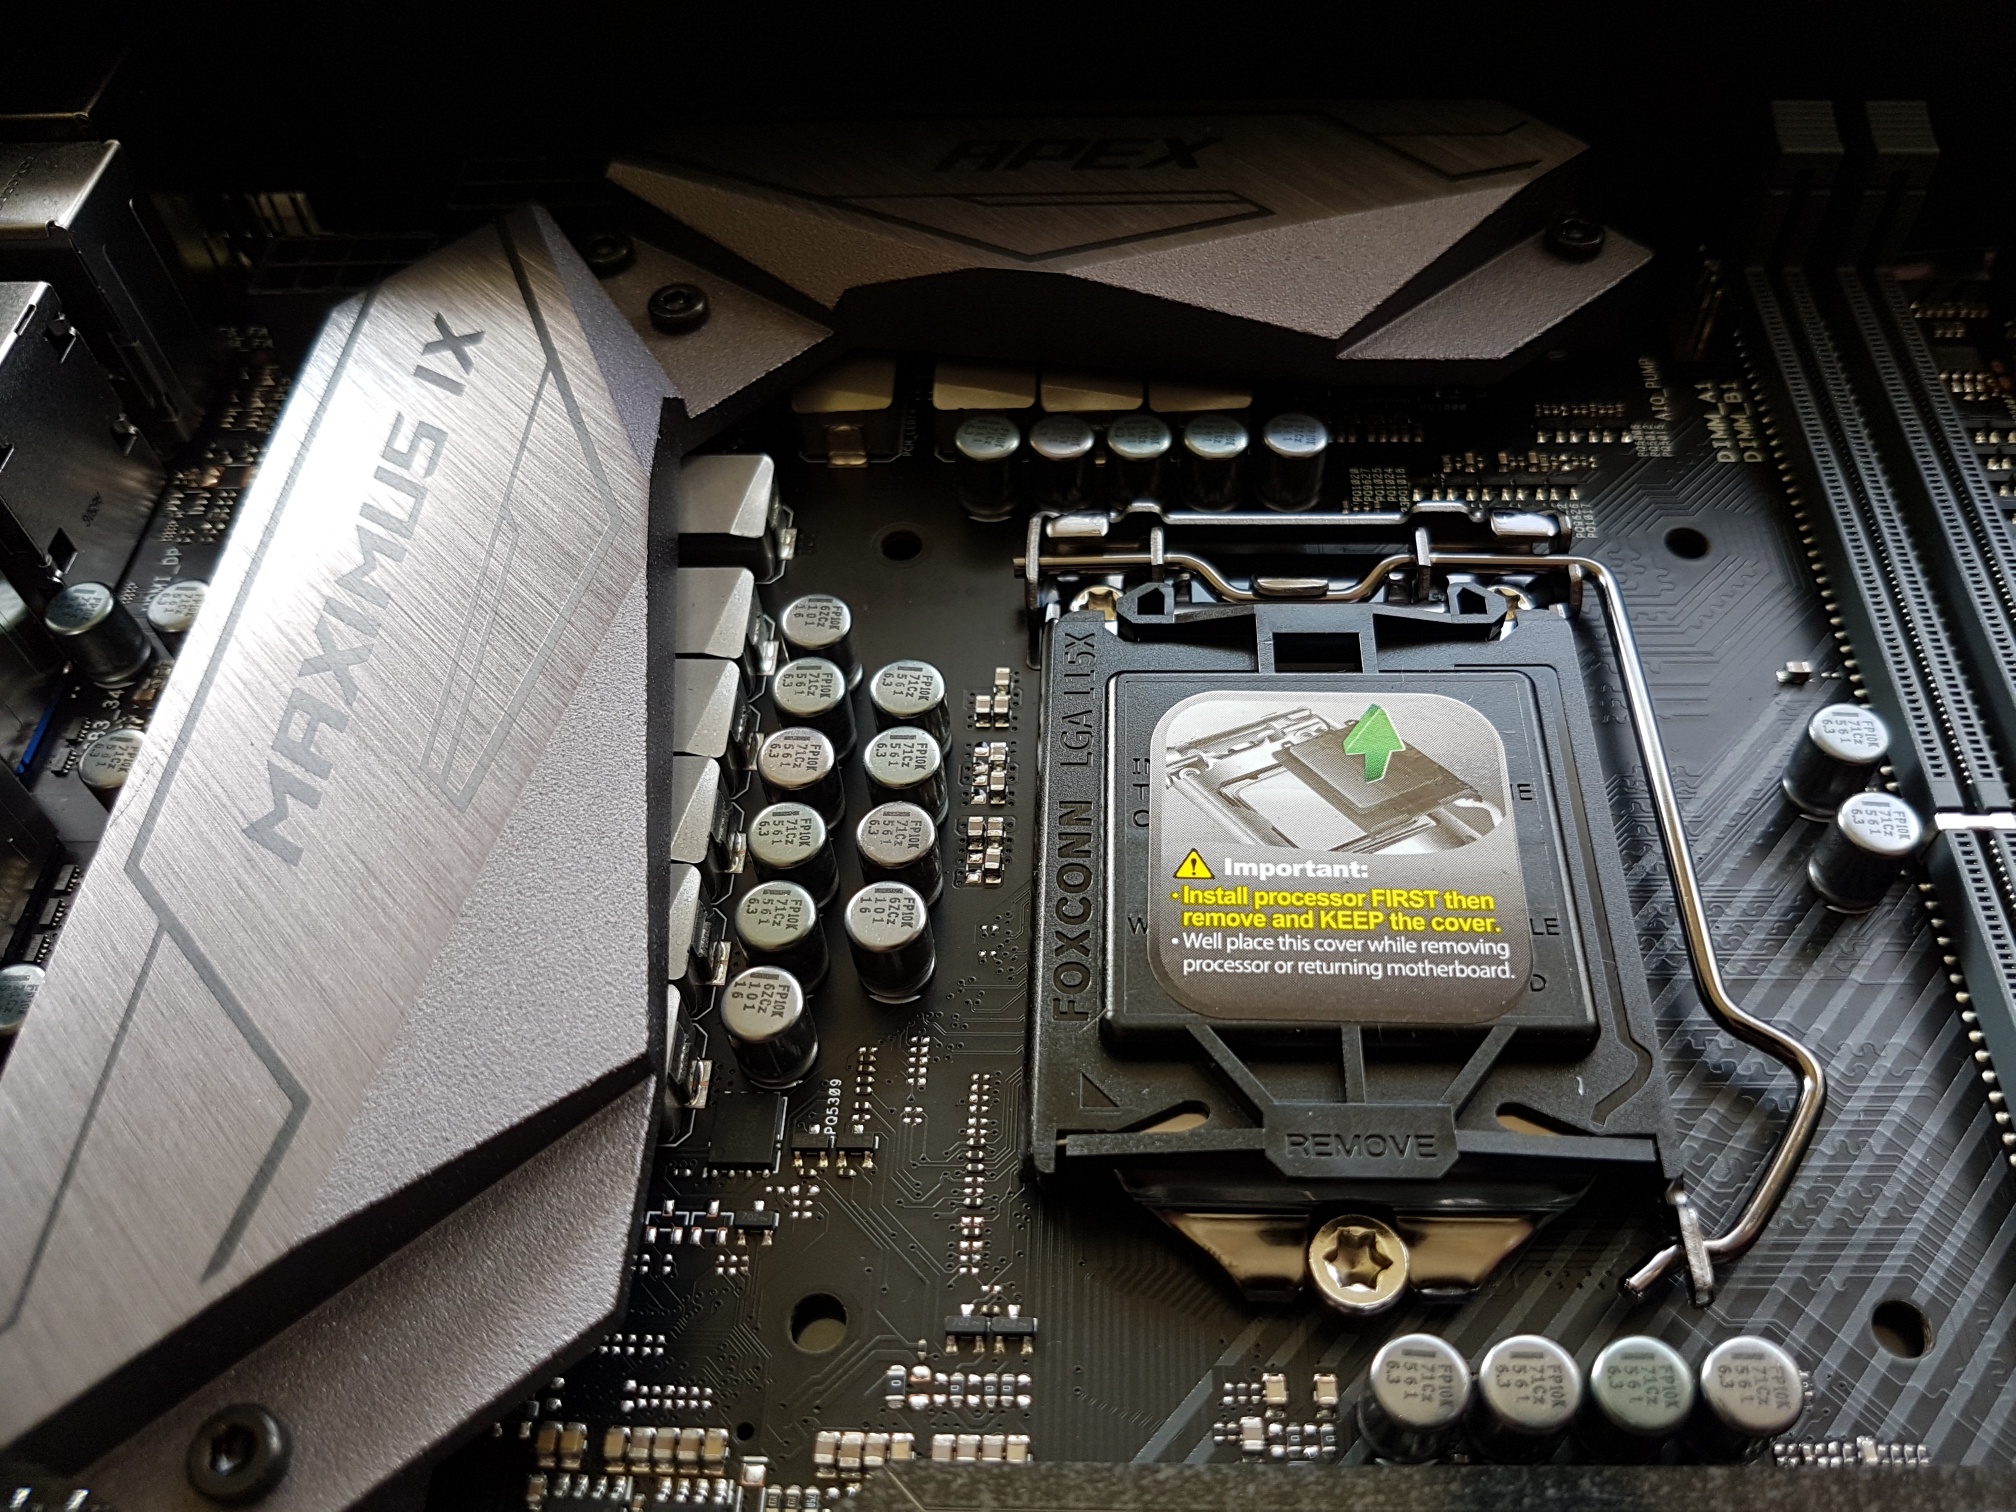
The VRM section of the Maximus IX Apex is covered by two big heatsinks. Below these heatsinks we find an 8+2 phase VRM setup with a high quality Infineon ASP1405 PWM controller (IR35201and Texas Instruments CSD87350 NexFETs).
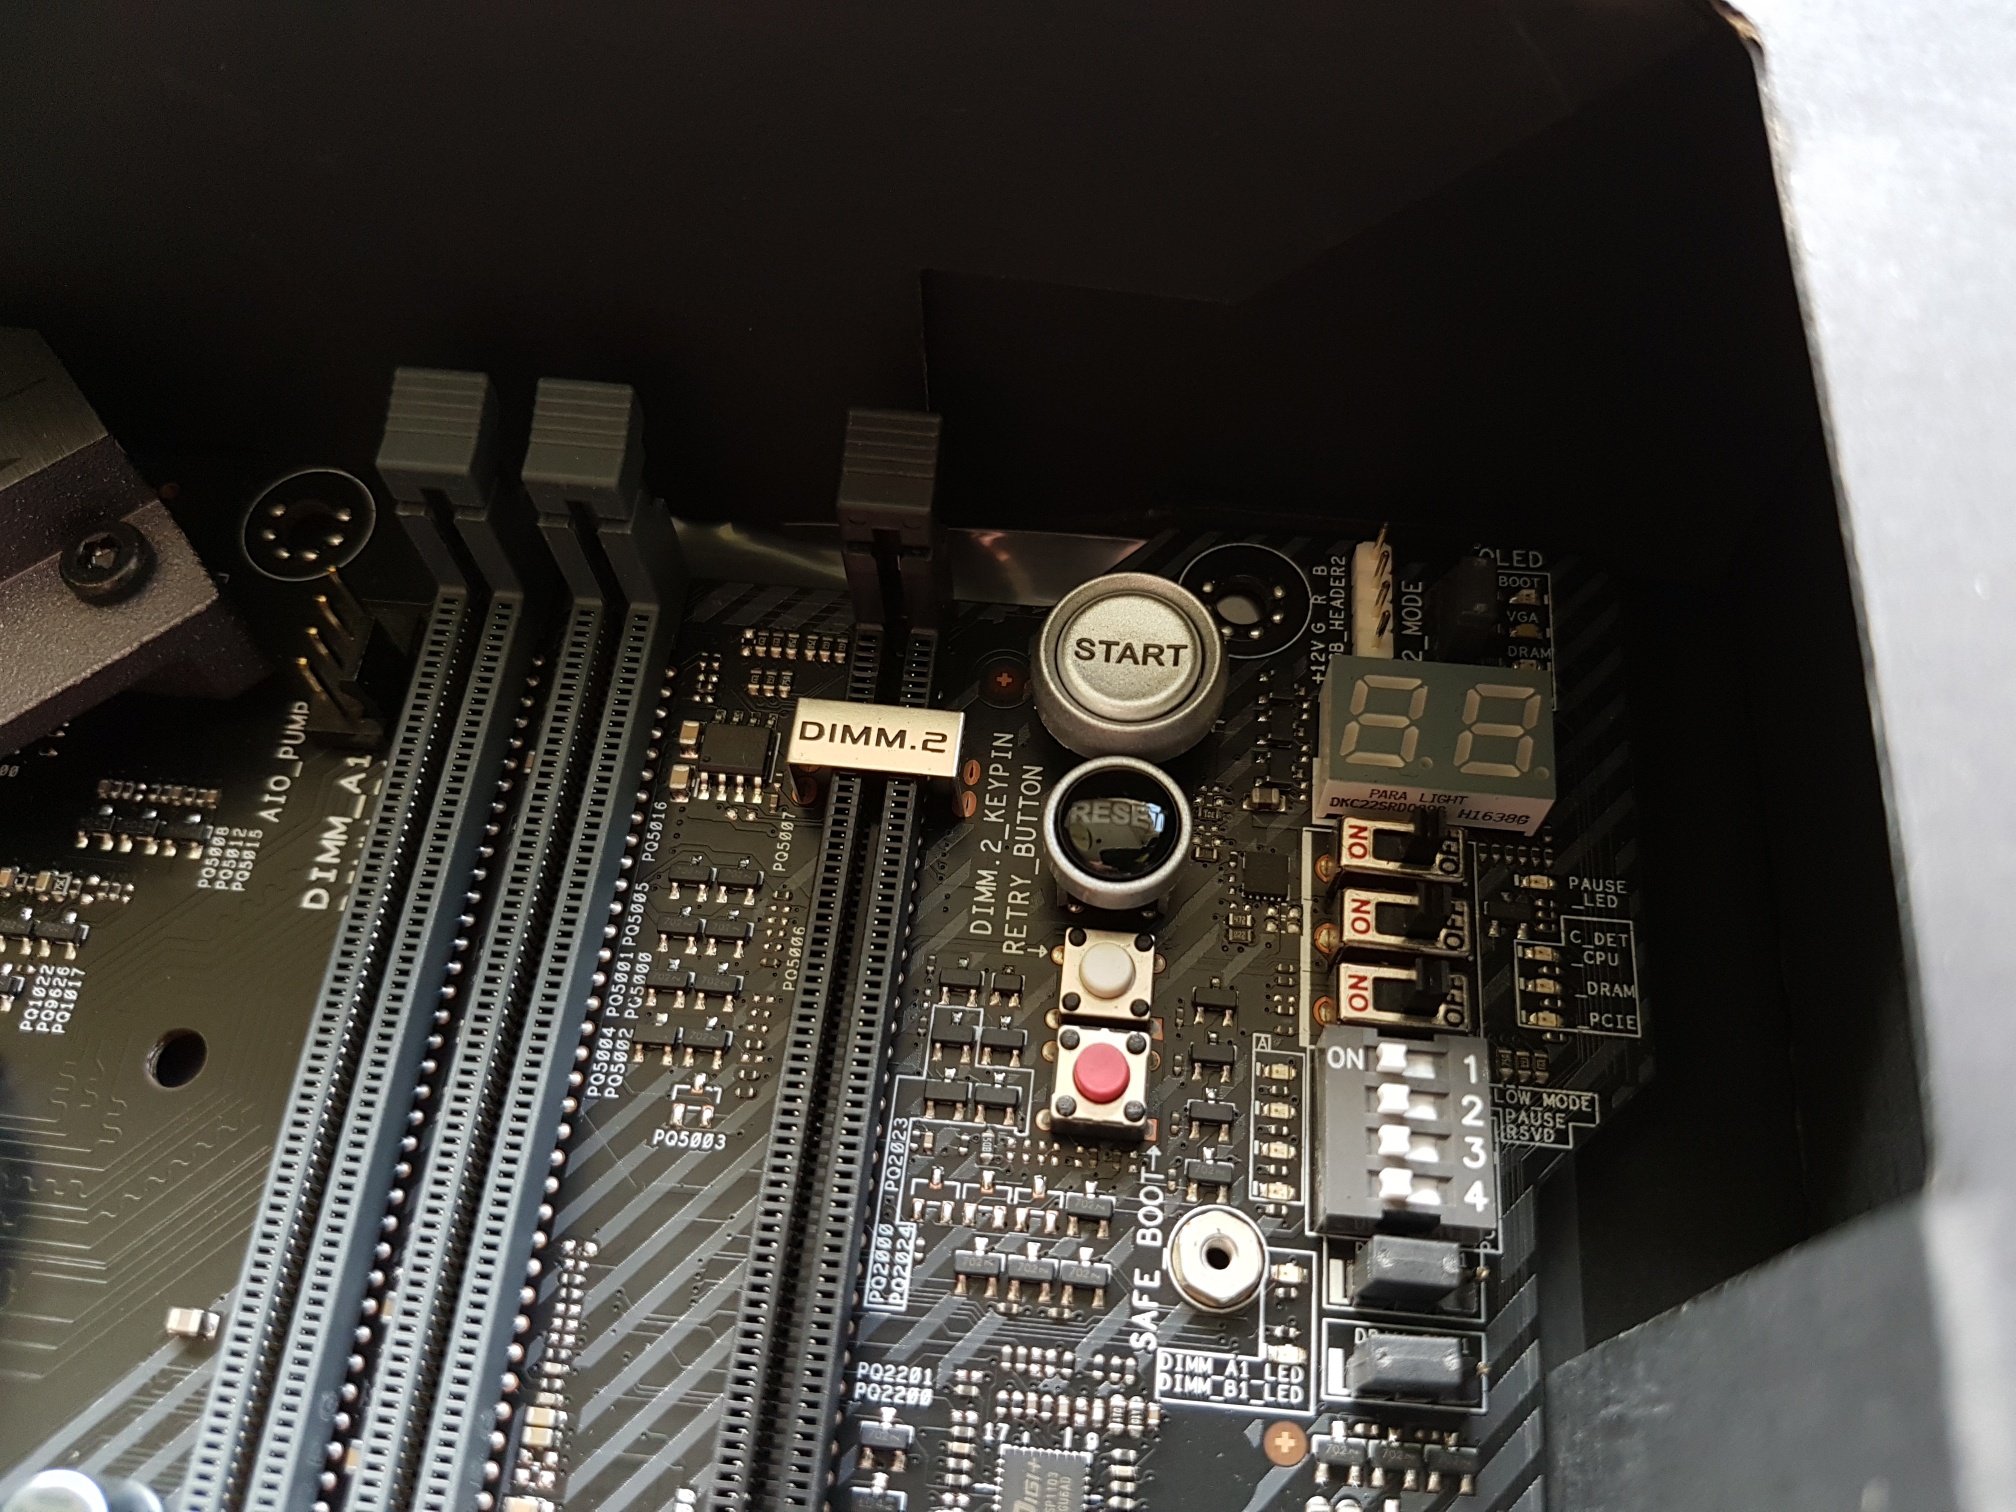
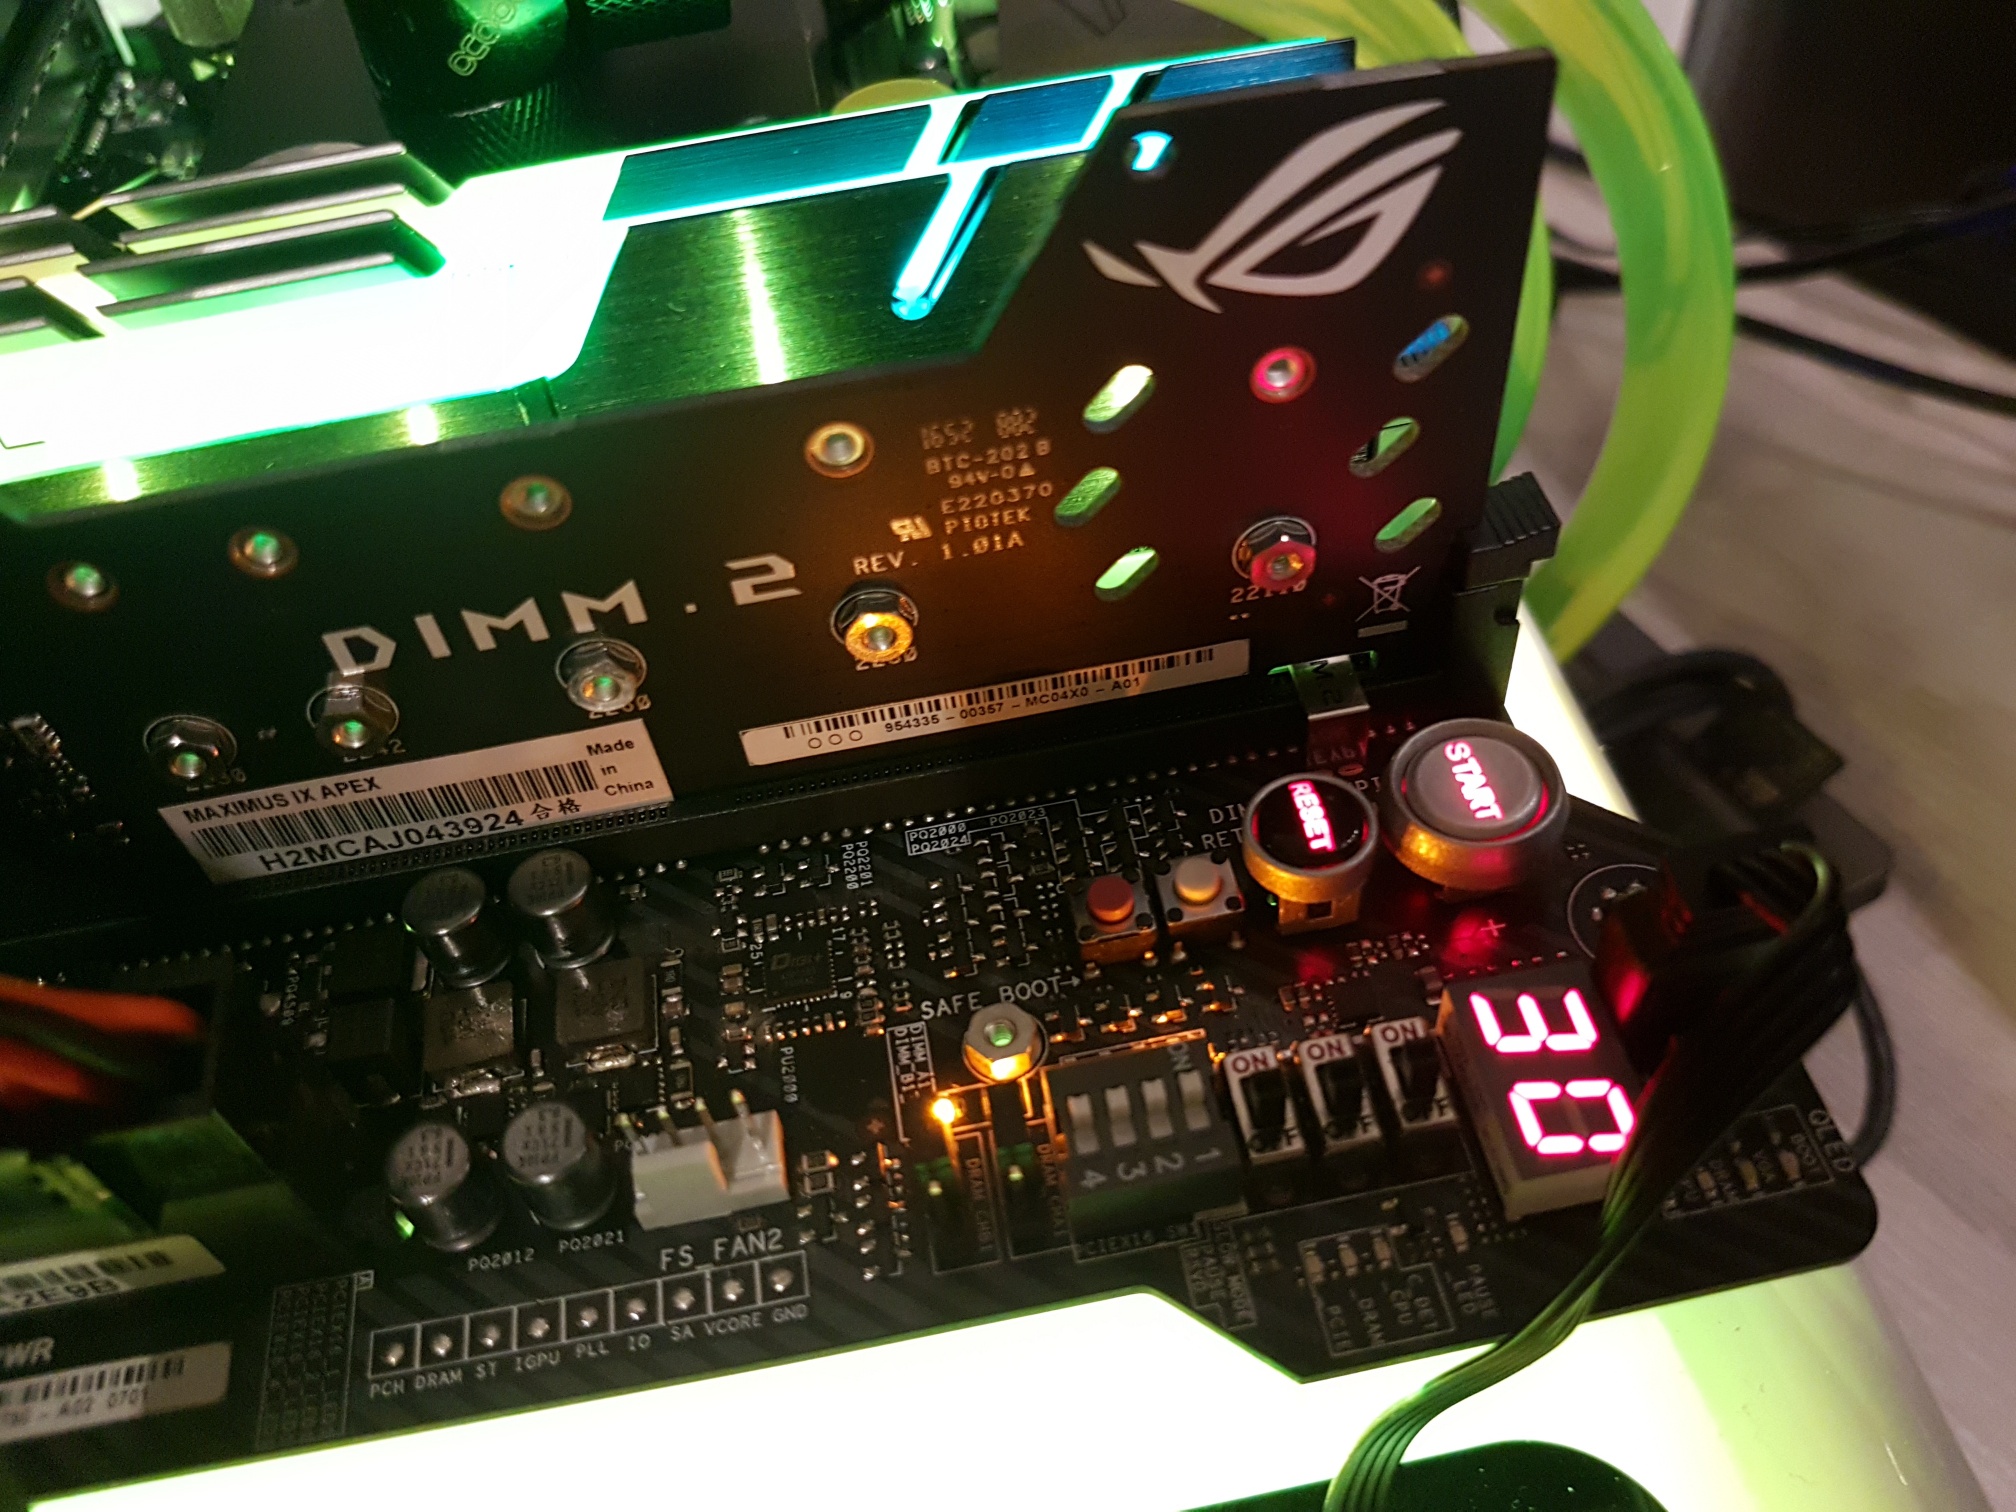
In the top-right corner of the motherboard we find the OC panel. We have four switches to disable individual PCI-E slots, an LN2 switch, slow mode and bios reset/retry buttons. To the left of the OC panel we have the traditional power-on and reset button.
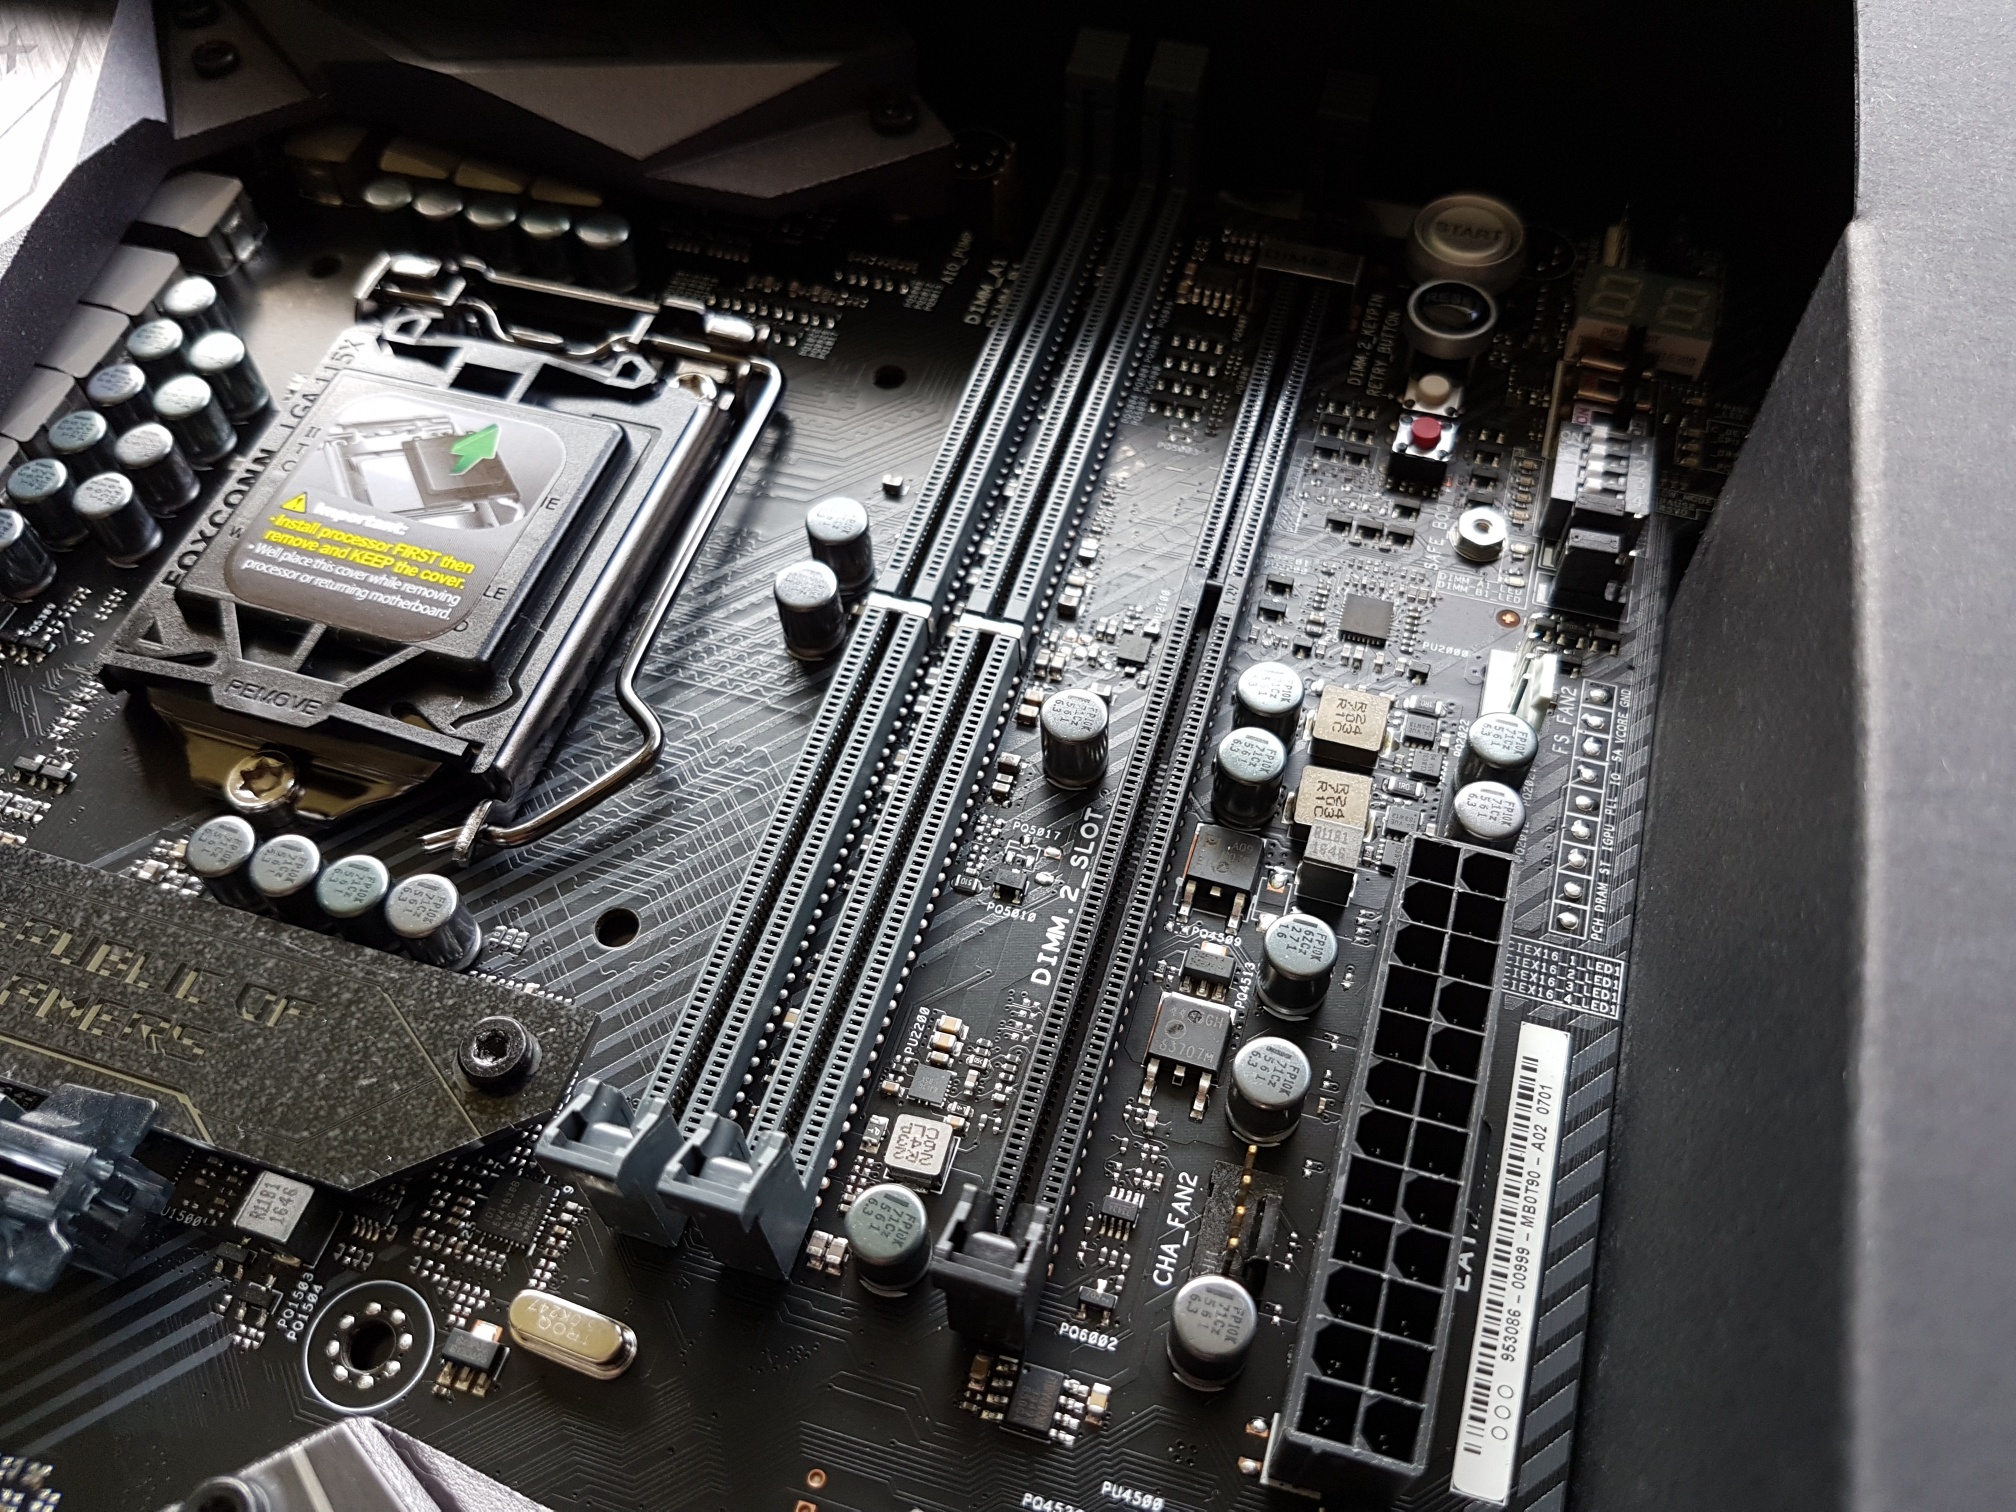
The most striking feature, or for some lacking feature, are just two 4.266 Mhz DDR4 Dimm slots making room for an exotic dual M.2. riser (DIMM.2) card.
Despite having only two Dimm slots, overclockers prefer it that way as more populated Dimms put more strain on memory controllers and VRMs, limiting overclocks at a certain point.
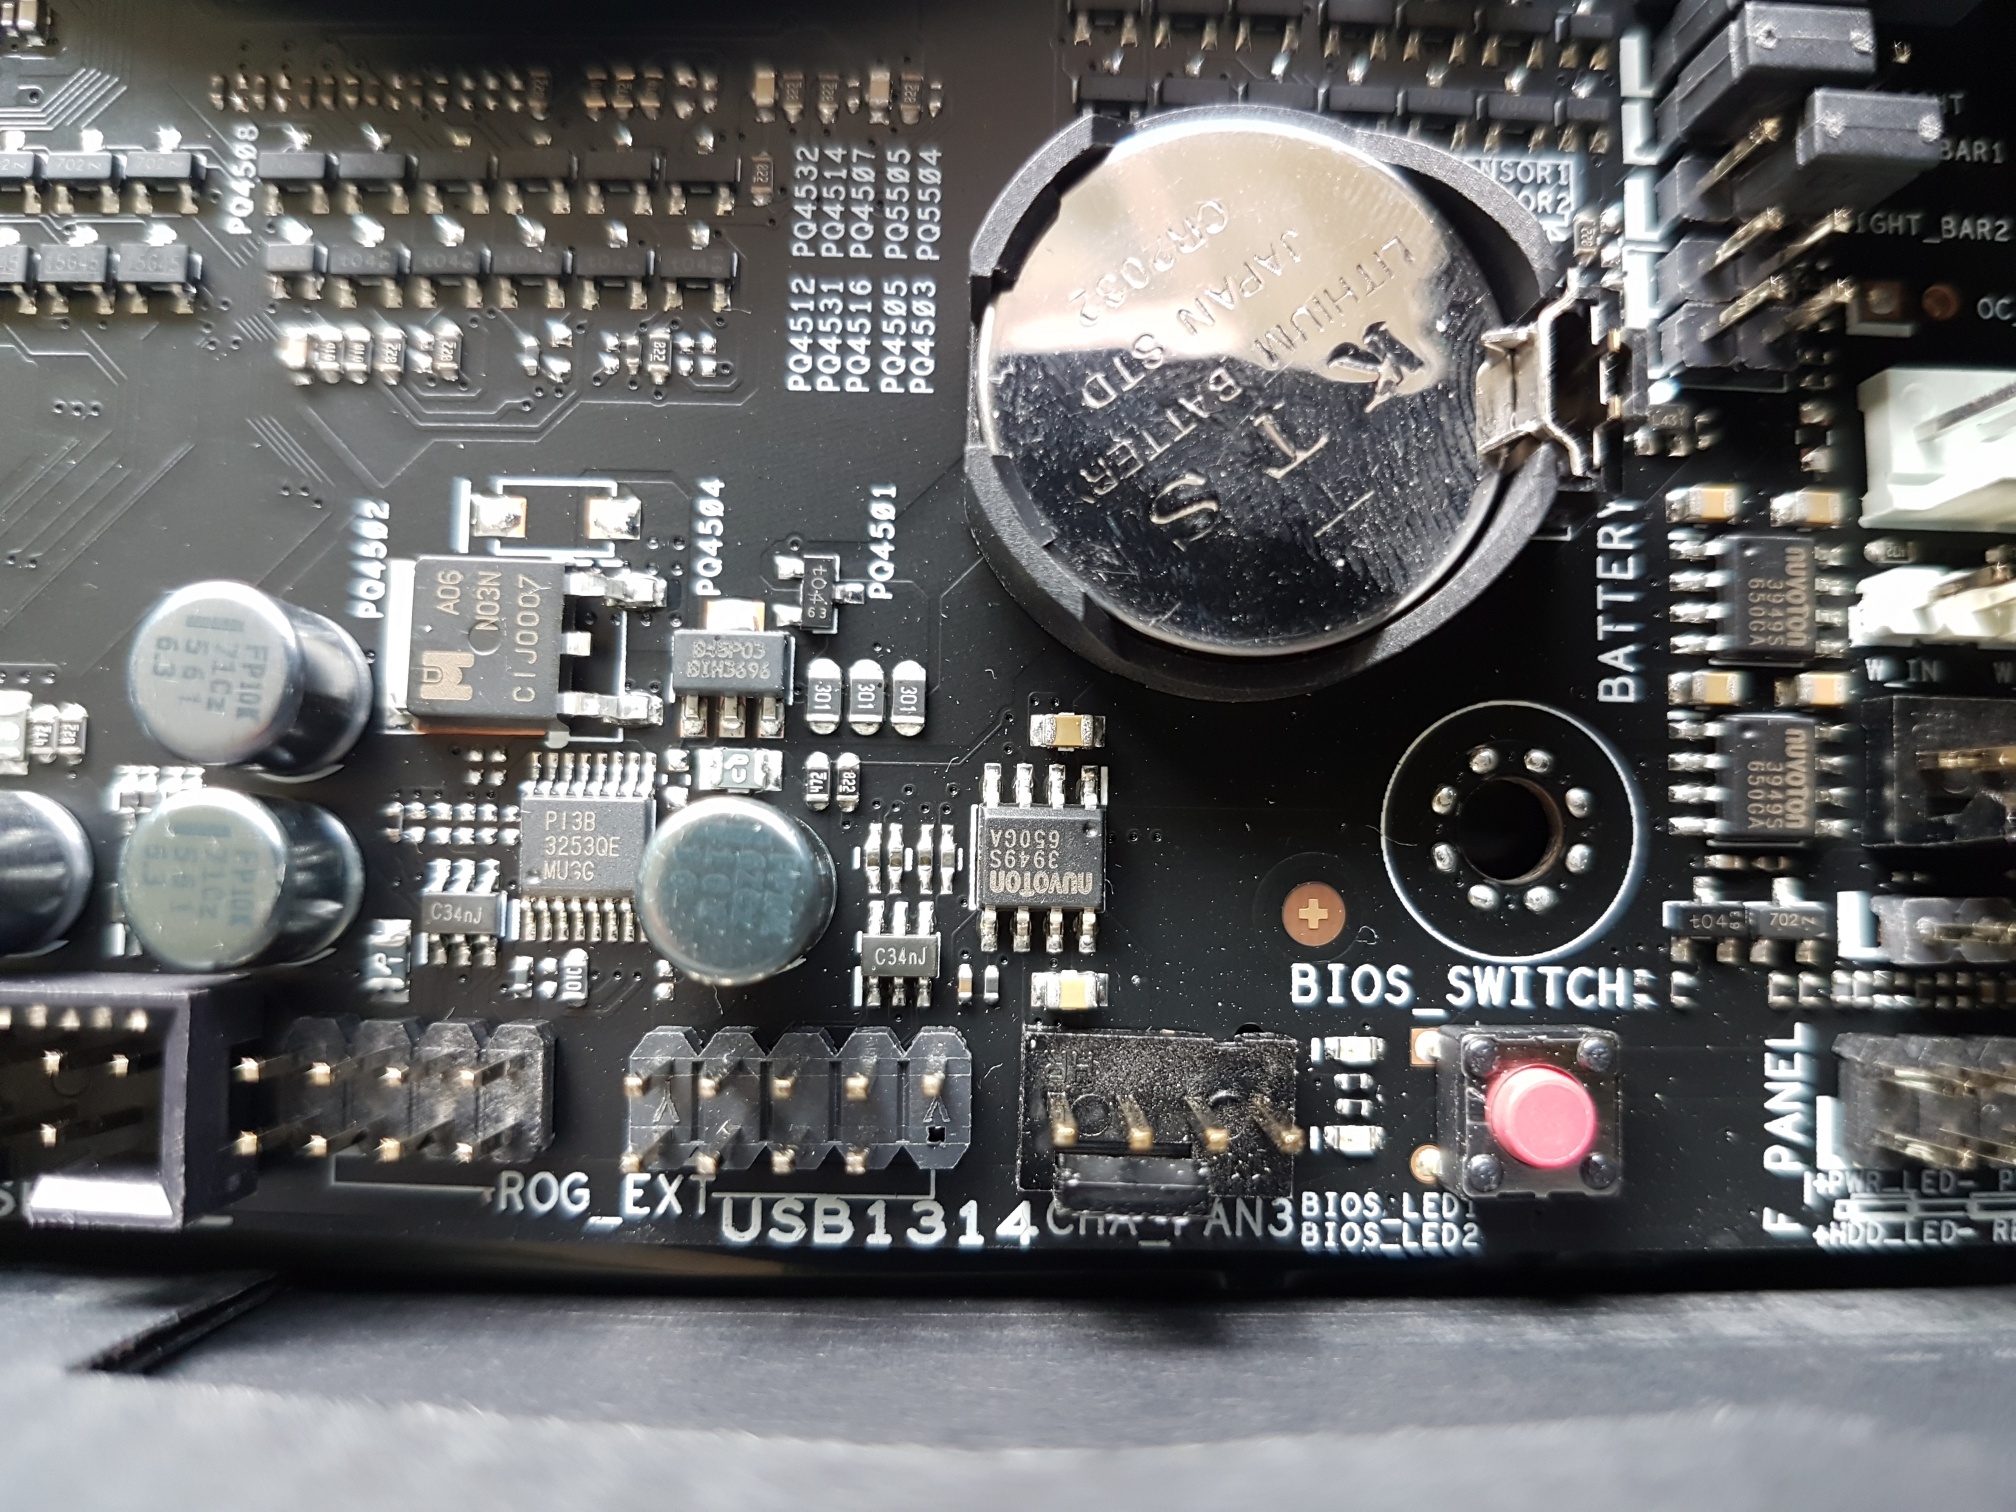
In the right bottom corner of the APEX board we find the bios switch. At the touch of a button you can switch between two bioses and a LED lights indicates which bios is in use. We also see one of the eight Fan connectors of the Asus Z270 Maximus IX APEX.
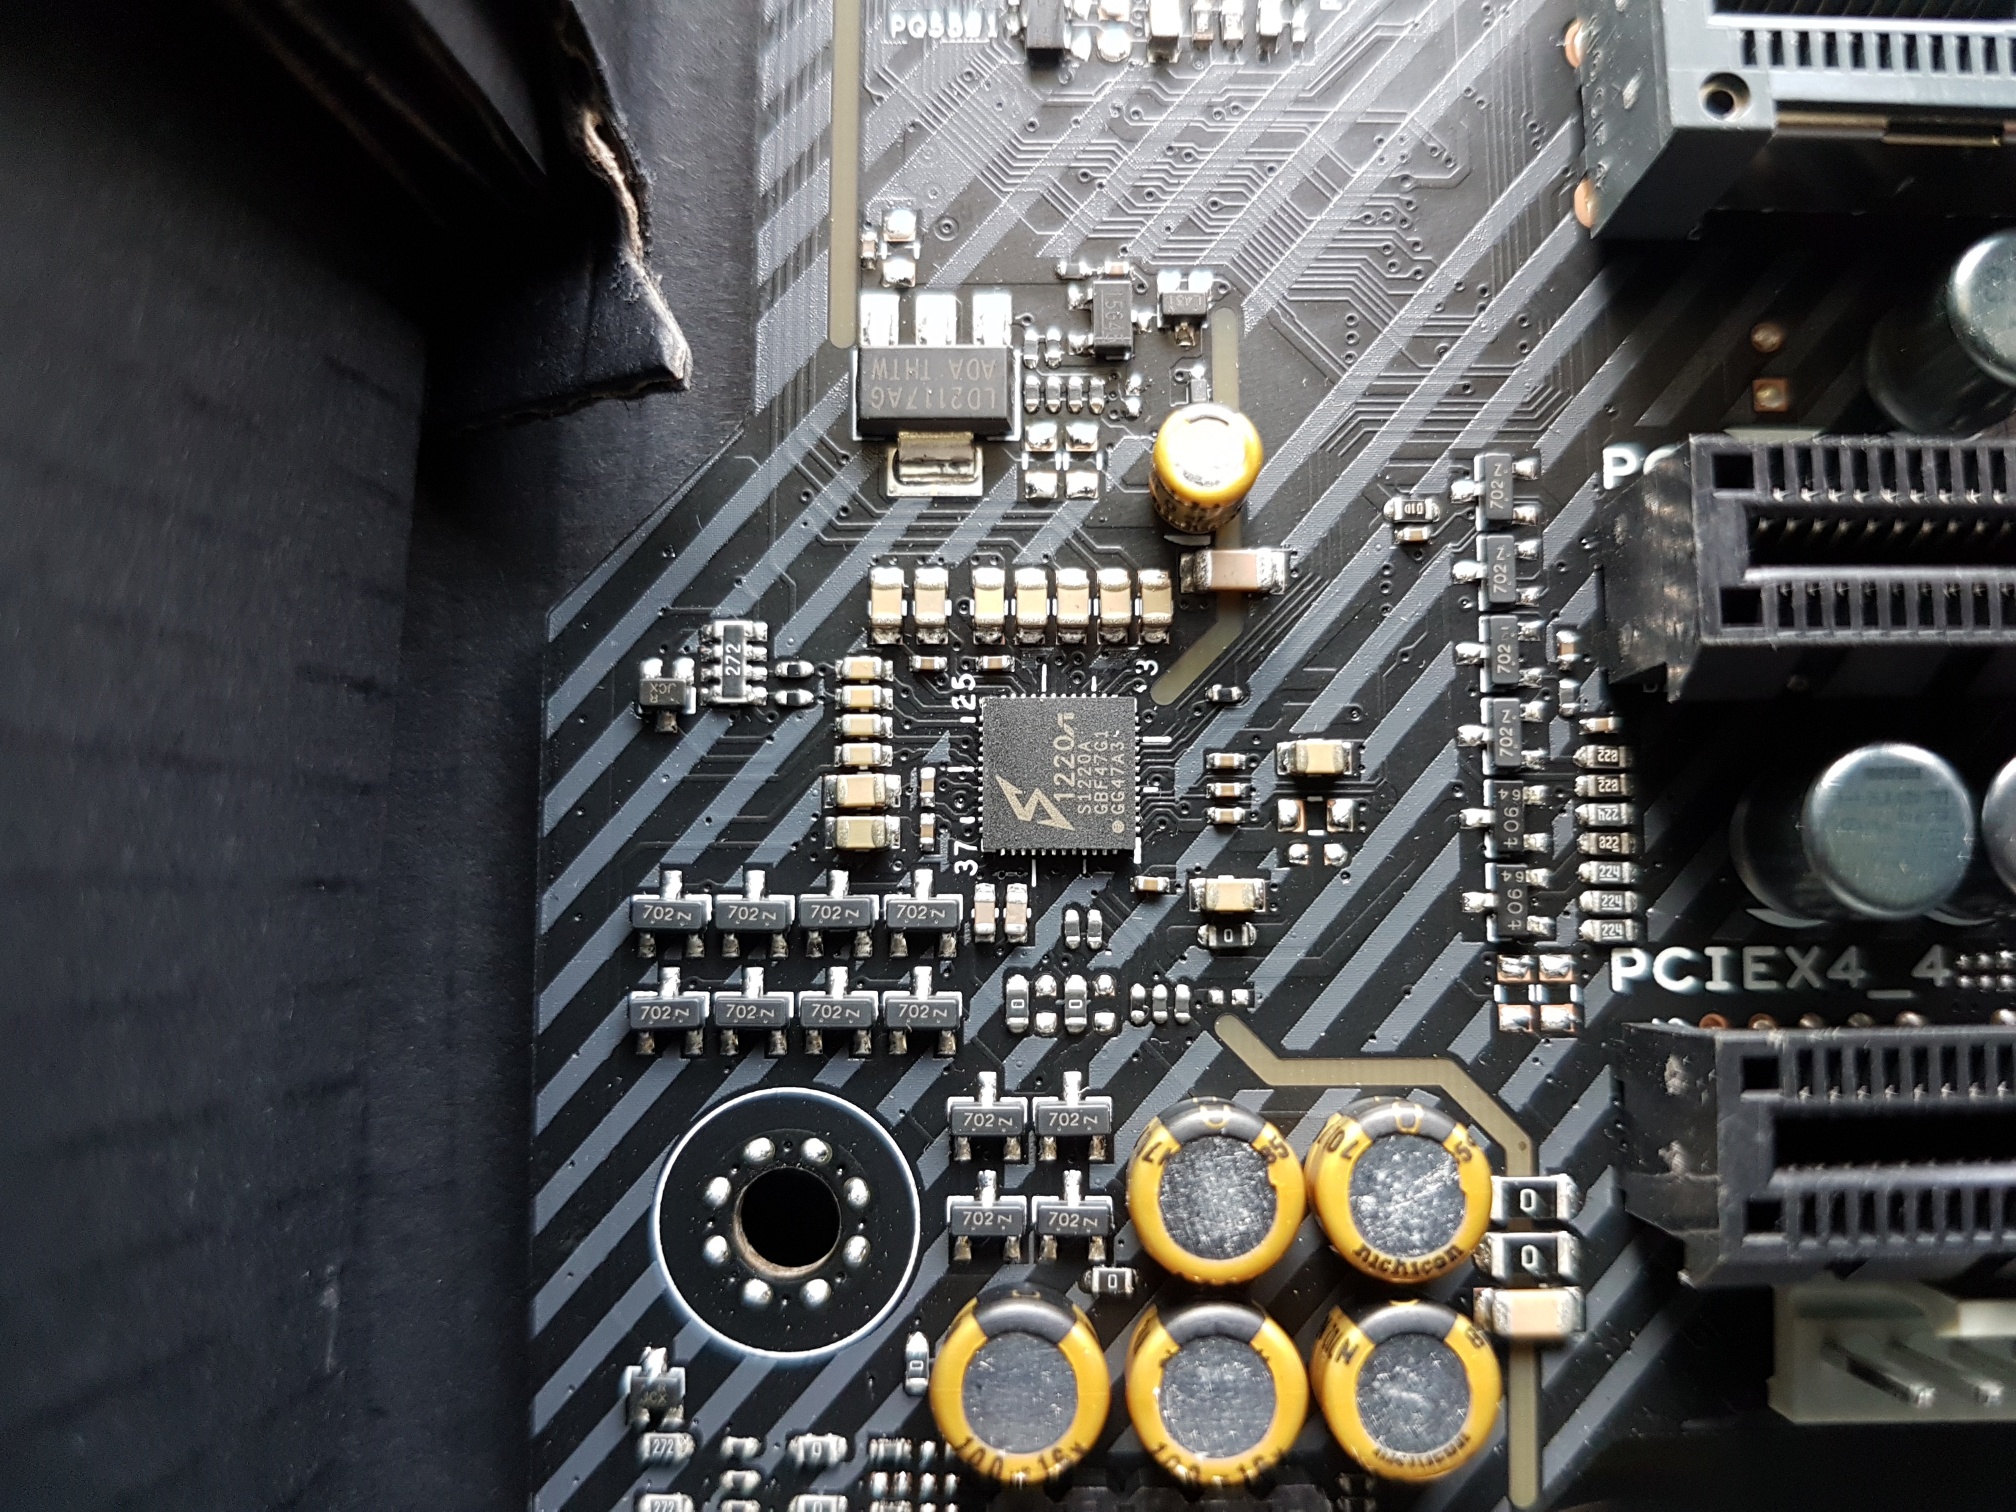
The Asus Z270 Maximus IX APEX features an ESS® ES9023P soundchip capable of a 113dB signal-to-noise ratio on the line-in connection and 120dB on line-out.
The Final build
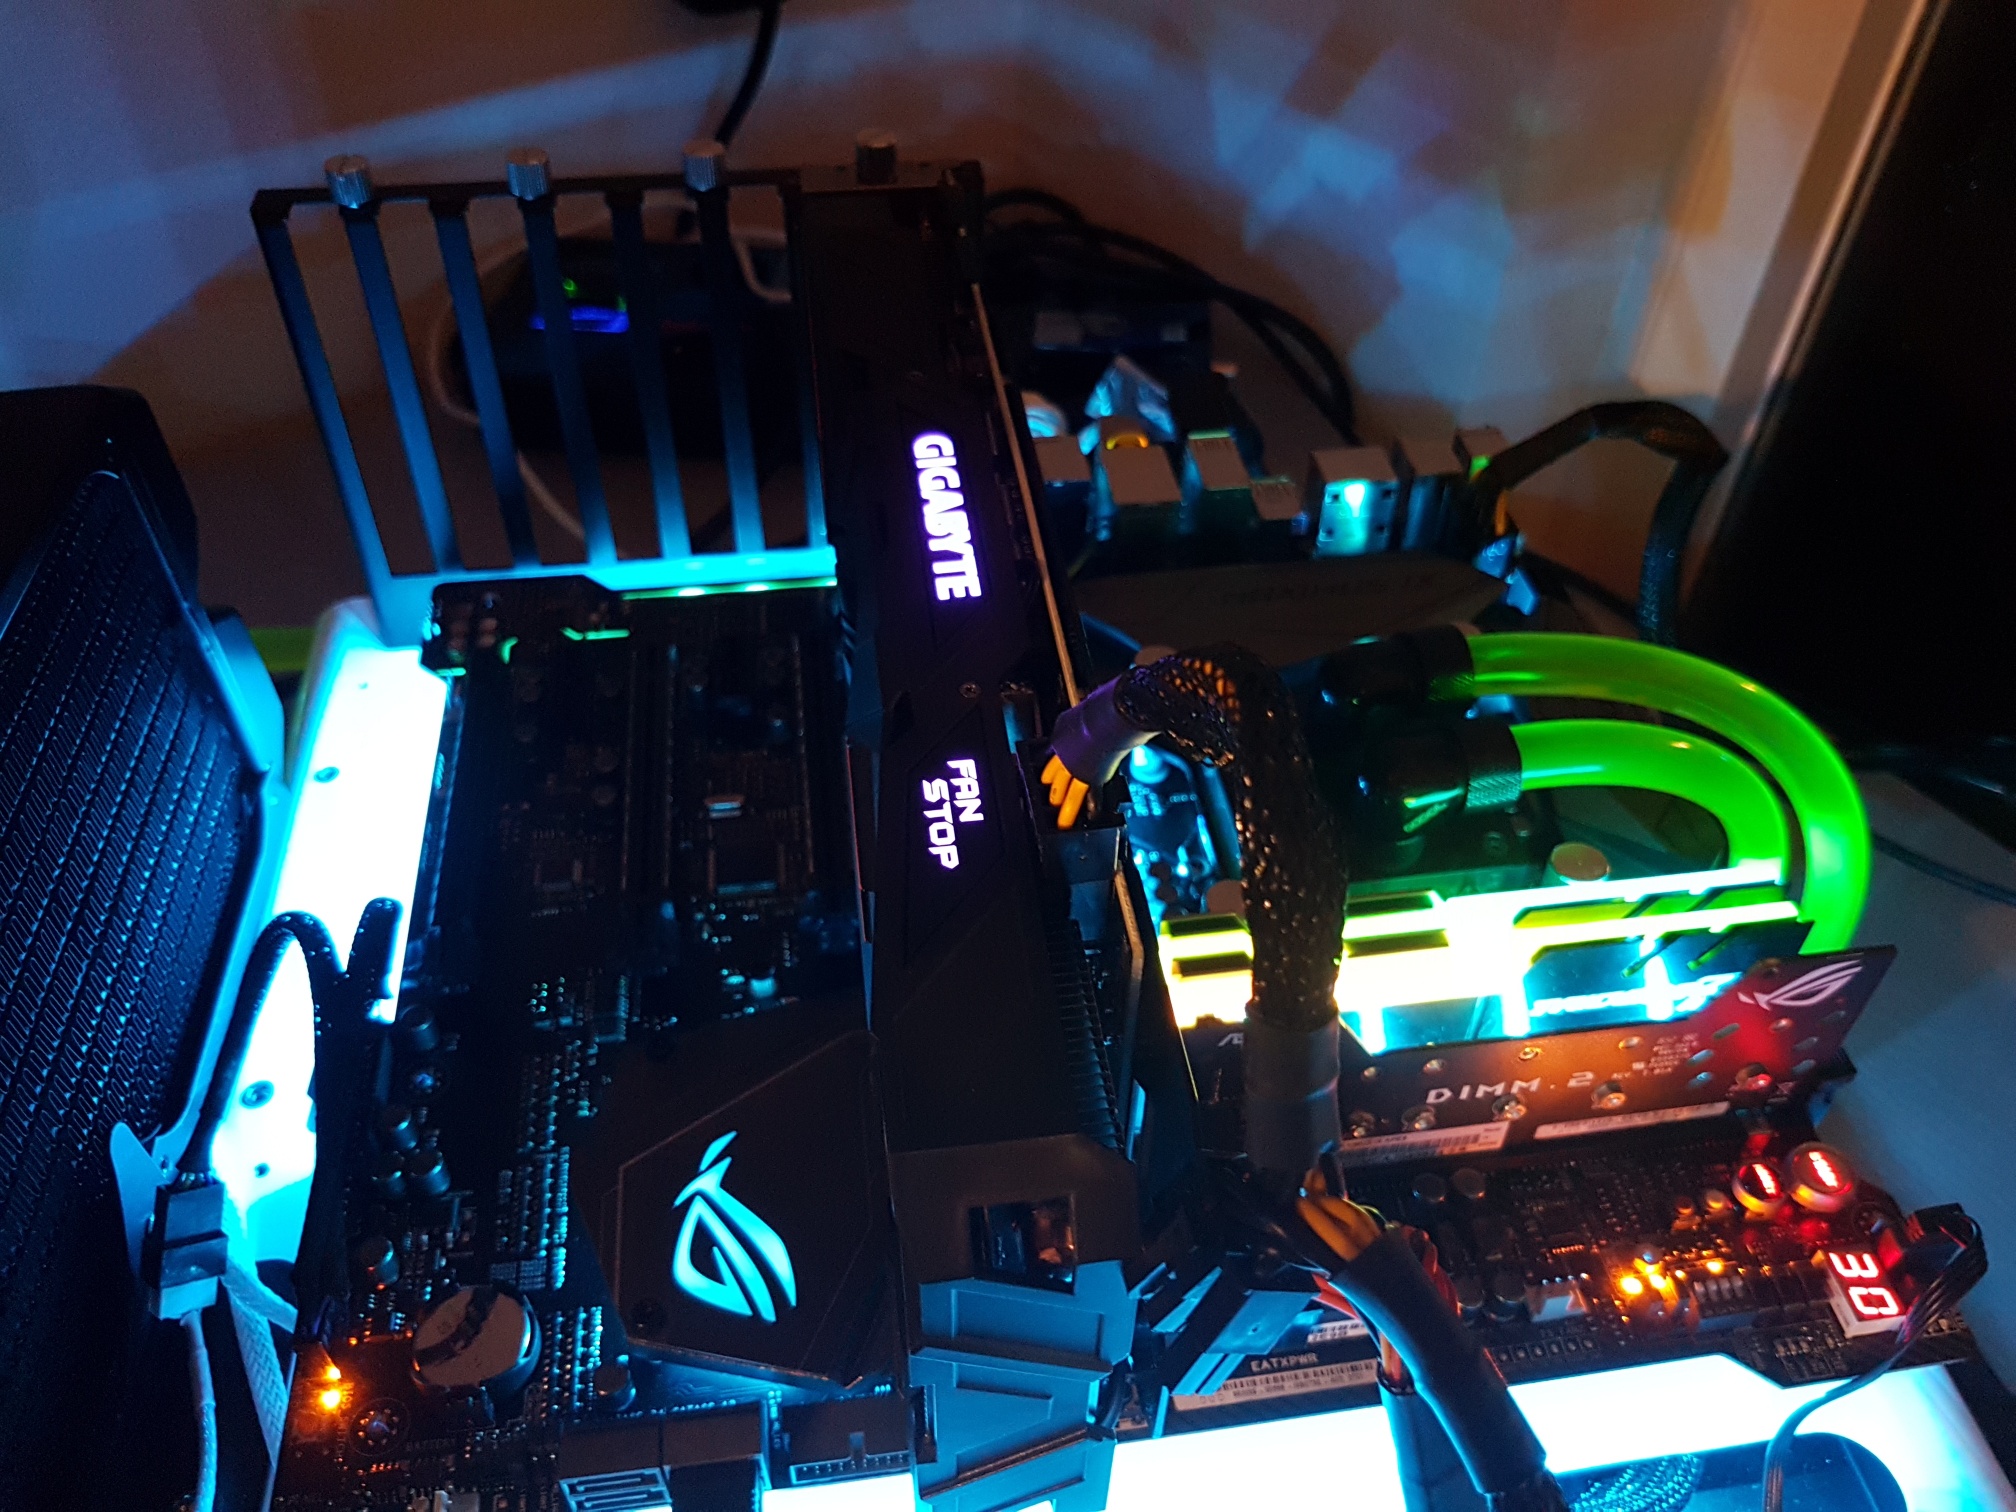
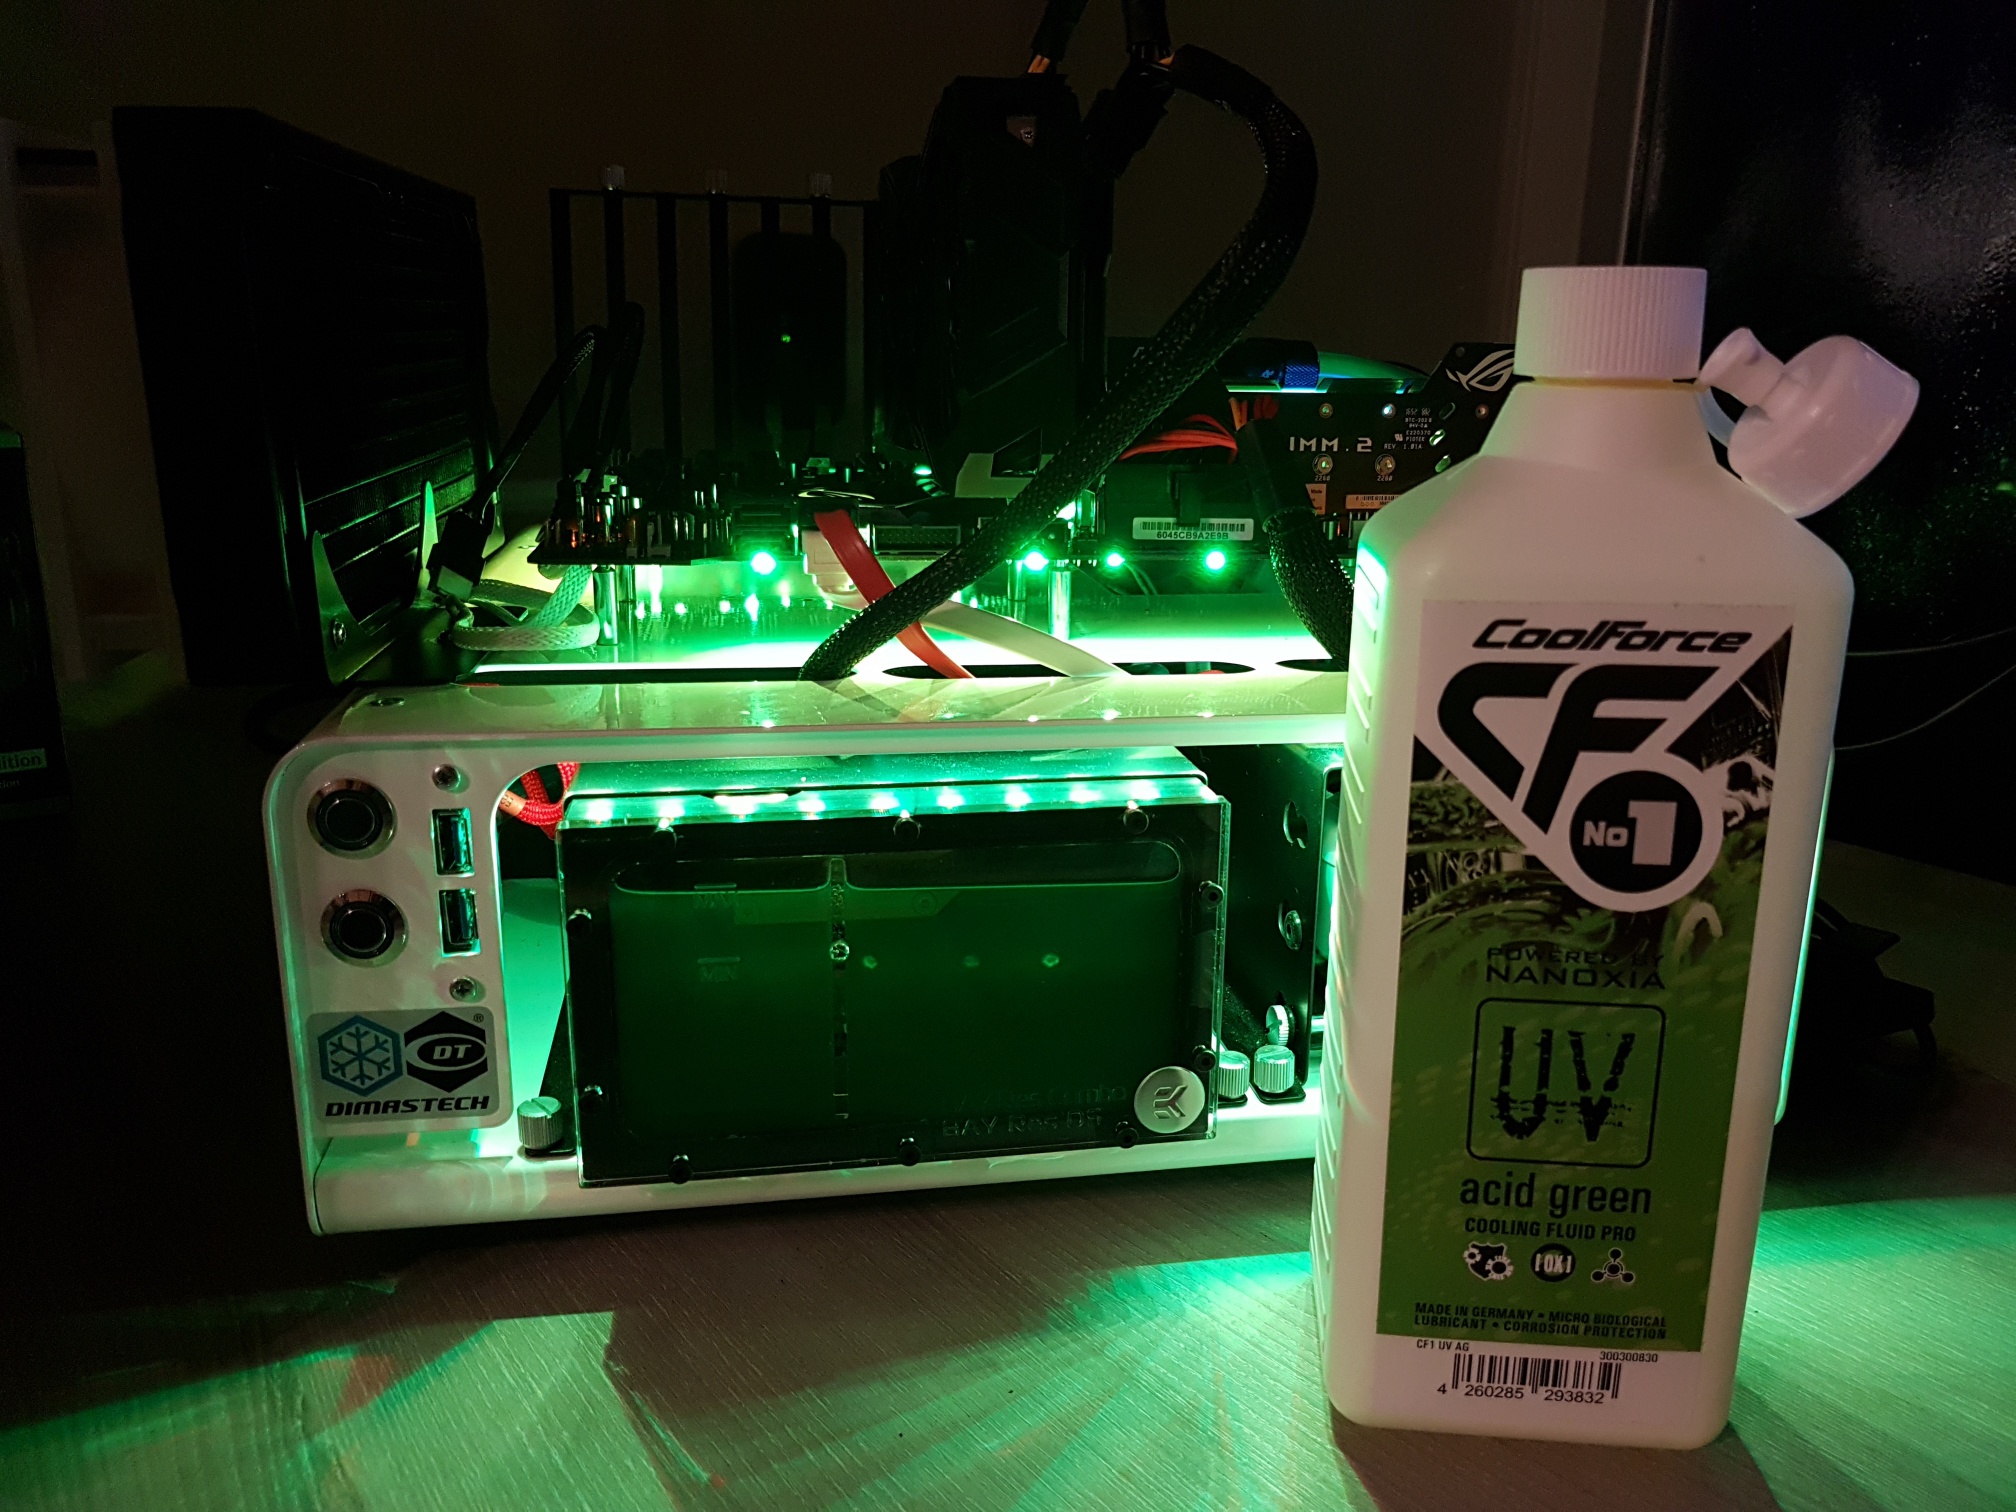
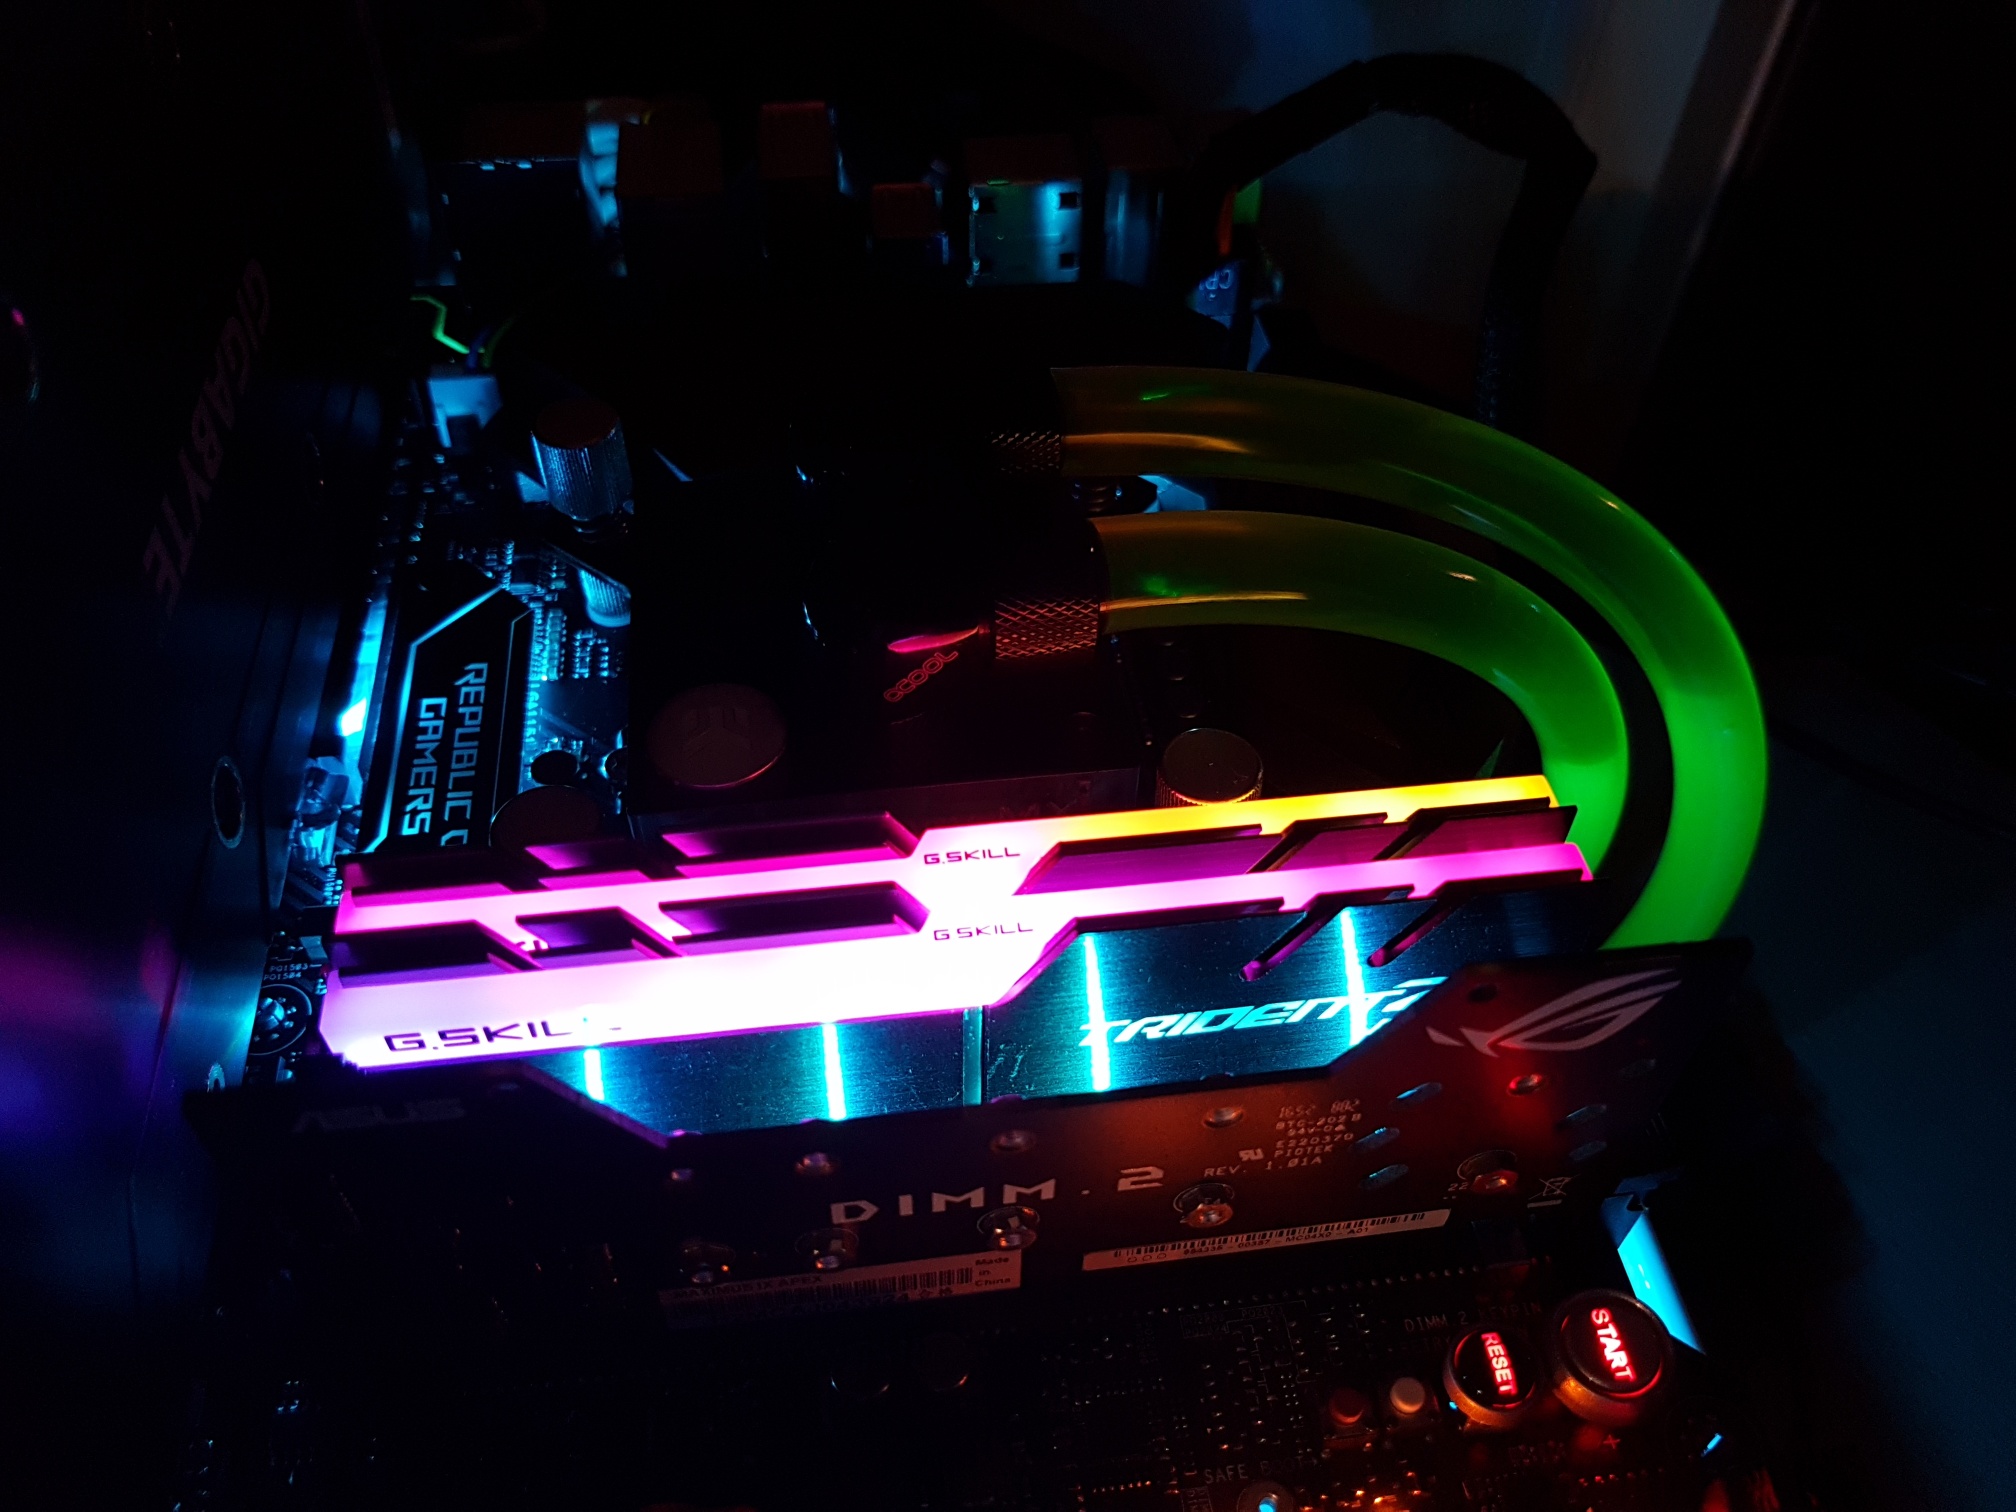
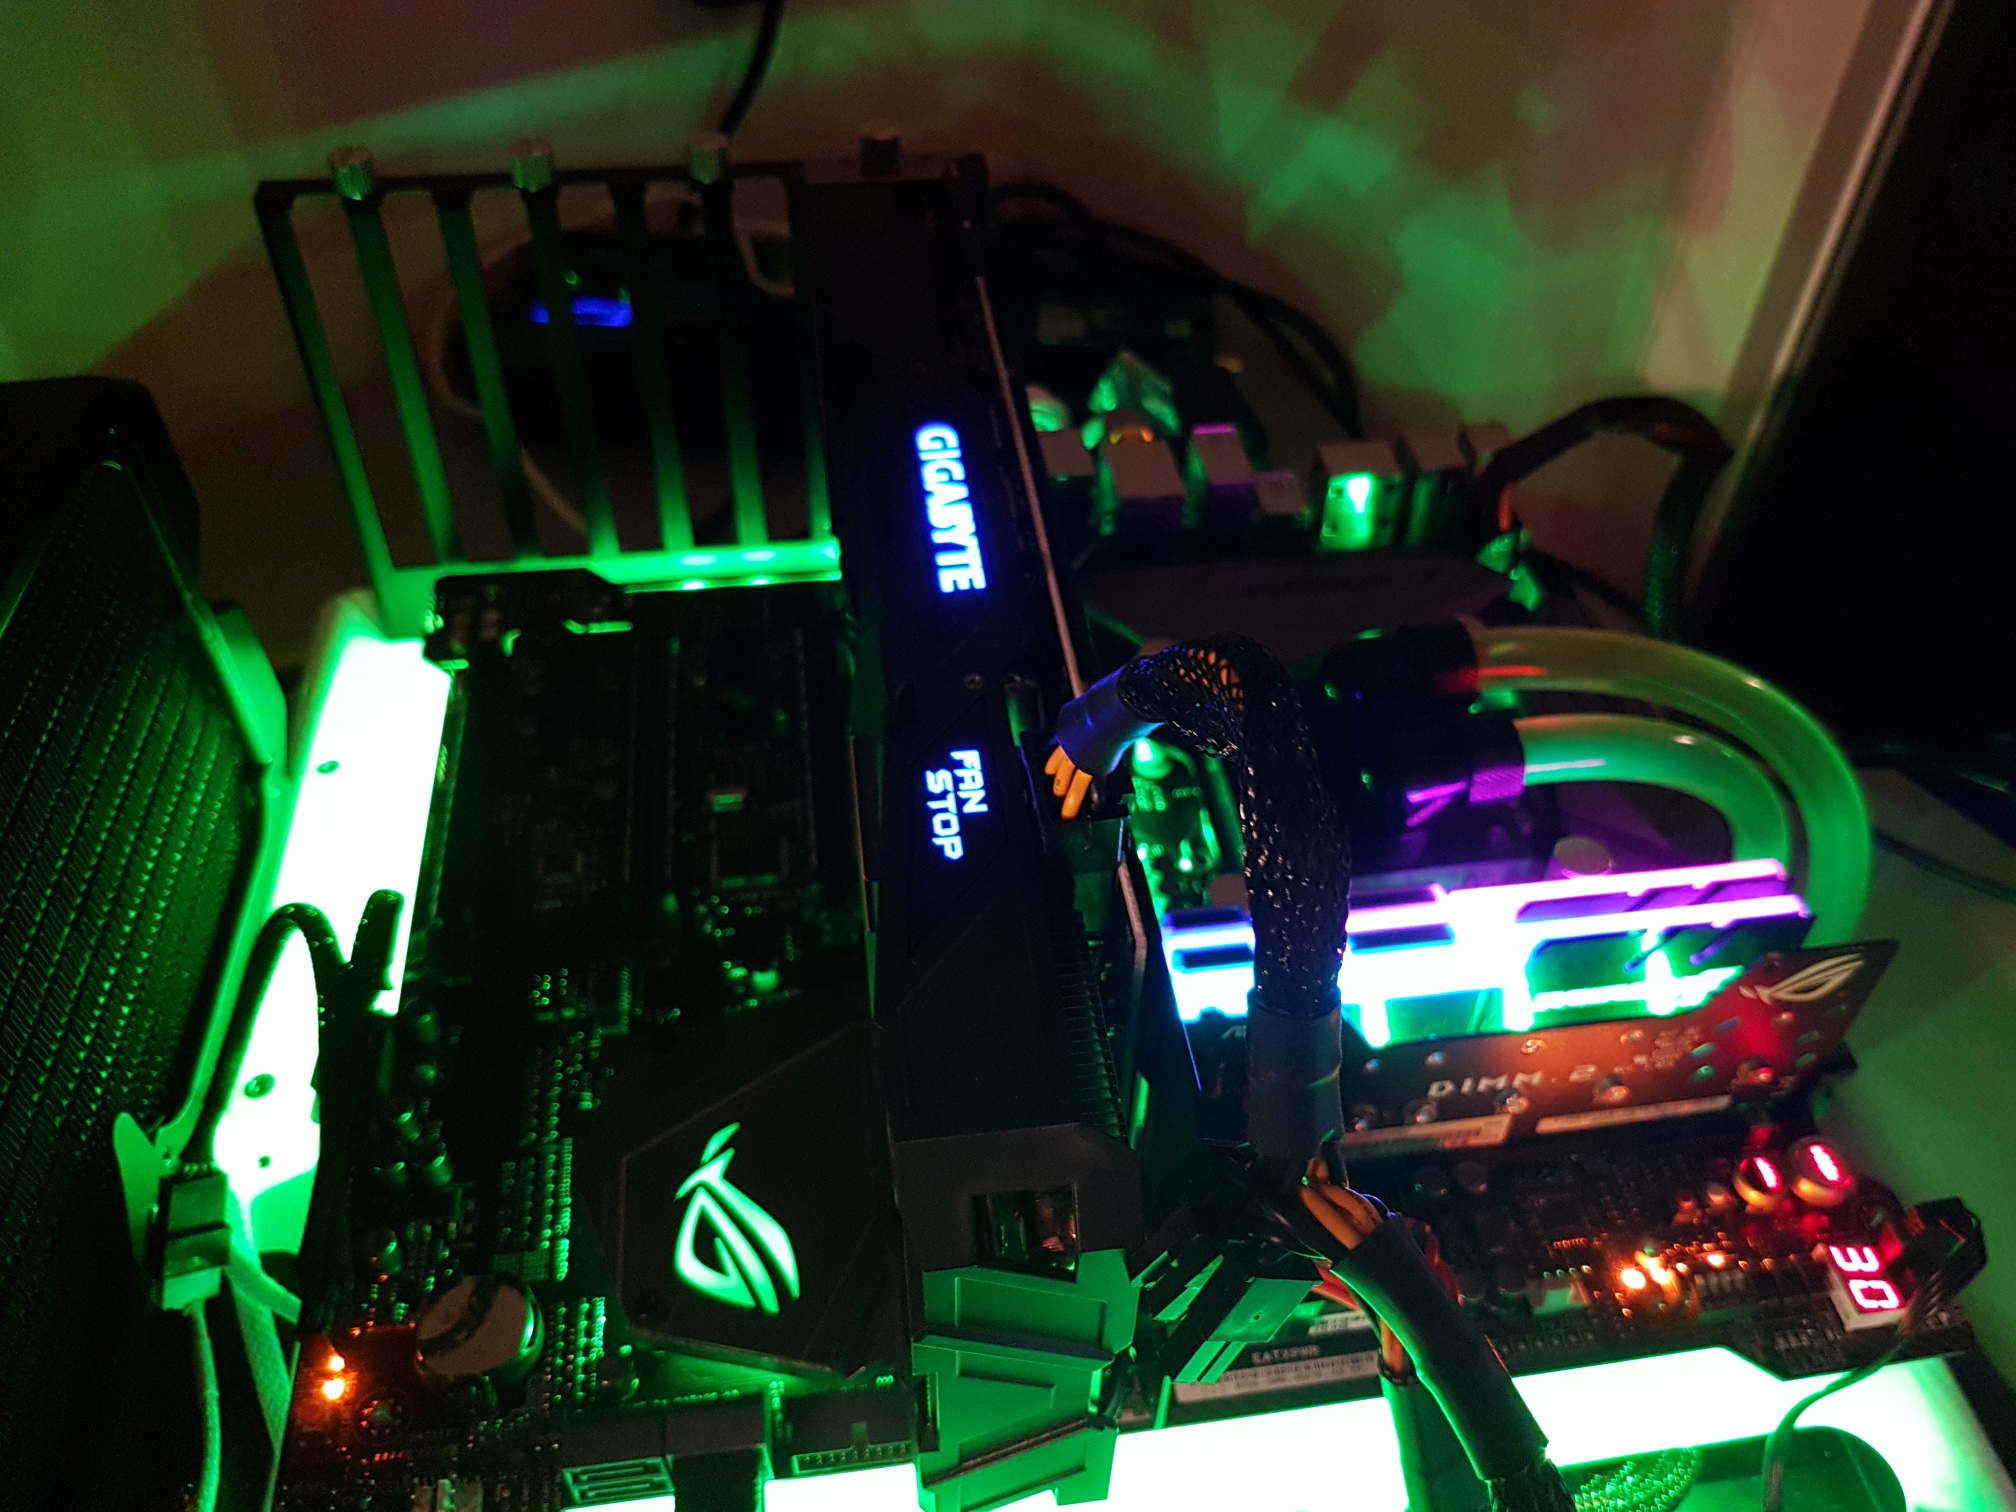
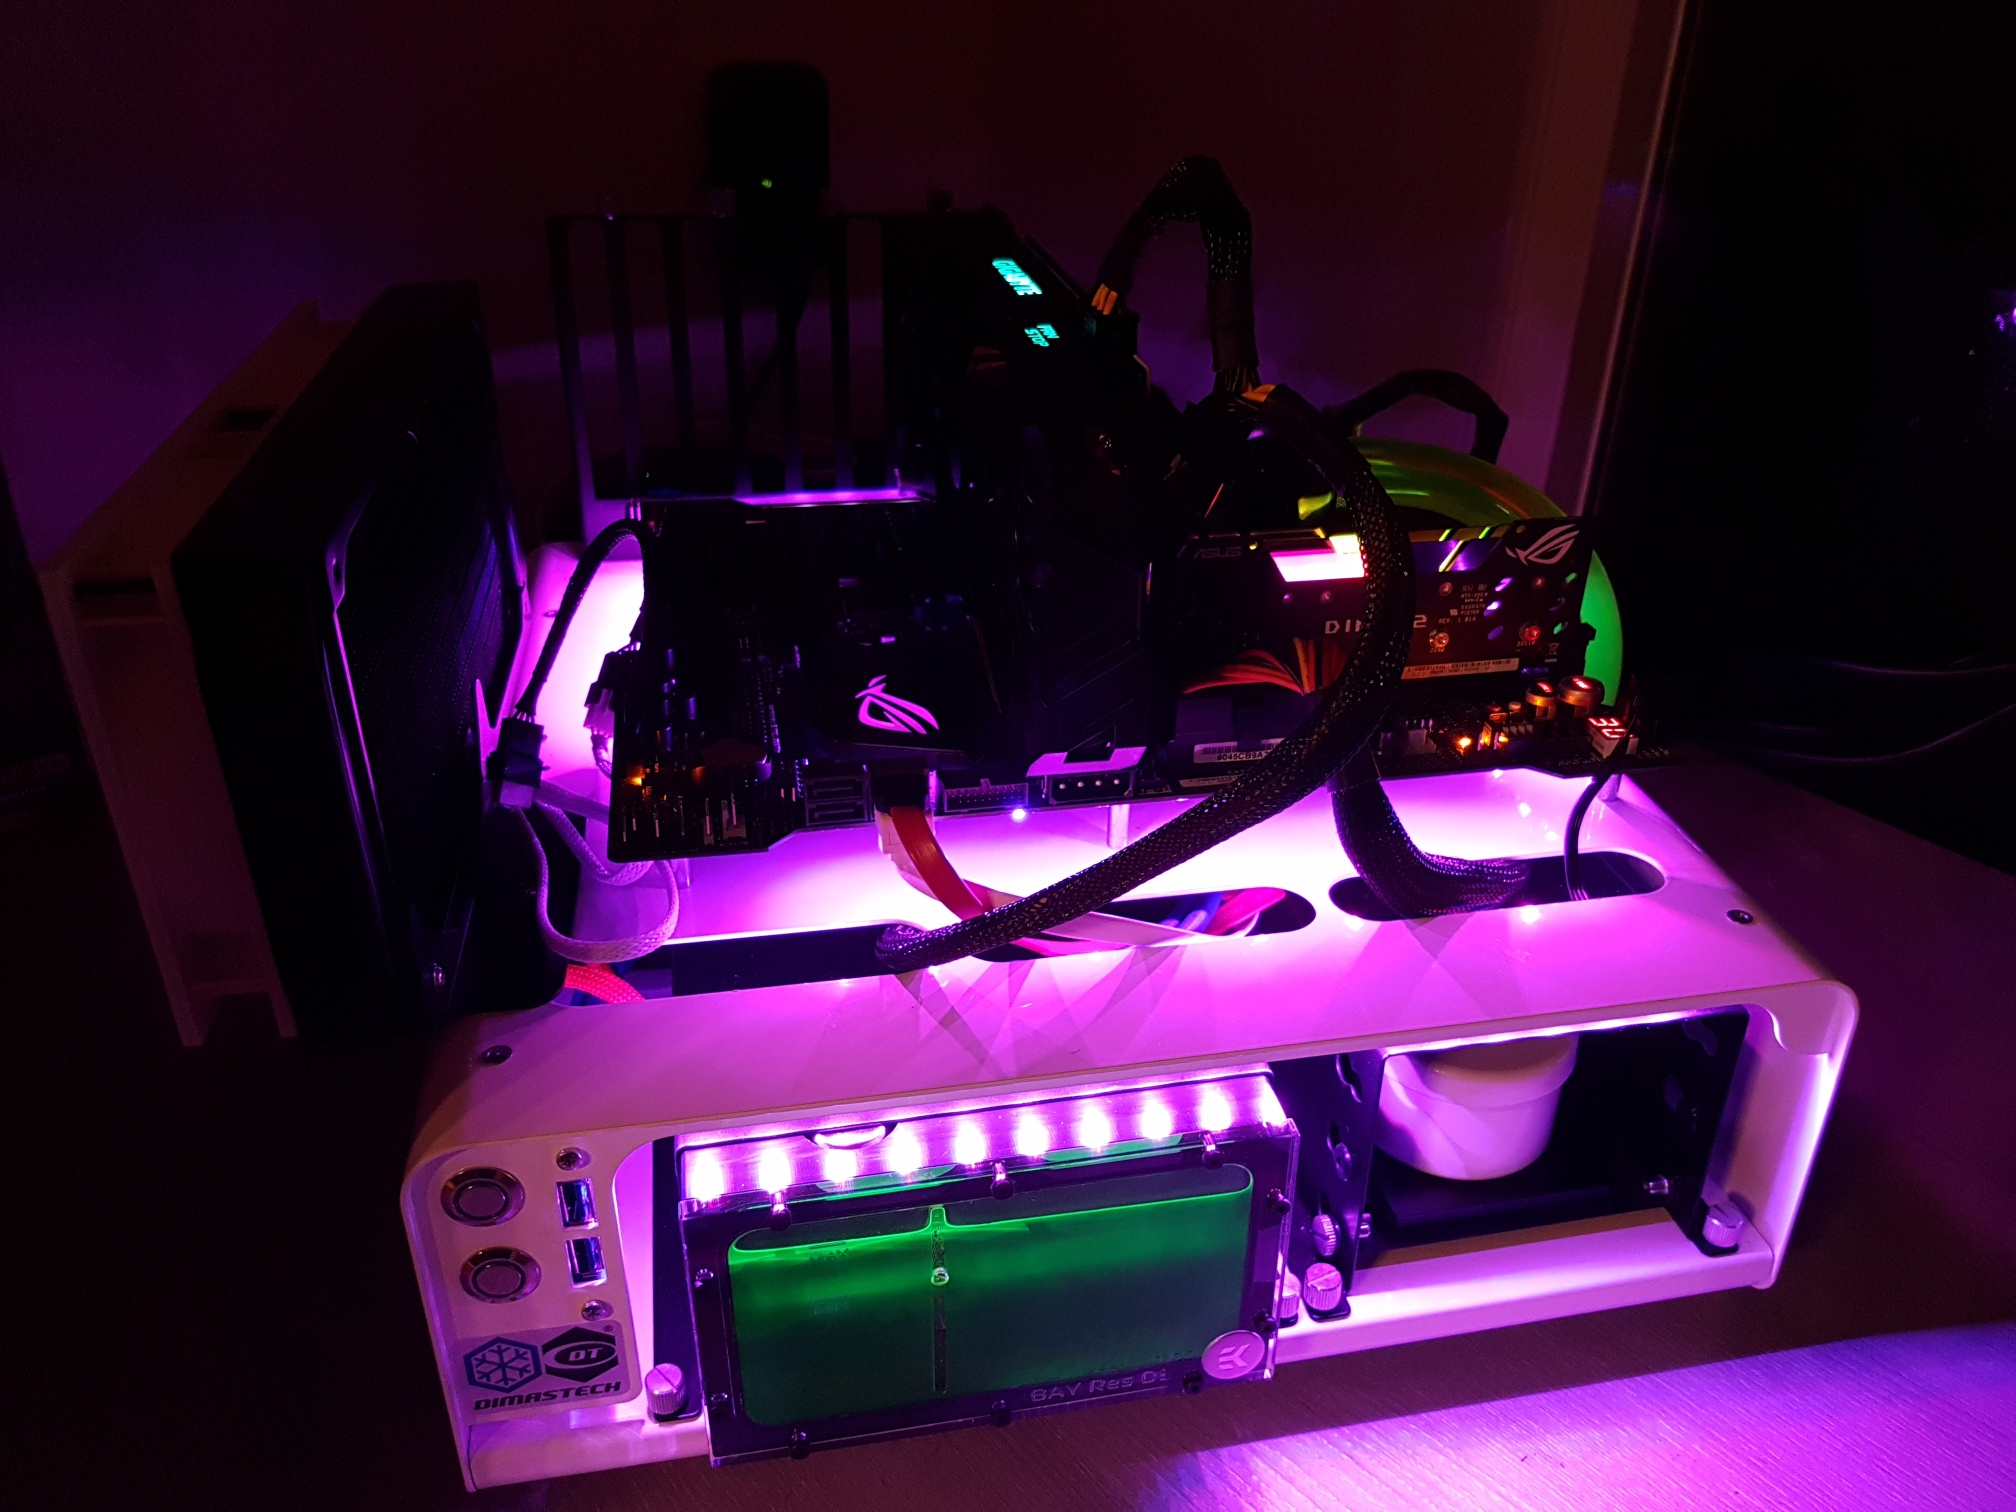
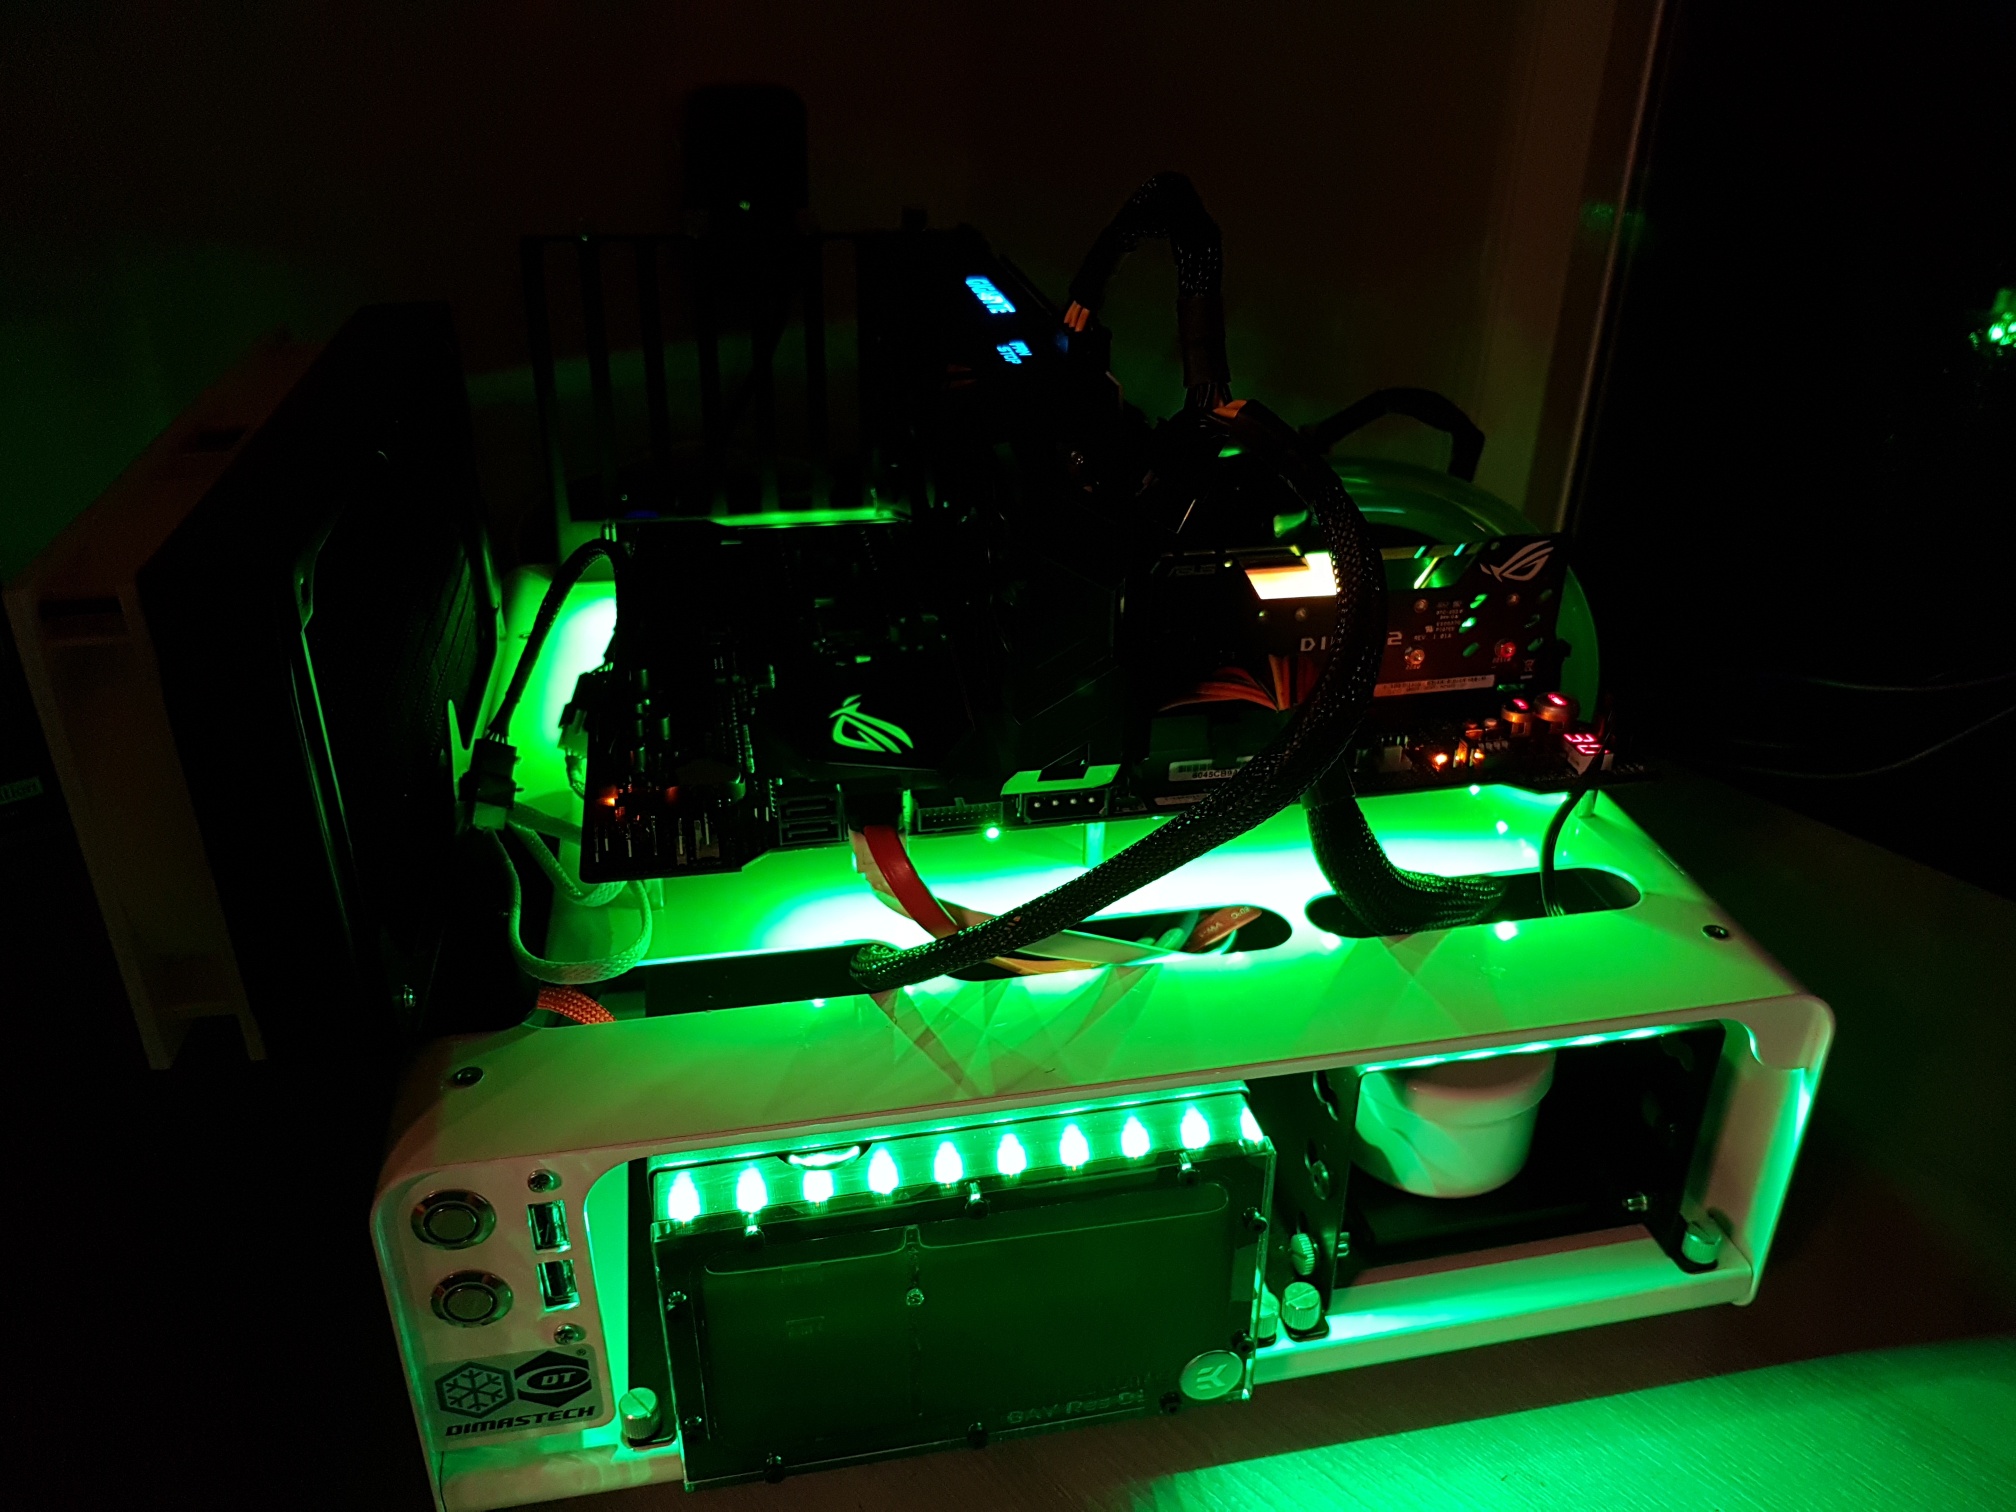
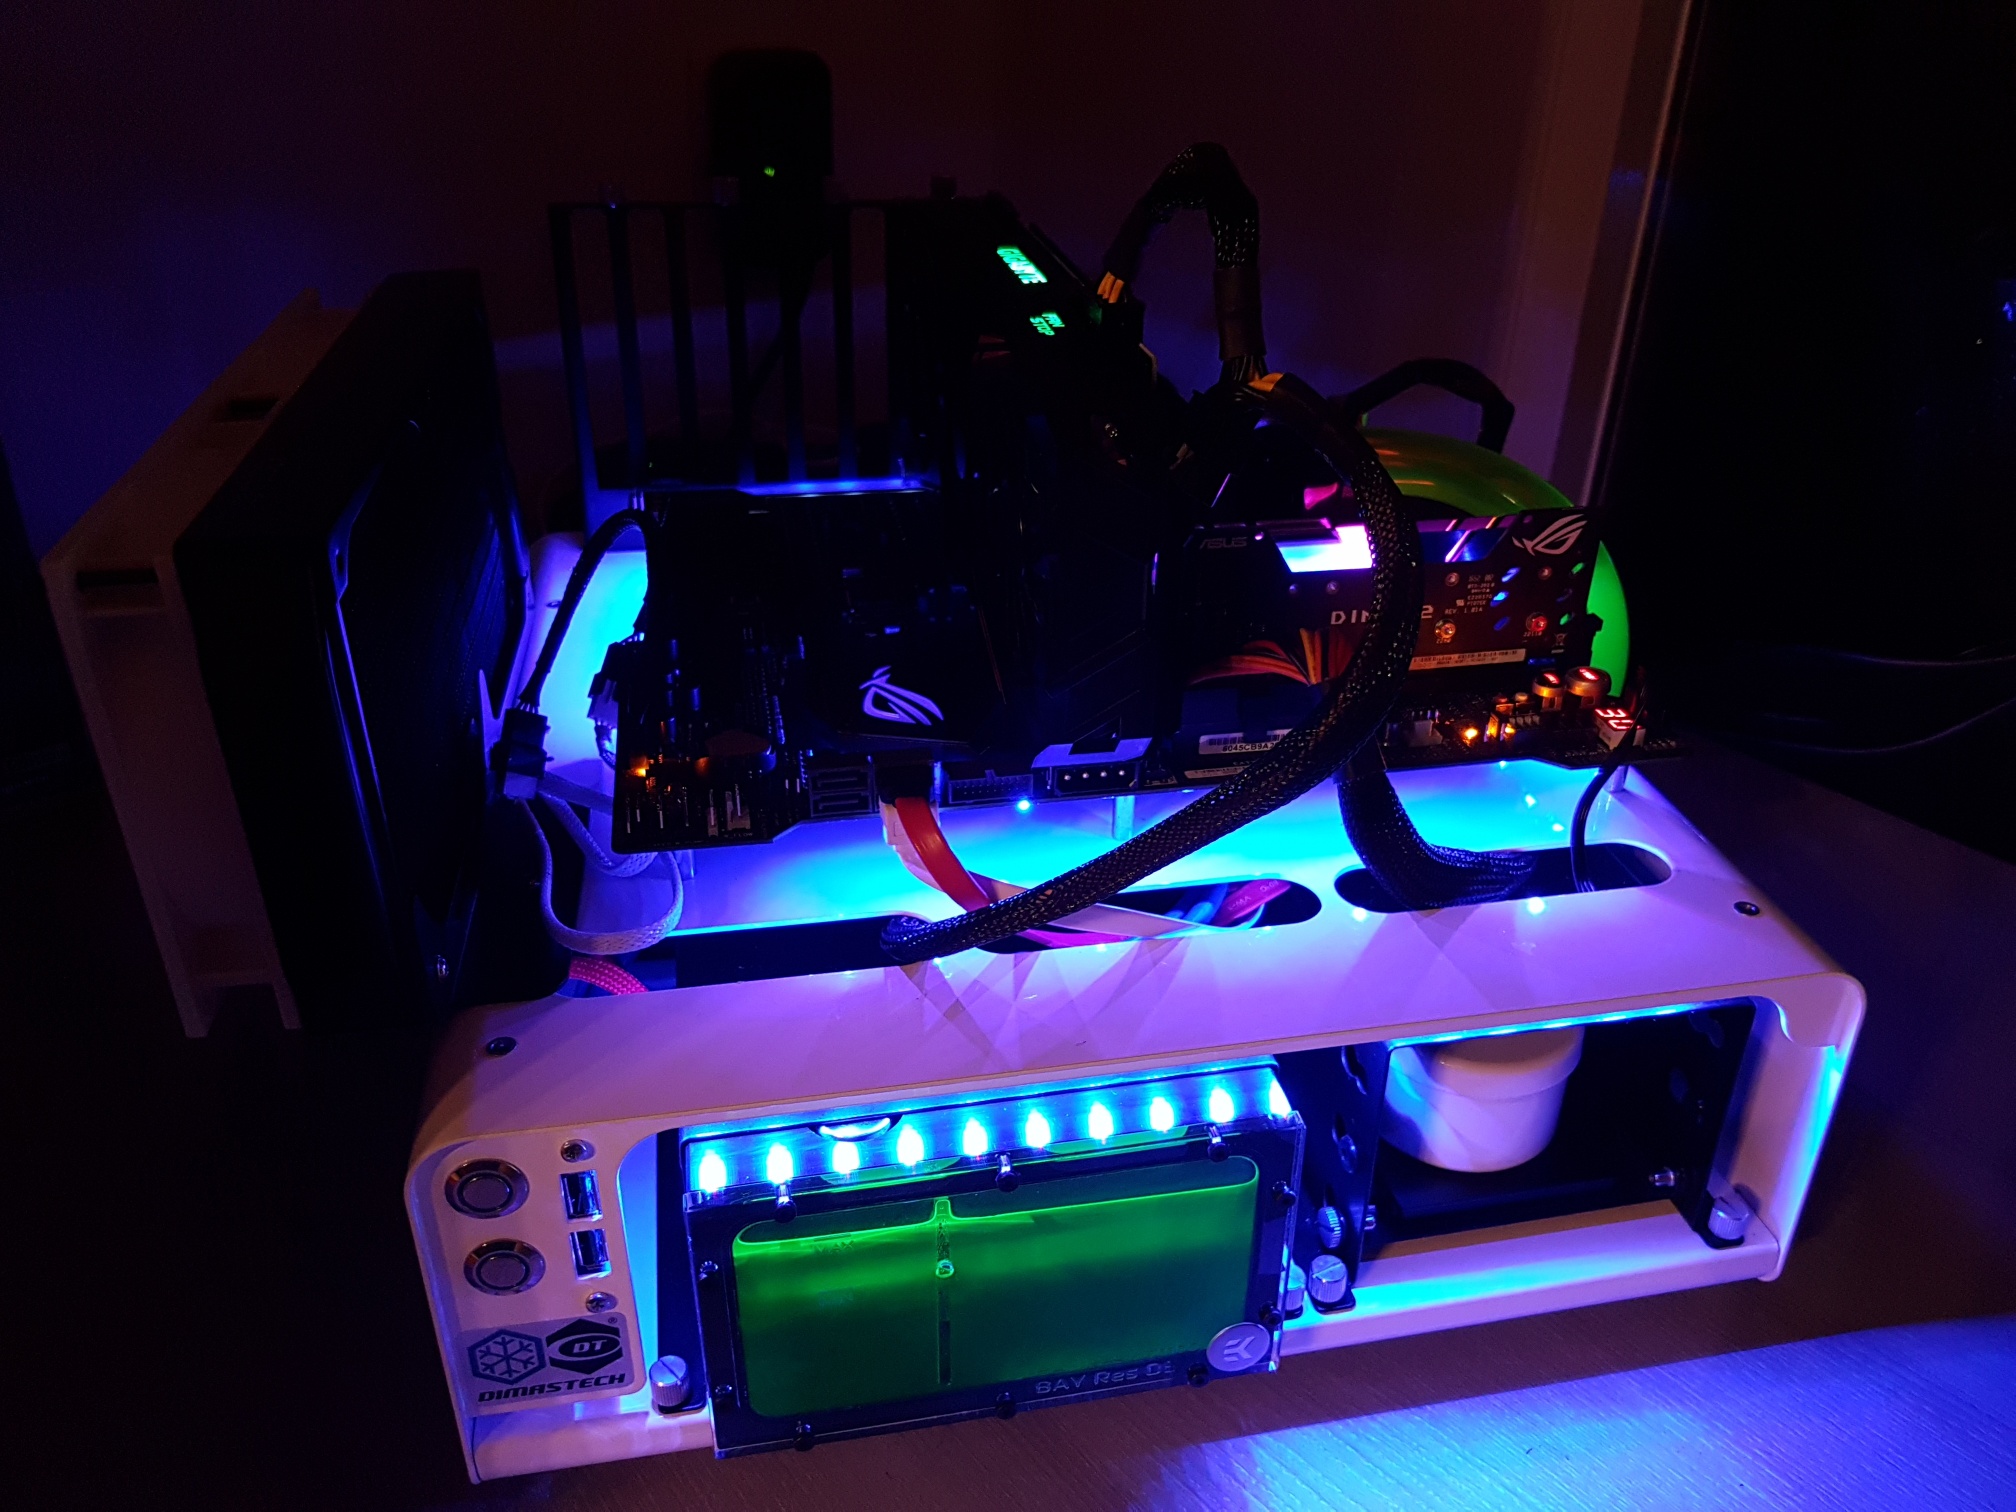
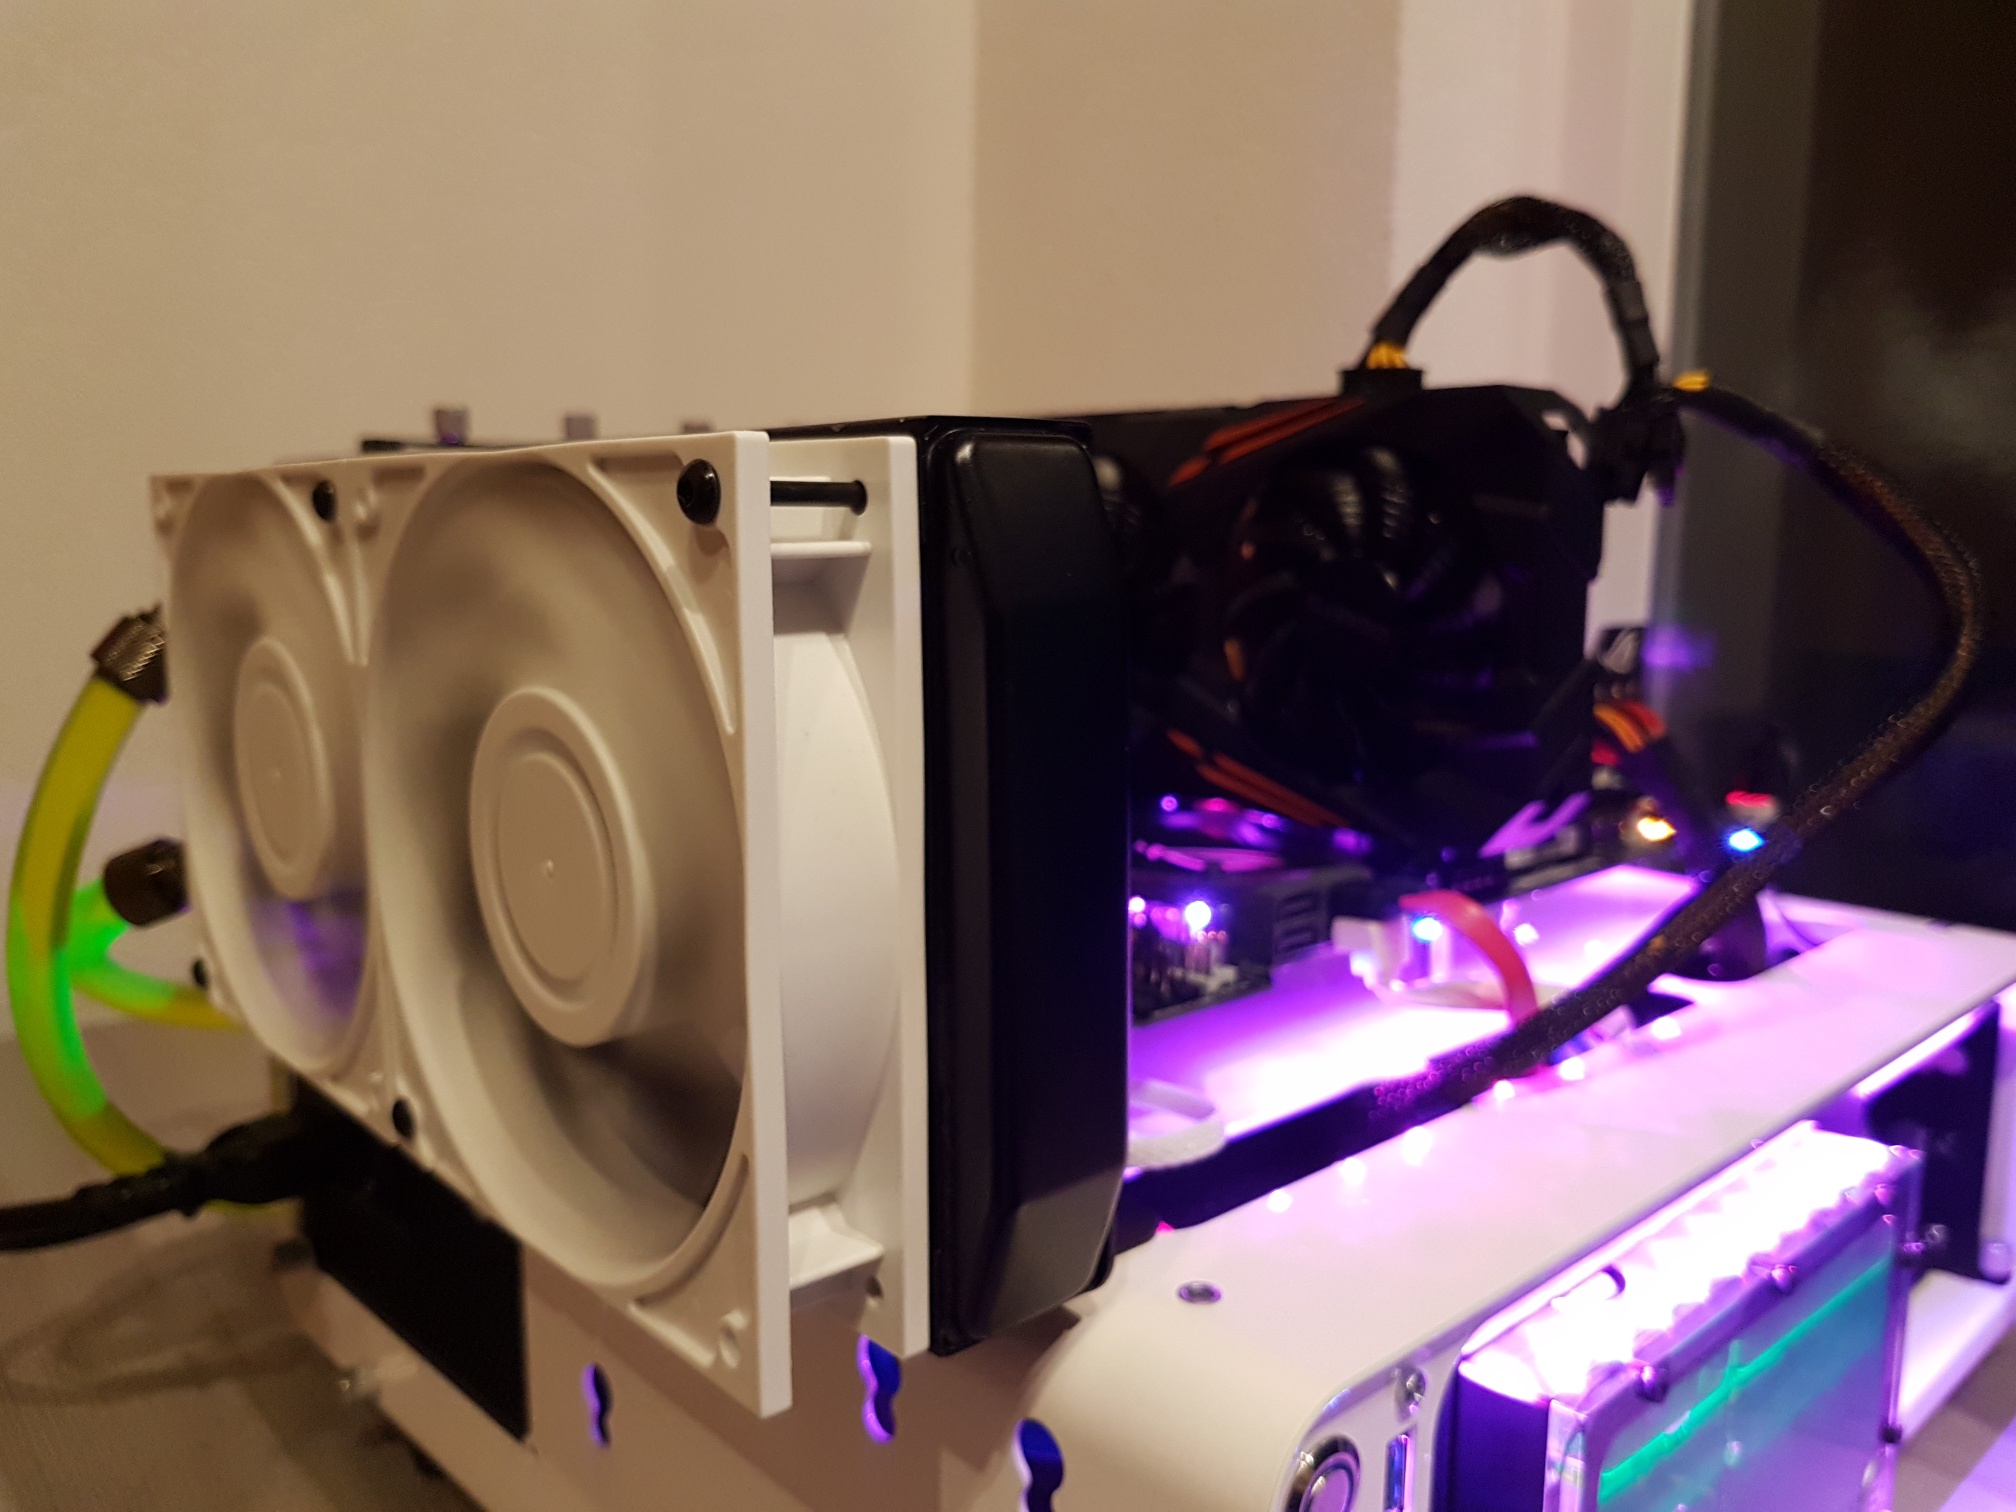
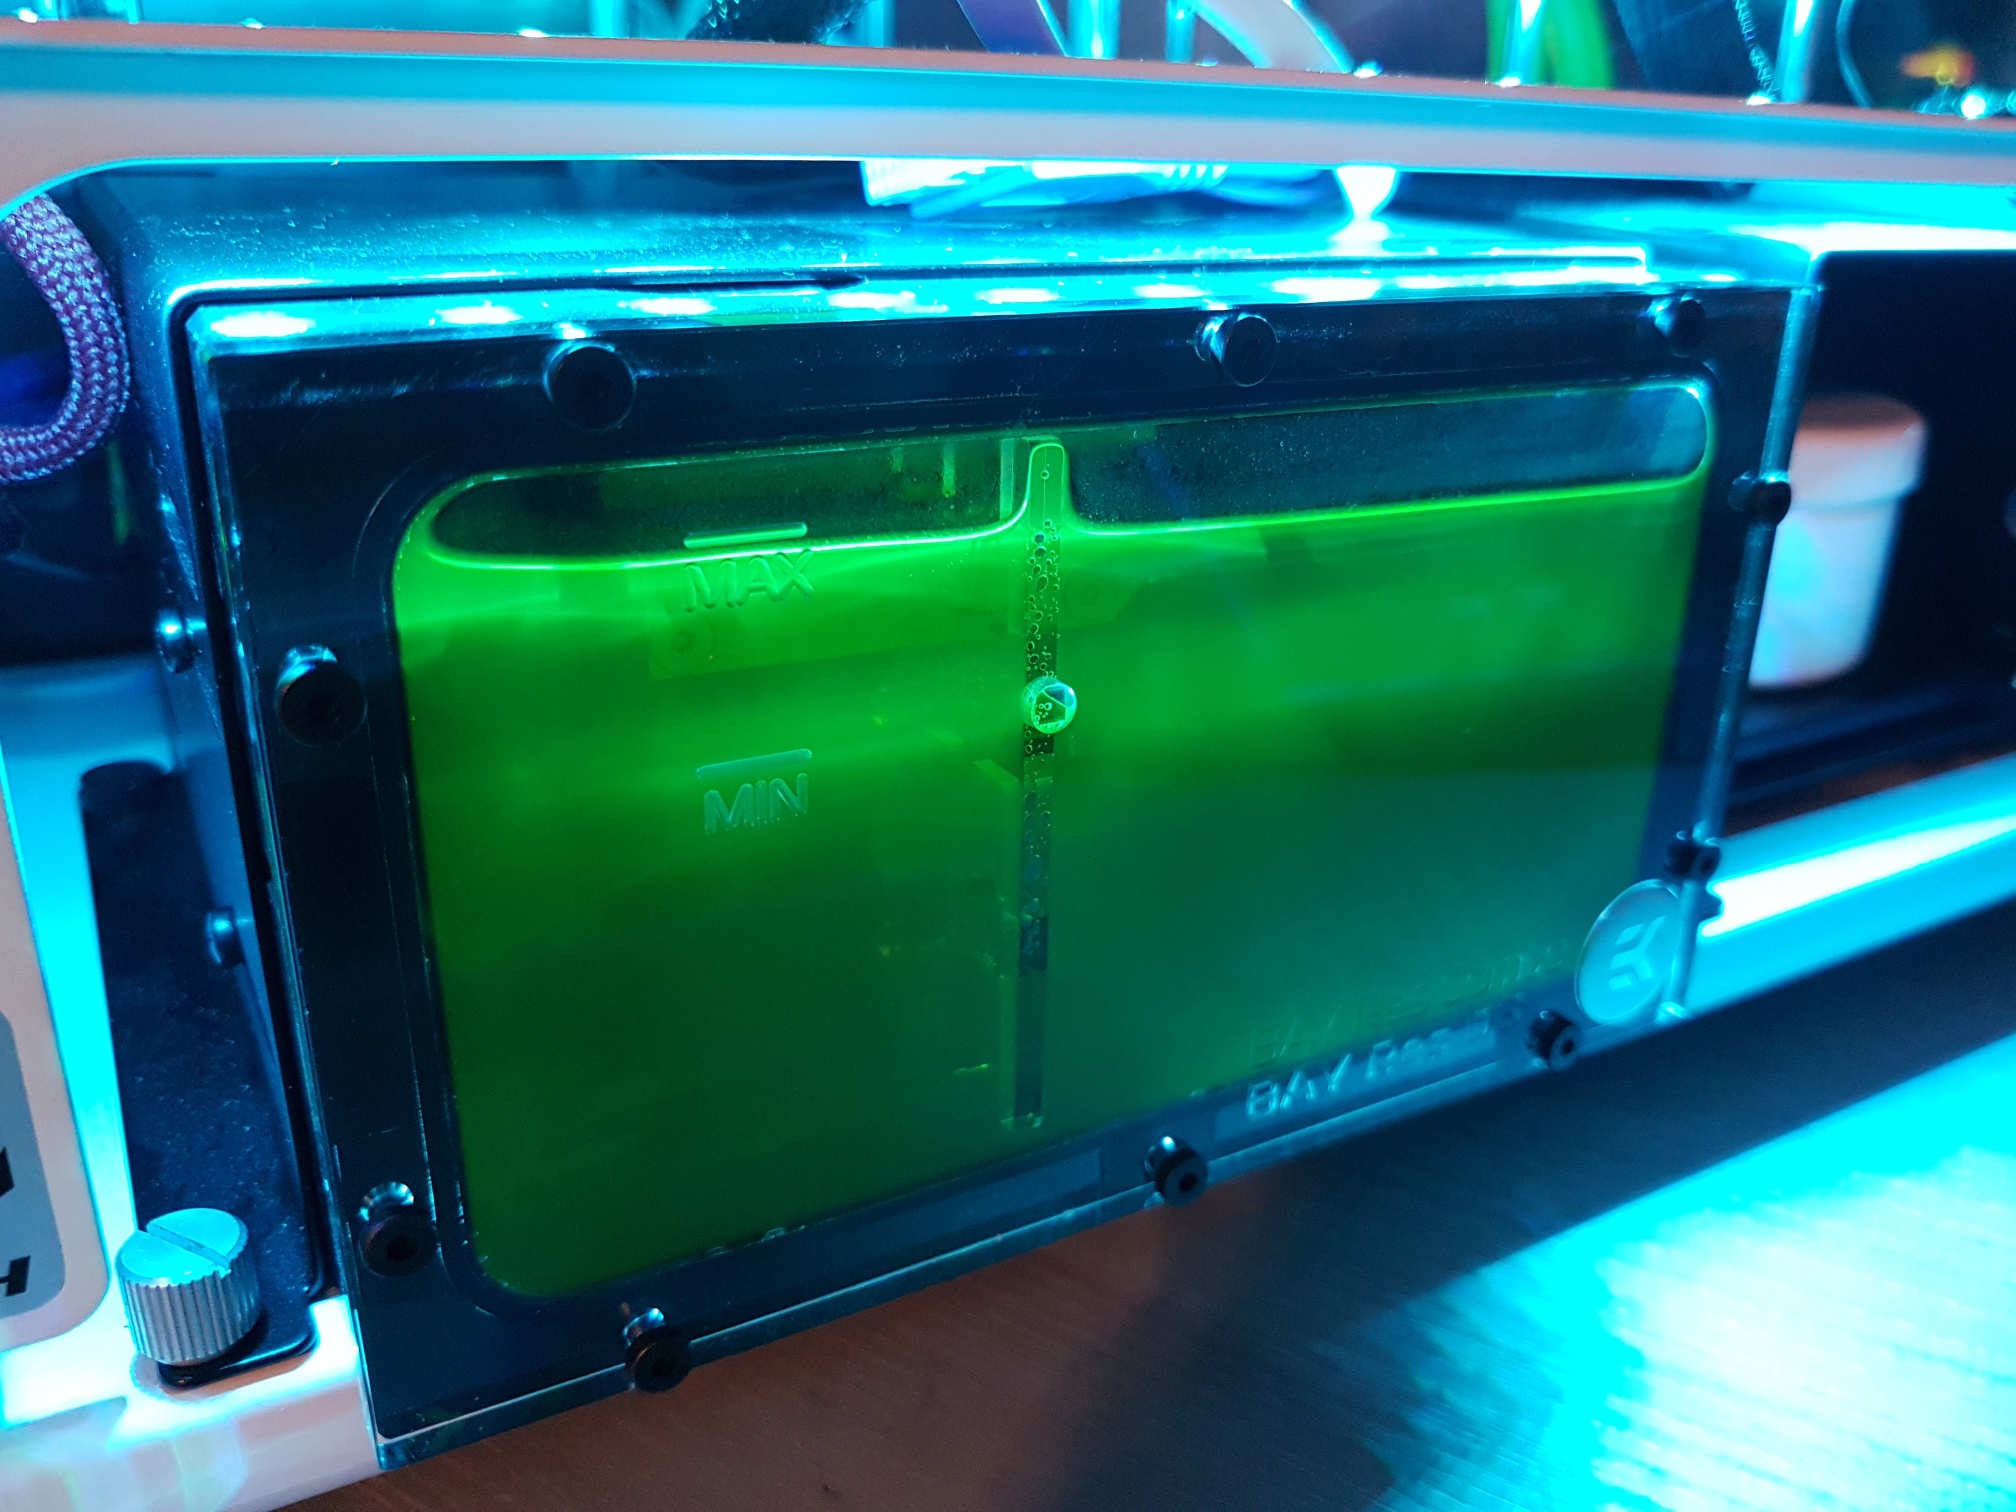
And there it is! Our future testsystem for all our new hardware. The finished testbench looks great! I added an EKWB Bay Res with D5 pump and EKWB Supremacy MX cpu block, a 2.5 inch ADATA 500GB SSD for all the programs, G-Skill Trident-Z 3200 RGB 2×8 GB RAM and a Gigabyte GTX 1070 G1 Gaming GPU. It is always the moment of truth, will it boot? Yes, it did! I went into the bios, set the multiplier to 50 and memory to XMP which resulted in a 5.0 GHz cpu core clock across all cores and a 3200mhz memory clock @ 14-14-14-34 timings. I knew our 7700K requires 1.29v for 5.0Ghz, but once in Windows I discovered the Asus Z270 Maximus though it was best to give it 1.42 volts. So i restarted entered the bios again and set cpu voltage to manual entering 1.29V. Temperatures under load don’t exceed 90 degrees Celcius running prime 95 small FFT’s. I think we are going to delid this cpu in the future, But for now we leave it’s hat on. Normal load temperatures in game don’t exceed 60 degrees Celcius. Time for some photo’s of the finished ‘build’. Enjoy!